Having issues getting your computer to recognize an external hard drive is frustrating, but the good news is that this problem can often be fixed with some simple troubleshooting steps. In this comprehensive guide, we’ll walk through all the reasons why your external hard drive isn’t being detected and show you how to get it working again.
Quick Answers
Here are some quick answers to common questions about external hard drives not being detected:
Is your hard drive receiving power?
Check that the drive is plugged into a working power outlet and that any required cables are connected. Some external drives require two cables – one for power and one for data transfer.
Is the drive connected properly?
Inspect the physical connection to your computer. Try unplugging and reconnecting the USB cable or trying a different USB port if possible.
Does the drive show up in Disk Management?
Open up Disk Management and see if the drive shows up there but not in File Explorer. If so, you may just need to assign a drive letter.
Have you tried updating drivers and software?
Update your USB and chipset drivers as well as any drivers required for the external drive to function properly.
Does the drive work on another computer?
Try plugging the drive into another computer to see if it’s detected there. If it works on another computer, the issue is with your original system.
Is the drive formatted properly?
Make sure the drive is formatted for the right operating system (like NTFS for Windows). You may need to reformat if not.
Step 1: Check the Drive’s Power Supply
The first thing to check is whether your external hard drive is getting power. For external hard drives, most require two separate connections – one for data and one for power. If the power cable is not properly plugged in, your computer won’t be able to detect the hard drive.
Carefully inspect the ends of all the cables connected to your hard drive. Make sure they are fully inserted and clicked into place. If it’s a USB connection, try unplugging and then re-inserting the cable. You can also try plugging the cable into a different USB port if possible.
If the drive requires an external power source, make sure the power cable is securely plugged into the drive and into a working electrical outlet. Test the outlet with another device to verify it is functioning properly.
Some smaller external hard drives are powered solely through the data cable (like a USB cable). For these, if you’ve confirmed the data cable is properly connected, connecting to another USB port or computer can help determine if the drive is receiving enough power.
Tips for checking drive power:
- Inspect ends of cables for any damage
- Reconnect data and power cables
- Try a different USB port if possible
- Test power outlet with another device
- Try connecting drive to another computer
Once you’ve verified the drive cables are properly connected and the outlet is supplying power, move on to checking the physical data connection.
Step 2: Inspect Physical Connection to Computer
If your external drive is powered on but still not detected, the data cable connection should be inspected. Data cables like USB, FireWire, Thunderbolt or eSATA connect the hard drive to the computer for file transfer.
First, check for any signs of damage on the data cable connectors. Bent pins or frayed/cut wires can cause connection issues. If damage is visible, the cables will likely need to be replaced.
Carefully unplug the data cable from the external drive and the computer port. Look for any debris buildup on the connectors that could impede a solid connection. Use compressed air to clean out the ports if needed.
Visually verify the port alignment is correct when re-inserting the cable. You should hear a firm click when the cable is fully seated. Try connecting to another computer port if possible to determine if the original port is functioning properly.
If you are connecting via USB, be sure the USB port is version 3.0 or higher. While a USB 2.0 port can be used, the speed will be substantially slower.
For eSATA connections, the eSATA interface on both the drive and computer must match. eSATA cables/ports are not identical to standard SATA.
Tips for inspecting physical connections:
- Check for bent pins or damaged wires on cable
- Clean debris from connectors with compressed air
- Ensure firm click when reconnecting cable
- Try different computer port if possible
- Use USB 3.0 or higher port for best performance
Checking over the physical connections is an important troubleshooting step. If the drive still won’t detect, it’s time to check for it in Disk Management.
Step 3: See if Drive Appears in Disk Management
Disk Management is a utility in Windows for managing hard drives and their partitions. It’s possible your external drive shows up here but not in File Explorer.
To open Disk Management on Windows 10 or 11, hit the Windows key and type “diskmgmt.msc” and select the Disk Management app. You can also right-click the Start menu and choose Disk Management.
In the Disk Management window, see if your external drive appears. It may show up as an unknown device with no drive letter assigned. A brand new drive not formatted and partitioned will also appear this way.
If you do see the drive here, you simply need to assign a drive letter to the external drive for it to show up in File Explorer. Right-click on the device and choose “Change drive letter and paths.” Then add a drive letter and you should then see the drive available for use.
However, if your external drive doesn’t appear at all in Disk Management, the drive itself could have failed, the data cable could be damaged, or there may be another issue with your system’s USB ports. Moving forward with additional troubleshooting steps can help identify the cause.
What to look for in Disk Management:
- External drive appears but no drive letter assigned – Assign a letter
- Brand new external drive appears but not initialized – Initialize disk
- No external drive appearing – Continue troubleshooting
Checking Disk Management should be quick and easy. If your drive still won’t detect, it’s time to do some software and driver updates.
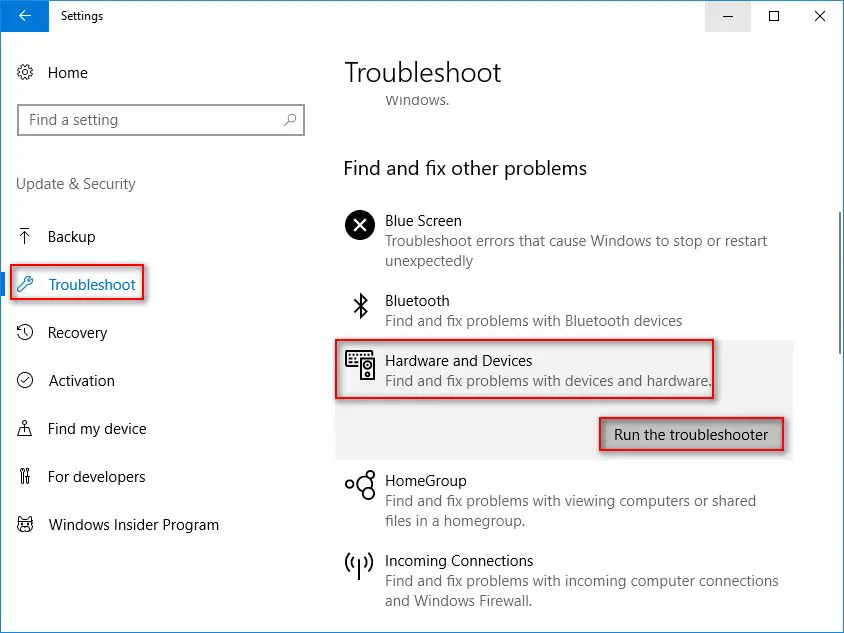
Step 4: Update Drivers and Software
Outdated drivers and software can prevent your computer from properly recognizing external devices. Taking the time to update them can often resolve external hard drive detection issues.
Update USB drivers
Begin by updating the USB drivers on your Windows computer. USB handles communication between your computer and connected USB devices.
To update your USB drivers:
- Open Device Manager (right-click Start menu and select it)
- Expand the Universal Serial Bus controllers section
- Right-click on each USB device and select Update driver
- Choose Search automatically for updated driver software
- Restart your computer
This will install the latest USB drivers available for your system which may resolve any driver conflicts or bugs that prevent recognizing external drives.
Update chipset drivers
Your motherboard chipset drivers are also important for managing external device connectivity. Follow the same process above to update the drivers for your chipset model.
Update external hard drive software
Many external hard drives have their own software for accessing extra features or utilities. Be sure you’ve installed the latest versions available. This includes:
- External hard drive software (WD, Seagate, etc.)
- Motherboard utility software
- RAID management software
Visit the support sites for your drive brand and motherboard to find and install the latest versions where available. Keeping this software up to date can prevent problems with detection.
Update Windows
Finally, make sure your Windows operating system is completely up to date. Windows Update frequently provides fixes for USB device connectivity issues.
On Windows 10 or 11, hit the Windows key, type “check for updates” and install all available updates from Windows Update. Then restart your computer.
Updating these four software components – USB drivers, chipset drivers, external hard drive software, and Windows updates can help resolve many drive detection problems caused by software flaws.
Step 5: Try Drive on Another Computer
If you’ve verified the drive is receiving power and the proper connections are in place but it still won’t show up, try connecting the drive to a different computer.
Use the same data cable and power connections to hook the drive up to another system. See if that computer properly detects and accesses the external hard drive. This helps determine whether the issue is with the original computer system or the drive itself.
If the drive does appear on the second system, the problem likely lies with the USB ports, drivers or software on your original computer. You may need to repair Windows, restore your system from a recovery point or restore default driver versions.
However, if the drive fails to be detected on multiple computers, the fault probably lies with the drive itself. Potential drive failure issues can include:
- Faulty USB bridge board
- Dead drive motor
- Failed drive controller
- Damaged read/write heads
At this point, you will need to either replace the external enclosure case of the drive or seek professional data recovery help.
Testing the drive on a secondary system is one of the best ways to identify whether the true issue is computer-related or with the drive itself.
Step 6: Check Drive Format
One other possibility is that your external drive is formatted with a filesystem type that is incompatible with your computer.
For example, a drive formatted in Linux EXT4 format may not show up on a Windows computer because Windows can’t read EXT partitions natively. Likewise, a drive formatted specifically for Mac will not work on a Windows machine unless reformatted.
You can use Disk Management to check the format of an external drive. Right-click on the disk name and select Properties. Then view the File System type.
If your drive shows a format not native to your operating system, like EXT4 for Linux or APFS for Mac, you’ll need to reformat it to a compatible filesystem before use. Just be aware reformatting will erase all existing data.
To reformat a drive on Windows:
- Right-click the drive in Disk Management
- Select Format from the menu
- Choose your desired file system (typically NTFS or exFAT for cross-compatibility)
- Give the drive a name and click OK.
Once reformatted, the drive should now appear normally on your Windows system. Just remember this erases everything already on the drive.
Conclusion
Troubleshooting an external hard drive that won’t detect requires some patience but is usually repairable with some simple steps. Be sure to check for drive power, try different physical connections, look in Disk Management, update software and drivers, attempt the drive on a secondary system, and check the format. With some diligence you should be able to get your external drive functioning again.