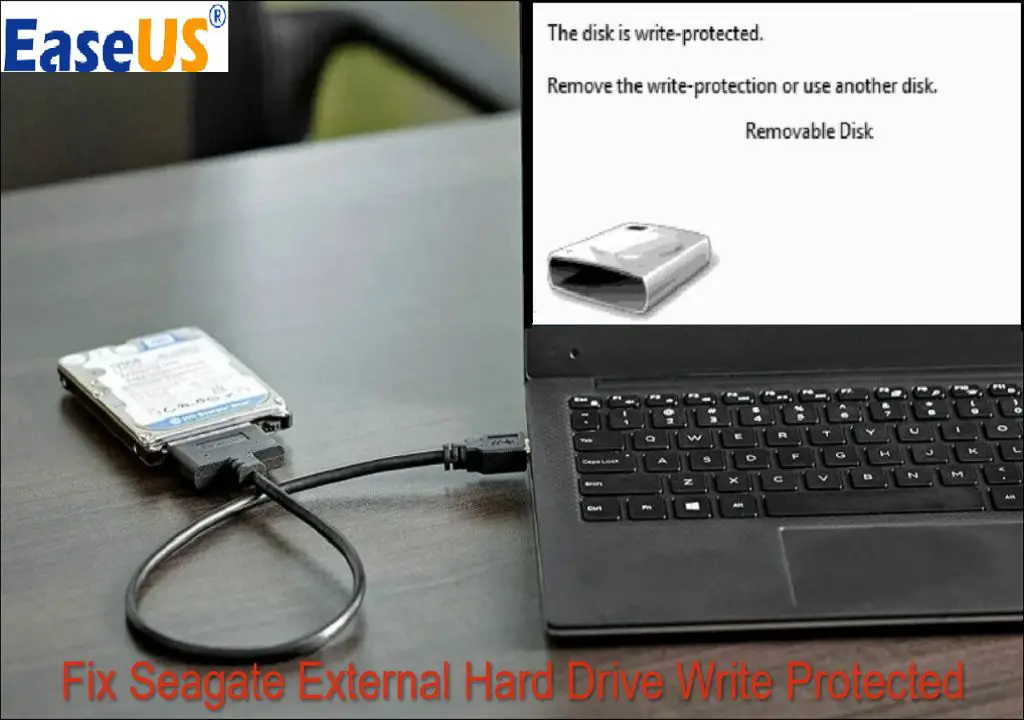
What is a Write Protected Hard Drive?
A write protected hard drive is one that prevents any data from being written onto it (https://www.stellarinfo.com/blog/solved-unable-to-remove-write-protection-from-hard-drive/). Write protection acts as a safeguard to prevent accidental deletion or modification of data on the drive. When a hard drive is write protected, existing files can be read from the drive, but no new data can be saved onto it.
Hard drive manufacturers include write protection capabilities to protect sensitive system files from corruption. Many external hard drives and memory cards have physical switches or tabs that toggle write protection on and off (https://www.diskpart.com/articles/remove-write-protection-from-hard-drive-0310.html). Some drives also have firmware-level write protection that is controlled programmatically.
Write protection is useful for preserving backup files, archive data, system disk images, and other read-only media. However, if write protection gets enabled unintentionally, it can prevent a hard drive from being used as desired. Thus, understanding the various causes of write protection and how to remove it is important for regaining full use of a drive.
Common Causes of Write Protection
There are several potential causes of write protection on a Seagate hard drive:
Accidental toggling of the physical write protect switch – Most hard drives have a small switch on the exterior that toggles write protection on and off. This switch may have been inadvertently moved to the “on” position, enabling write protection (Source: https://www.stellarinfo.com/blog/solved-unable-to-remove-write-protection-from-hard-drive/).
Issues with the hard drive firmware – Sometimes a firmware bug or corruption can cause write protection problems. Updating to the latest firmware version can often resolve this (Source: https://recoverit.wondershare.com/partition-tips/disk-write-protected.html).
Damaged controller board – If the controller board sustains physical damage, it can cause the drive to go into write protection mode. Replacing the damaged controller board may be necessary.
External hard drive enclosures enabling write protection – Some external drive enclosures have built-in write protection that gets enabled, preventing the drive within the enclosure from being written to. Opening the enclosure and removing the bare hard drive can resolve this.
Troubleshooting Physical Write Protect Switch
Many external hard drives have a physical write protect switch on the housing that controls whether the drive can be written to. This switch is typically labeled “Lock” or “Write Protect” and toggles between two positions – one that allows writing data to the drive and one that prevents writing.
To check if your Seagate drive’s write protection is being caused by the physical switch, you’ll need to locate the switch on the housing and check its current position. Seagate provides instructions for finding the write protect switch on specific drive models on their support site. The switch is often found on one of the short edges of the drive enclosure.
If you toggle the switch to the unlocked position and the drive is still write protected, the switch may be damaged. You can test it by trying to write a small file to the drive after toggling the switch. If the file write fails, the switch is likely broken and the enclosure may need to be replaced to fix write protection.
However, if toggling the switch enables writing to the drive, then a simple repositioning of the physical write protect switch was all that was needed to resolve the issue.
Updating Hard Drive Firmware
One potential solution to fix a write-protected Seagate hard drive is to update the firmware. Seagate provides firmware updates for many of their hard drives to improve performance, fix bugs, and address security concerns. The latest firmware can be downloaded from the Seagate support site.
To safely update the firmware, first back up any important data on the drive. Then download the Seagate Firmware Update Utility for your operating system. Connect the write-protected drive to your computer via USB or SATA. Launch the Firmware Update Utility, select your drive, and click “Update Firmware.” Follow the on-screen instructions to complete the process. The utility will walk you through the steps to flash the new firmware onto the drive.
It’s crucial to use the correct firmware for your specific drive model, or else you may brick the drive. Refer to Seagate’s firmware finder to determine the latest firmware for your drive before updating. Overall, updating to the latest firmware can potentially resolve write protection issues, but take precautions and follow Seagate’s instructions closely.
Fixing Damaged Controller Board
One potential cause of a write protected hard drive is a damaged controller board. The controller board is the printed circuit board (PCB) that houses the main controller chip and other electronic components. Signs of a damaged controller board include the drive not being detected by your computer or making beeping noises.
If you suspect a damaged controller board, the fix involves replacing it with a matching replacement board. Follow these steps:
- Remove the old board – This involves opening the hard drive casing and disconnecting the old board from the internal connectors.
- Source a replacement – Find a replacement board that exactly matches the part number and revision of your original. Sites like DonorDrives can help you find a match.
- Install the new board – Carefully connect the replacement board to the internal drive connectors. Reassemble the drive casing.
With the new, undamaged controller board installed, the drive should function normally again without write protection.
Swapping the board yourself requires technical skill. As an alternative, you can use a professional drive recovery service to replace the controller board for you.
Disabling Write Protection on Enclosures
Some external hard drive enclosures have built-in write protection that can be disabled. This is commonly seen with USB enclosures that have a physical switch or button to toggle write protection on and off.
For example, Rosewill RX-358 U3C BLK hard drive enclosures have a small switch on the back that slides between “Lock” and “Unlock” (Source). Sliding it to Unlock will disable the write protection and allow writing to the hard drive again.
Other enclosures like Inateck 2.5 Inch USB 3.0 HDD Enclosure have a button on the side you can press to enable/disable write protection. Pressing it until the light is off will disable write protection (Source).
Consult your enclosure’s manual to see if it has a physical write protect switch or button. Toggle or press it to disable write protection as needed.
Removing the Hard Drive from Enclosures
Sometimes write protection on an external hard drive is caused by an enclosure issue. By removing the drive from the external enclosure and accessing it directly, you may be able to bypass any write protection the enclosure tries to assert. Here are some tips for removing the hard drive:
First, examine the external enclosure case for any screws or clips that hold it together. Opening the case may reveal regular phillips or torx screws, or proprietary screws requiring a special tool. Carefully open the enclosure, checking if cables attach the drive to an internal USB/SATA interface board.
Gently remove the bare hard drive from the enclosure, being careful not to damage any connectors. Most modern drives use a standard SATA interface, while older drives may use PATA/IDE. With the drive removed, you can now access it directly via SATA or with a SATA-USB adapter.
Connect the bare drive to your computer’s SATA ports or externally via USB adapter. If the drive functions normally when separated from the enclosure, the issue was likely caused by faulty firmware or settings on the enclosure’s control board. In this case, you may continue using the bare drive, or install it in a new compatible enclosure.
Low-Level Format to Reset Drive
Low-level formatting a hard drive erases all data by overwriting the entire disk with zeros. This resets the drive by clearing any firmware issues that may be causing the write protection. However, low-level formatting results in complete data loss, so this method should only be used if you no longer need the data on the drive.
A program like HDD Low Level Format Tool can perform a low-level format on a hard drive (Source). To use it:
- Download and install HDD Low Level Format Tool.
- Connect the write-protected Seagate drive to your computer.
- Open HDD Low Level Format Tool.
- Select your Seagate hard drive from the dropdown menu.
- Check the “Quick Format” box.
- Click “Format Disk”.
- Confirm again that you want to erase all data.
- Let the low-level format run to completion.
After the low-level format finishes, disconnect and reconnect the Seagate drive. It should now allow writing data again. Just keep in mind this method results in permanent data loss.
Secure Erase to Wipe Drive
Secure erase is an effective method for completely wiping a hard drive by overwriting the existing data to destroy it. This process uses software like HDD ERASER to replace all sectors with zeroes or random data, making previous files unrecoverable (Stellar Info, 2022).
To use secure erase, you will need a SATA to USB adapter to connect the hard drive to your computer if it is an internal drive. Then download HDD ERASER or a similar secure erase utility. Follow the steps to completely overwrite and wipe the hard drive. This should remove all data and partition information, effectively resetting the drive.
It’s important to understand this is an irreversible process that permanently destroys all data on the drive. So secure erase should only be used if you are fine with complete data loss and want to wipe the drive before reuse or disposal. Backup any important files before starting a secure erase.
When to Seek Professional Help
If you’ve exhausted all the DIY troubleshooting options and still can’t remove write protection or recover your data, it may be time to seek professional help. Data recovery services specialize in retrieving data from damaged, corrupted, or unresponsive drives. They have specialized tools, clean room facilities, and years of experience that give them the best chance of recovering your important files.
Seeking professional help is especially advised if you have mission critical or irreplaceable data on the write protected drive. Personal photos, financial documents, business files – for this type of data, it’s often worth the cost to hire experts. The more you’ve worked on the drive yourself, the lower the chances a DIY solution will still work.
Data recovery services can also help find and use the proper disk management utilities for your specific drive. They have access to advanced software and hardware tools not available to the typical user. These specialized tools make it possible to repair drive issues, disable write protection, and recover data in ways that go beyond consumer-level software.
Recovering data from a damaged or write protected drive takes expertise. While DIY solutions may work, professional services offer the best chance of getting your files back intact. Their experience, proprietary tools, and clean room facilities justify the higher cost when your data is valuable.
