If you’ve just purchased a new external hard drive and plugged it in but it’s not showing up on your computer, don’t panic! There are several potential reasons why your external drive may not be detected and straightforward steps you can take to troubleshoot and fix the issue.
Quick Fixes to Try First
Before digging into more complex solutions, try these quick and easy steps which resolve external hard drive detection issues for most users:
- Check the USB cable – Try unplugging the cable from both the drive and computer, inspect it for damage, then firmly re-insert it on both ends.
- Try another USB port – Plug your drive into a different USB port on your computer, preferably one directly connected to the motherboard.
- Reboot your computer – Completely power down your PC then restart it.
- Connect drive to another PC – Try plugging the drive into another computer to see if it appears there.
Following one or more of these steps often resolves external drive detection problems right away. If the drive still isn’t popping up, don’t worry – solutions outlined in the sections below should get your new drive up and running.
Verify Drive Power Status
Before troubleshooting further, it’s important to check:
- Is the drive plugged into a working power outlet, surge protector, or USB hub?
- Does the drive have an activity light that normally illuminates when connected?
- Is the activity light on/flashing, or is there no sign of power?
If the drive’s power light is off or not lighting up:
- Try connecting the drive’s power cable to a different outlet
- Use a different USB cable
- If an external drive requires two USB connections (for data and additional power) make sure both are firmly connected
If there are still no signs of power, the hardware itself may have failed. Contact the external drive manufacturer for warranty support or replacement options.
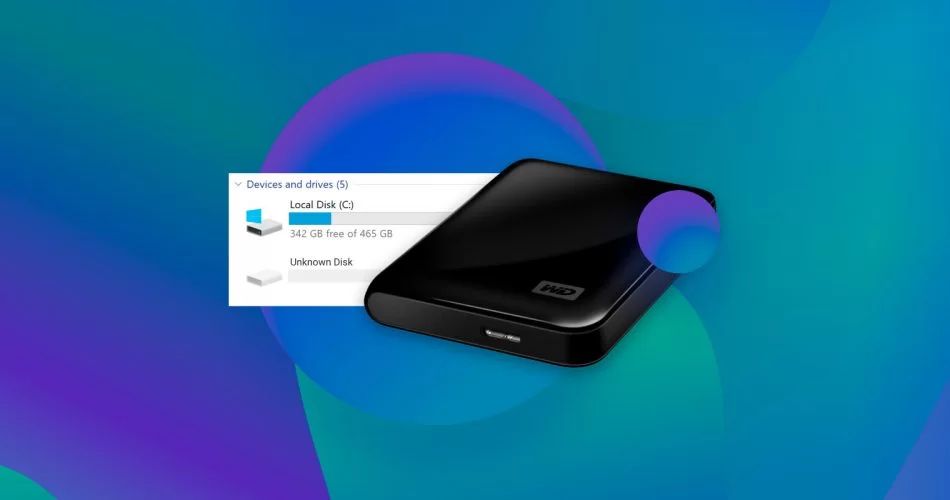
Check Drive in Disk Management
Disk Management is a Windows built-in tool that displays all connected internal and external drives. It also allows you to initialize and format drives, partition space, and assign drive letters. Checking Disk Management should be one of the first steps when troubleshooting an external drive detection issue.
To open Disk Management on Windows 10 or 8:
- Hit the Windows key to open the Start menu
- Type “disk management”
- Click Create and format hard disk partitions
For Windows 7:
- Go to Start menu > Control Panel > Administrative Tools > Computer Management
- Select Disk Management on the left side
Inside Disk Management, all connected drives should be visible. Look for your external drive:
- Does the drive appear but show as unallocated space? If so, it needs to be initialized and formatted before use.
- Is the drive showing but not assigned a drive letter? Right-click and select Change Drive Letter and Paths to add one.
- Does your drive show up in Disk Management at all? If not, move on to the driver installation steps below.
If your drive appears in Disk Management but is not functioning or detecting properly, you may need to partition and format the drive before it can be used properly.
How to Initialize an External HDD in Disk Management
Brand new external drives that are not partitioned and formatted out of the box must first be initialized. This prepares the drive to accept a volume structure like MBR or GPT before a partition can be created and formatted.
Note: Initializing a drive erases all data on it. Backup any important data first.
- In Disk Management, locate the disk # for your external drive along the bottom. It should say “Unknown” and “Not Initialized”.
- Right-click the disk # and select Initialize Disk.
- Agree to the warning prompt that initializing erases all data.
- Select the disk’s partition style: MBR or GPT. (GUID Partition Table is newer and required for drives larger than 2TB.)
- Allow the disk to initialize. The status will change from Unknown to Online.
Your new external drive should now be visible in File Explorer and prepared for formatting.
How to Format an External Hard Drive in Disk Management
After initializing a drive, Windows can format it into a usable file system. FAT32 and exFAT are compatible across Mac, Windows, Linux, game consoles, and other devices, while NTFS is native to Windows.
Note: Formatting erases all data on a drive. Backup data first.
- In Disk Management, right-click the Unallocated space on your external drive and select New Simple Volume.
- Follow the prompts to initialize volume size and assign a drive letter.
- Select NTFS or your desired file system.
- Give the volume a memorable name then format it.
Within a few moments your drive should be ready to use. If it still isn’t appearing, move on to driver installation or Power Management troubleshooting steps.
Install Drivers for External Drive
External hard drives connect to PCs via the USB port. They function via USB mass storage drivers installed on the computer operating system or USB attached storage drivers. If these get corrupted, go missing, or become outdated then a drive may fail to detect or work properly.
Manually reinstalling or updating USB drivers ensures the necessary driver files are present for external devices to be recognized. OEM external drive manufacturers like Seagate, WD, LaCie, Samsung, etc. also provide their own branded drivers for download.
Install or Update USB Drivers
Generic USB mass storage drivers from Microsoft or your PC or motherboard manufacturer typically handle most external drive connections. Reinstalling these ensures external drives can be detected.
On Windows 10 and 8:
- Open Device Manager via the Control Panel or by typing devmgmt.msc into the Run prompt.
- Expand the Disk drives category.
- Right-click the USB external hard disk driver > Uninstall device.
- Unplug the drive’s USB cable.
- Restart your computer.
- After reboot, plug the USB cable back in and allow driver to reinstall automatically.
- The drive should now appear in File Explorer.
On Windows 7:
- Go to Start > Control Panel > Device Manager
- Under the Universal Serial Bus Controllers category, right-click each USB Hub or USB Host Controller entry > Uninstall
- Unplug external drive’s USB cable
- Restart computer
- After reboot, reconnect USB cable to reinstall drivers and detect drive
Install External Hard Drive Manufacturer Driver
For branded external drives from Seagate, Western Digital, LaCie, etc. you can install the company’s dedicated driver instead of using Microsoft’s generic driver.
- Visit the support site for your specific drive model.
- Download the latest Windows driver file.
- Close other programs then double click to install downloaded file.
- Restart computer after driver installation.
- Reconnect your external drive.
The tailored driver offered by the hardware maker provides updated functionality, integration, and diagnostics for their drive model. However, the Microsoft driver typically has broader device compatibility if troubleshooting a no name, off-brand, or older external drive.
Change Power Management Settings
Power management options on your computer may lead to connectivity issues with external USB hard drives. Selecting optimal settings prevents power saving modes that can disrupt or entirely disconnect external drives.
Two main power settings should be adjusted:
- USB selective suspend
- USB power management
Make sure both options are disabled or configured optimally for your system to maintain consistent external drive connections.
Disable USB Selective Suspend
USB selective suspend is a Windows power saving feature. It allows unused USB ports to enter low power mode to conserve energy. However, this can cause connected external drives to disconnect and have trouble reconnecting.
Disabling USB selective suspend prevents power management from interfering with external drive connections.
To turn off Selective Suspend:
- Go to Control Panel > Hardware and Sound > Power Options
- Click Change plan settings next to your active power plan
- Select Change advanced power settings
- Expand USB settings > USB selective suspend setting
- Change Plugged in and On battery settings to Disabled
Configure USB Power Management
Additional USB power management options prevent the USB port and bus from turning off power to avoid disconnecting drives.
Adjust power management settings:
- Go to Device Manager
- Expand Universal Serial Bus Controllers section
- Right click each USB Root Hub > Properties > Power Management tab
- Uncheck Allow the computer to turn off this device to save power for each one
With those power management configurations prevented from disconnecting external drives, detection and connectivity should be consistent.
Replace Faulty USB Cable
Sometimes the USB cable itself is the culprit behind an undetected external drive. Fraying, loose connections, damage, or excess length can affect how well a USB cable transmits data between the drive and computer.
Try replacing the USB cable with a high quality, short (1 meter or less) cable that firmly inserts into the external drive and USB port without wiggle room or space between connections.
For drives requiring two USB connections for power, use separate cables instead of a single Y-cable if possible. This avoids potential power issues from underpowered or faulty single dual USB cables.
Eliminate USB Hub Interference
Using a USB hub, whether standalone or built into devices like a keyboard or monitor, can sometimes interfere with external drive connections and detection.
Try connecting your external drive directly to your computer’s USB port instead of routing through a USB hub. Hubs can overwhelm shared bandwidth causing connectivity issues with external storage.
Update BIOS/UEFI Firmware
Outdated motherboard firmware versions can inhibit successful communication between USB ports and connected external drives. Updating to the latest BIOS or UEFI firmware version provided by your computer or motherboard manufacturer may resolve external drive detection problems after connection.
Refer to your PC or motherboard support site for instructions on obtaining and flashing updated BIOS/UEFI firmware to the system.
Replace Faulty USB Controller
If you’ve exhausted all other troubleshooting, the USB controller hardware itself may be malfunctioning. The USB controller manages communication between the computer’s motherboard and connected external USB drives. Just like the drives themselves, sometimes the USB controller components fail.
Try replacing:
- The motherboard, if USB ports are built directly into it
- Add-on USB controller expansion cards
- USB hubs
If replacing the computer’s USB controller hardware allows your external drive to be detected, the previous USB controller device had failed. Contact the manufacturer if it is still under warranty for replacement.
External Hard Drive Won’t Show Up FAQs
Here are answers to some frequently asked questions about external USB drives not appearing.
Why does my external hard drive not show up?
Common reasons an external drive may not show up include outdated drivers, Windows power management settings, bad cables, hardware failure, or using a dead drive on another PC. The steps above can resolve most detection issues.
Why is my external hard drive not detected?
An external drive may not be detected due to the same reasons as above. The main solutions include trying another USB port or computer, reinstalling drivers, checking Disk Management, changing power management, replacing the cable, or updating BIOS/UEFI firmware.
How do I get my external hard drive to show up?
To get an external drive to show up, plug it into a different USB port, reconnect power cables, reboot your computer, update drivers, adjust power management settings, replace the cable, clear USB conflicts, or update BIOS/UEFI firmware. The drive should then appear.
What do I do if my external hard drive is not working?
If an external drive stops working, try it on another computer to confirm it’s actually the drive that’s not working, not just problematic detection on one PC. Also replace cables, check Disk Management, test a different cable, and check for signs of physical failure like noises or smoke.
Why is my external hard drive not spinning?
If an external drive isn’t even powering on, it could mean the power cable is damaged, power switch is faulty, power supply inside drive enclosure has failed, or the drive itself has fully malfunctioned.
Can I recover data from an external hard drive that is not detected?
If crucial data is on a drive that won’t appear due to hardware failure, seek professional data recovery service. They can dismantle the external enclosure to access the raw drive inside then use specialized tools to recover data to another external drive.
Conclusion
External hard drives sometimes fail to properly connect to computers, but troubleshooting and correcting this issue is possible in most cases. After trying quick fixes, check Disk Management, reinstall drivers, adjust power management, replace faulty USB hardware, and update firmware. Your new external drive should display as expected so you can access and store data.
