There are a few potential reasons why your Mac may fail to turn on after the battery has been completely drained or “dead.” In this comprehensive guide, we’ll explore the most common causes and solutions to help get your unresponsive Mac up and running again.
Quick Overview: Common Reasons a “Dead” Mac Won’t Turn On
Before diving into more detail, here is a quick overview of the most common culprits behind a Mac not powering up after the battery has been fully drained:
- Dead battery – The battery no longer holds a charge and needs to be replaced.
- Faulty power adapter – The power adapter is damaged or providing insufficient power delivery.
- Loose cable connections – Internal power cables have become loose or disconnected.
- Corrupt PRAM/NVRAM – Parameter RAM and non-volatile RAM have become corrupted and need resetting.
- Faulty logic board – The Mac’s main logic board has failed or been damaged.
- Short circuit – A short circuit is preventing the Mac from powering up safely.
Now let’s explore these common issues in more detail, along with steps to troubleshoot and resolve them.
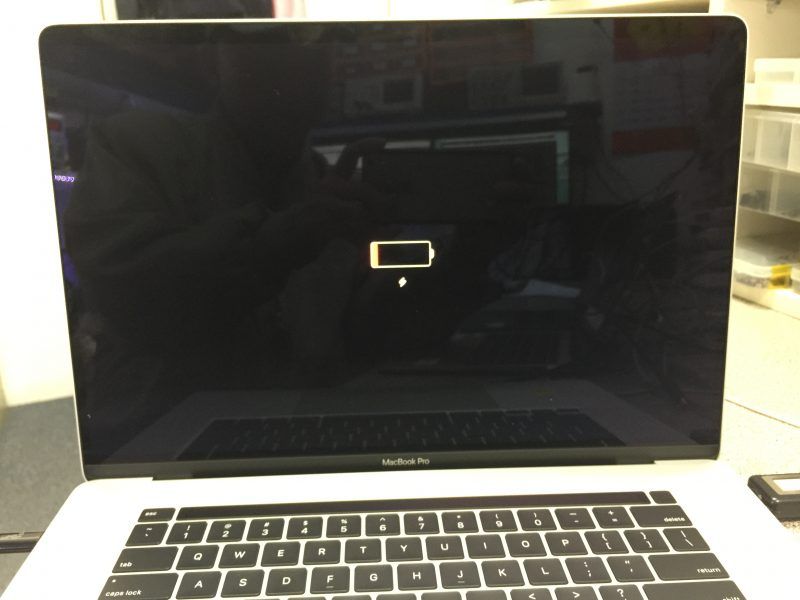
1. Dead Battery
One of the most common reasons a Mac won’t power up after being drained fully is that the battery has reached the end of its lifespan and can no longer hold a charge.
Lithium-ion batteries have a limited number of charge cycles before they begin to degrade. Once capacity drops below a usable level, the battery will be unable to provide enough power to boot up the Mac.
Warning signs of a worn out battery include:
- Very short battery life per charge
- Mac randomly shutting down despite showing 40-50% battery
- Battery status light flashing when pressing the battery indicator button
If your Mac is more than 3-4 years old and you notice any of those symptoms, there’s a good chance the battery needs replacing.
Testing and Replacing a Dead Battery
To confirm the battery is the issue, try these steps:
- Connect the Mac’s power adapter and press the power button. If the Mac still won’t start up, the battery is likely dead.
- Shut down the Mac, remove the bottom panel, and disconnect the battery cable. Reconnect the cable and try powering on just with the adapter. If it works, the battery needs replacement.
- Test the battery voltage with a multimeter. A reading below 3 volts indicates it’s dead and should be replaced.
- Swap in a known good battery. If the Mac powers on, then the original battery was faulty.
If testing confirms the battery is dead, you’ll need to replace it. For older MacBooks and MacBook Pros, the battery is user-replaceable. For newer models and iMacs, only Apple technicians can safely perform the battery swap.
Preventing Future Battery Issues
To maximize your new battery’s lifespan and avoid repeat issues, follow these battery care best practices:
- Avoid completely draining the battery. Keep charge cycles between 20-80%.
- Don’t leave the Mac plugged in at 100% charge for extended periods.
- Store the battery at around 40% charge if not using the Mac for a while.
- Use the Mac in cooler ambient temperatures when possible.
- Only use Apple power adapters to charge.
- Install the latest macOS updates which can improve battery performance.
2. Faulty Power Adapter
If you’ve ruled out a dead battery, the next thing to check is the Mac’s power adapter.
A faulty power adapter prevents sufficient power from reaching the Mac, leading to failure to turn on when the battery has no charge left.
Here are some signs of a faulty power adapter:
- Frayed, damaged cord insulation
- Intermittent connectivity when plugged into Mac
- Adapter feels abnormally warm or hot
- LED indicator light not turning on when plugged in
- Mac randomly shutting down despite showing 50%+ charge
A damaged power cord is the most obvious sign of a bad adapter. But the adapter may still provide power intermittently which can be trickier to diagnose.
Testing a Potentially Faulty Adapter
To properly test your power adapter:
- Inspect the cord and brick for any physical damage
- Try plugging the adapter directly into the Mac, not through a hub/dock
- Check if the LED indicator lights up when plugged into Mac and outlet
- Measure voltage output with a multimeter if LED doesn’t light up
- Try an alternative power adapter if available
If the LED fails to turn on or voltage is outside the normal 14-20V range, then the adapter should be replaced.
Replacing a Faulty Power Adapter
Always replace a potentially faulty power adapter with an official Apple power adapter. Third party adapters often don’t provide sufficient power delivery or can even damage your Mac.
You can purchase an official replacement power adapter directly from Apple, at an Apple store, or from major retailers like Best Buy that sell genuine Apple adapters.
Be sure to get the adapter with the matching wattage for your Mac model. Using an underpowered adapter could result in failure to boot issues.
Preventing Future Power Adapter Failures
You can minimize wear and tear on your Mac’s power adapter by following these practices:
- Don’t strain the cable near the connector
- Use cable wraps to prevent fraying
- Unplug when not in use to avoid overheating
- Keep adapter brick away from heat vents
- Avoid using damaged third-party adapters
With proper care, an Apple power adapter should last 3-5 years under normal use before needing replacement.
3. Loose Display/Power Cable Connections
If both the battery and power adapter are confirmed to be working, loose internal cable connections could be preventing power from reaching the logic board and components.
On MacBooks and iMacs, the most common cables to come loose over time are:
- Display cable connecting screen to logic board
- Power cable connecting logic board to battery
- Power cable from logic board to power adapter port
These cables can gradually wiggle loose from repeated opening/closing of the display and normal movement of the device. Drop damage can also knock cables partially loose.
How to Check for Loose Display/Power Cables
Getting to these cables requires opening up the Mac, which should only be done by experienced technicians, as the procedure involves many small screws and careful disassembly.
To check for loose cabling, the technician will:
- Completely power down the Mac
- Remove the bottom panel and/or display panel to access cables
- Visually inspect cables for any obvious detachment from logic board
- Gently wiggle cables to check if they are still firmly attached
- Reseat any loose connections and reassemble Mac
- Power on Mac to see if issue is resolved
Securing Loose Display/Power Cables
If a cable is found to be partially detached, the technician can reseat the connection. Some steps they may take include:
- Removing any obstructions blocking access to the connector
- Gently pressing the cable end back into the logic board socket
- Using tweezers to grasp and firmly reinsert the cable
- Using adhesive strips to firmly secure the connection
For cables that still appear intact, adhesive can be used as reinforcement to avoid future loosening. The Mac can then be reassembled and hopefully power on normally.
4. Corrupted PRAM/NVRAM
The PRAM (Parameter RAM) and NVRAM (Non-Volatile RAM) help store your Mac’s settings for clock, volume, screen resolution, startup disk selection, and other preferences.
They can sometimes become corrupted through unexpected power loss, failed macOS updates, or hardware issues. Corrupted PRAM/NVRAM can lead to boot failures, even when the battery and adapter are good.
Signs of potentially corrupted PRAM/NVRAM include:
- Error tones at startup
- Need to constantly reset PRAM/NVRAM settings
- Settings like volume resetting to defaults
- Unpredictable freezing during boot
How to Reset/Zap the PRAM and NVRAM
Resetting the PRAM and NVRAM can clear any corruption and restore your Mac’s precious setting data to a clean state.
Here is how to reset PRAM/NVRAM on an Intel-based Mac:
- Shut down your Mac fully
- Turn on your Mac and immediately press Option + Command + P + R keys
- Keep holding the keys until you hear the startup chime again
- Let go and allow Mac to finish booting up
And for M1/M2 Macs:
- Shut down your Mac fully
- Turn on your Mac and immediately press and hold the power button
- Keep holding the power button until Options menu appears
- Select “Erase PRAM” using the trackpad/mouse
This should fully reset the PRAM and NVRAM, which often resolves boot failures and other quirky behaviors caused by corrupted data.
Preventing Future PRAM/NVRAM Corruption
While occasional resets are normal, frequent PRAM/NVRAM issues usually indicate an underlying hardware problem or failing storage drive.
To minimize corruption chances:
- Avoid force shutting down your Mac during updates
- Use a UPS to protect against power outages
- Address potential overheating issues
- Have experienced technicians check for cabling or logic board problems
5. Faulty Logic Board
The logic board (also known as the motherboard) is the main controller for your Mac’s hardware and systems.
If the logic board is damaged or defective, it can result in complete failure to power on even when the battery and adapter are in working order.
Common signs of logic board failure include:
- Intermittent crashing/freezing
- Error tones at startup
- Overheating shutdowns
- Corrupted video/graphics
- Issues after liquid damage
Determining if logic board failure is the root cause requires professional diagnosis by experienced Mac technicians.
How to Test a Potentially Faulty Logic Board
Steps a technician may take to test for a faulty logic board include:
- Eliminating other failed components like battery or power supply
- Trying known good replacement RAM and hard drive
- Looking for signs of liquid corrosion or physical damage
- Booting to Apple Hardware Test or external drive
- Checking diagnostic LEDs on failed boot attempts
This in-depth testing can identify if the issue stems from irreparable logic board failure.
Repair Options for a Dead Logic Board
If the Mac’s logic board is confirmed faulty, there are a couple repair options:
- Logic board replacement – The entire board is swapped out for a new or refurbished replacement.
- Component-level repair – Individual failed components like capacitors are desoldered and replaced.
The optimal fix depends on age of the Mac, availability of replacement boards, and whether liquid damage is present.
In some cases, extensive logic board damage means the repair cost exceeds the Mac’s worth, and replacement is the most viable option.
6. Short Circuit
Short circuits occur when stray conductive material creates an abnormal connection within your Mac’s components leading to a spike in current.
This can sometimes cause automatic shutdown to protect the logic board, and prevent the Mac from turning on afterwards due to activation of safety mechanisms.
Some potential causes of short circuits include:
- Spilled liquids getting on the logic board
- Using inferior third-party cables
- Small metal screws coming loose inside the Mac
- Accumulation of dust and particles within the device
How to Check for Short Circuits
Diagnosing a short circuit requires disassembling the Mac and closely examining components and cabling.
A technician will check for:
- Signs of liquid spills or corrosion
- Any small foreign objects lodged within the case
- Crimped or frayed power and data cables
- Detached solder joints or contacts
- Burn or scorch marks from electrical spikes
Thermal imaging cameras can also help identify sources of excessive undesired heat buildup caused by shorts.
How to Fix Short Circuits
If a short circuit is confirmed, steps to fix it include:
- Completely dry out the logic board if liquid damaged
- Carefully remove any metal shards or foreign objects
- Check and reseat all detachable cables
- Replace damaged cables and connectors
- Insulate any exposed solder points or wires
Reassembling the Mac after repairs, discharge cycles may be needed to reset protective safety mechanisms activated by the short.
Conclusion
Troubleshooting why your Mac won’t turn on after the battery is fully dead can be frustrating, but is usually fixable with one of the solutions outlined. The most common issues are battery or power adapter failure, loose cabling, corrupt PRAM/NVRAM, logic board faults, and short circuits.
Whenever faced with a Mac that won’t power up, methodically isolate whether the battery and/or adapter are at fault first. Check connections and reset PRAM/NVRAM next. For continued issues, seek professional help to test the logic board and internal connections.
With persistence and the right troubleshooting techniques, you can revive an unresponsive “dead” Mac in most cases. Back up data regularly so important files aren’t lost if forced to replace the Mac entirely.