Installing a Serial ATA (SATA) hard drive can seem daunting to someone who has never done it before, but it’s actually a straightforward process that anyone can do with some simple instructions. In most cases, installing a SATA hard drive simply involves mounting the drive into an open bay in your computer case, connecting the SATA and power cables, and making sure the drive is detected in the BIOS. As long as you have a free SATA port on your motherboard and an available power connector from your power supply, the physical installation is very easy. The most difficult part for beginners is usually configuring the drive to work properly with the operating system after it’s installed, which involves partitioning, formatting, and assigning drive letters. Thankfully, most operating systems walk you through these steps during the initial setup.
What is a SATA hard drive?
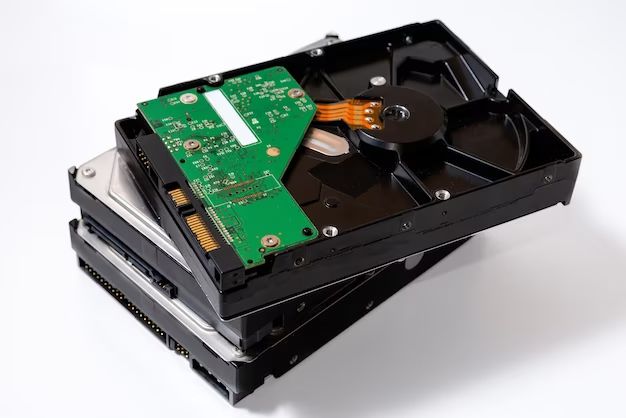
A SATA hard drive uses the Serial ATA interface to connect to the computer’s motherboard. This serial interface transmits data in individual bits rather than in parallel groups. SATA has been the standard hard drive interface since it began replacing the older Parallel ATA (PATA) standard in 2003.
Here are some key advantages of SATA compared to older PATA drives:
– Faster transfer speeds – SATA allows for faster data transmission, starting at 150MB/s and going up to 600MB/s for the latest SATA III standard. PATA maxes out at 133MB/s.
– Thinner cables – SATA cables are much thinner and more flexible than PATA cables, allowing for better airflow and less clutter in the computer case.
– Native hot swapping – SATA supports hot swapping, which means drives can be removed and added while the computer is running. This is not easily possible with PATA.
– Modern standard – SATA is the standard for all modern computers. PATA is obsolete.
Virtually all internal consumer hard drives produced now use the SATA interface. Both hard disk drives (HDDs) and solid state drives (SSDs) are available in 2.5-inch and 3.5-inch SATA form factors.
Tools/parts needed
Installing a SATA hard drive into a desktop computer is a very simple process and requires minimal tools and parts. Here’s a quick rundown of what you’ll need:
– SATA hard drive – This could be a new blank drive or repurposed from another system. 3.5″ and 2.5″ sizes will work.
– Open drive bay – An unused 3.5″ or 2.5″ drive bay in your case to mount the SATA drive.
– SATA data cable – This cable connects from the drive to the motherboard.
– SATA power cable – This cable connects from the PSU to the drive.
– Screws – To secure the drive into the drive bay.
Many cases and motherboards will include the necessary SATA data and power cables, but replacements are inexpensive if needed. You may also need a screw driver to install the drive into the bay.
How to Install a SATA Drive
Installing a SATA drive involves just a few simple steps:
1. Turn off and open the computer case
Turn off the computer via the operating system, then unplug the power cord from the back and open up the case. This provides access to the inside and allows safe handling of components.
2. Locate an open drive bay
Look inside the computer case for an unused 3.5″ or 2.5″ drive bay. Many cases have multiple bays to install hard drives and solid state drives. Choose an open bay with direct access to the rear of the case.
3. Mount the hard drive
Place the SATA drive into the open drive bay, ensuring the ports on the rear of the drive align with the back of the case. Insert screws through the side mounting holes to securely attach the drive.
4. Connect SATA data and power cables
Use a SATA data cable to connect from your motherboard’s SATA port to the SATA port on the drive. Then connect a SATA power connector from the power supply to the drive. Make sure the cables are securely inserted.
5. Close up case and boot computer
Carefully close up the computer case and plug the power cord back in. When you turn on the computer, the BIOS should detect the newly added drive. Then you can partition and format the drive through Windows Disk Management or Mac Disk Utility.
And that’s it, the physical SATA drive installation is complete! The process to get the drive fully operational depends on your operating system, but most will walk you through the remaining steps. Just follow the on-screen prompts to partition, format, and assign a drive letter. Then your new drive is ready for use as extra storage space.
Tips for Installing SATA Drives
Keep these tips in mind to ensure a smooth installation process:
– Refer to your computer or motherboard manual for the exact SATA ports to use. SATA ports are numbered, with port 0 often defaulting to the OS drive.
– Always use the manufacturer-provided cables, don’t use any old SATA cables. Quality matters.
– Ensure cables are securely connected at both ends and that locking tabs on the SATA ports are engaged.
– Handle hard drives carefully and only hold them by the sides or mounting frame. Avoid touching sensitive parts.
– Don’t force connectors into ports, they should insert smoothly if properly aligned.
– For 2.5″ SSD drives, use adhesive mounts or drive bay adapters to provide a snug fit in 3.5″ drive bays.
– External enclosures are available to convert internal SATA drives to external USB drives for easy portability.
– During initial boot, enter BIOS setup utility to confirm the new drive is detected before initializing it in the OS.
Following these best practices will help ensure many years of reliable usage from your new SATA hard drive!
Initializing the New Drive in Windows
Once the physical installation of the SATA drive is complete, you’ll need to initialize it within Windows to start using it. Here are the steps:
1. Open Disk Management
Hit the Windows key and type “disk management” to find the Disk Management utility. You can also get to it through Computer Management.
2. Locate the new disk
Look for the new disk in the drive list, likely labeled as “Disk 1” or higher. The disk will say either “Not Initialized” or “Unallocated” if it’s a new blank drive with no partition.
3. Initialize the disk
Right-click on the blank disk and choose Initialize. Select either MBR or GPT partitioning. GPT is newer and required for drives over 2TB.
4. Create a new volume
Right-click on the Unallocated space on the drive and choose New Simple Volume. Walk through the wizard formatting it and assigning a drive letter.
5. Start using the new drive
Once it has a drive letter, the new volume will appear in File Explorer. You can begin transferring files to it or setting it up as extra storage space.
The process is very quick and you don’t have to use any command line or advanced disk tools. The Disk Management utility makes it easy for beginners to get a new SATA drive up and running on their system.
Initializing the New Drive in Mac OS
Here are the steps to initialize a new SATA drive on Mac:
1. Open Disk Utility
Go to Applications > Utilities and launch Disk Utility. This is the main tool for managing disks and volumes on Mac.
2. Locate the new disk
Select the new physical disk on the left sidebar. It will likely be labeled as Disk 2 or higher if it’s a newly added drive.
3. Click Initialize
With the new disk selected, click the Initialize button at the top of the Disk Utility window. This will prepare the drive for formatting.
4. Create a new volume
Click the Partition tab. Choose a name, format, and size for the new volume to be created on the disk. Common formats are Mac OS Extended or APFS.
5. Start using the new drive
Once formatted, the new volume will mount and appear on the desktop and in Finder. You can move files to it or select it as a backup drive for Time Machine.
Again, Disk Utility provides a simple graphical way to get your new SATA drive up and running quickly. Within minutes, it’s ready for use as extra storage space.
Potential Issues When Installing SATA Drives
Though the SATA drive installation process is typically straightforward, here are some common issues that may arise:
Drive not detected in BIOS
If your new SATA drive isn’t showing up at boot, double check the SATA data and power cables are securely connected at both ends. Try a different SATA port and cable if possible. Also verify the drive bay power and data connectors are intact.
Requires formatting before use
Brand new blank SATA drives will need to be partitioned and formatted first before files can be stored on them. This quick process can be done through Windows Disk Management or Mac Disk Utility.
Not enough SATA ports
Many motherboards have limited SATA ports, like 4-6 ports. You may need to install a SATA expansion card if there are no available SATA ports left on your motherboard for connecting more drives.
Hot swap not recognized
If trying to hot swap a SATA drive, not all operating systems or motherboard chipsets support this. Generally it is supported in Windows 7 and higher and modern Linux kernels. Make sure to enable AHCI mode in BIOS as well.
Older OS doesn’t support GPT
Initializing a drive over 2TB may require using GPT partitioning. However, older operating systems like Windows XP do not support GPT, limiting you to MBR partitioning for the OS drive.
Loose cables or mounts
Check for any loose connector cables or drive mounts that could lead to disconnects or damage. Cables should click into place securely and drives must be firmly screwed into drive bays.
As long as you follow the step-by-step process, initializing and using a new SATA hard drive is quick and painless. But if any issues do pop up, these tips can help troubleshoot the most common problems.
Frequently Asked Questions
Here are answers to some common questions about installing SATA hard drives:
Is SATA or IDE better?
SATA is better. It offers faster transfer speeds, thinner cables, hot swapping support, and is now the standard over the obsolete IDE/PATA. Virtually all modern computers use SATA rather than IDE.
Can a SATA drive be used externally?
Yes, SATA drives can be used externally by installing them into USB, eSATA, or Thunderbolt enclosures, which provide external power and data connections.
What’s the power consumption of SATA drives?
Most 3.5″ SATA hard drives use between 5-12 watts on average. 2.5″ drives often use around 2-5 watts. So power draw is very low, easily provided by standard PC power supplies.
What is the maximum SATA cable length?
SATA cables can be up to 1 meter long, which is sufficient for most cases. Longer cables can sometimes cause signal issues. Extenders can be used for runs longer than 1 meter if absolutely necessary.
Can I hot swap SATA drives?
SATA drives are designed to support hot swapping. But you need hardware/OS support such as AHCI mode enabled. Removing a live OS drive is not recommended. External enclosures provide the simplest hot swap capabilities.
Do I need drivers to use a SATA drive?
No additional drivers are needed. SATA controllers are built into modern motherboards and operating systems already include SATA support. The drives are plug and play once initialized by the OS.
How do I secure erase a SATA drive?
To fully wipe and erase a SATA drive, use the secure erase tools built into operating systems or the utility from the drive manufacturer. On Linux you can use hdparm. On Windows use Parted Magic. This overwrites all data for security.
Conclusion
Installing a SATA hard drive or SSD into a desktop computer is an extremely simple process that usually takes less than 5 minutes after you have the physical drive. With minimal tools and parts needed, it’s a very approachable DIY task for anyone to tackle. Following the step-by-step instructions to connect the SATA and power cables and mount the drive provides quick success.
After the physical installation is complete, the operating system seamlessly handles the initialization and formatting of the new disk using straightforward disk management utilities. Once partitioned and assigned a drive letter, the new SATA drive is ready to use for additional storage capacity. The plug and play functionality means even computing beginners can easily upgrade their PC storage. And with the right external enclosures, SATA drives can also be used as portable storage devices.
Overall, whether you want to breathe new life into an old spare SATA drive or are looking to add faster solid state storage to your system, installing a fresh SATA hard drive is an affordable way to greatly improve your PC in just minutes. The simple SATA interface, combined with automatic OS integration, makes the process painless for both laptop and desktop users.
| OS | Disk Utility | Key Steps |
|---|---|---|
| Windows | Disk Management | Initialize disk, create volume, assign drive letter |
| Mac OS | Disk Utility | Initialize disk, create volume, format |
| Linux | fdisk, gparted | Create partition table, format filesystem |
