What is an SSD?
An SSD, or solid-state drive, is a type of non-volatile computer storage media that stores persistent data on solid-state flash memory (Wikipedia, 2022). Unlike a traditional hard disk drive (HDD), which contains spinning platters and movable read/write heads, an SSD has no moving parts and instead uses microchips to store data digitally (Crucial, 2022).
SSDs offer several benefits over traditional HDDs. Because there are no moving mechanical components, SSDs are more durable, operate silently, and have much faster read/write speeds. SSDs also provide better performance for opening files and launching applications, and use less power, resulting in longer battery life for laptops (Avast, 2022).
The lack of moving parts also makes SSDs more resistant to physical shock, run cooler, and allows for smaller and more compact storage designs. Overall, upgrading from an HDD to an SSD provides a substantial performance boost for most computing tasks.
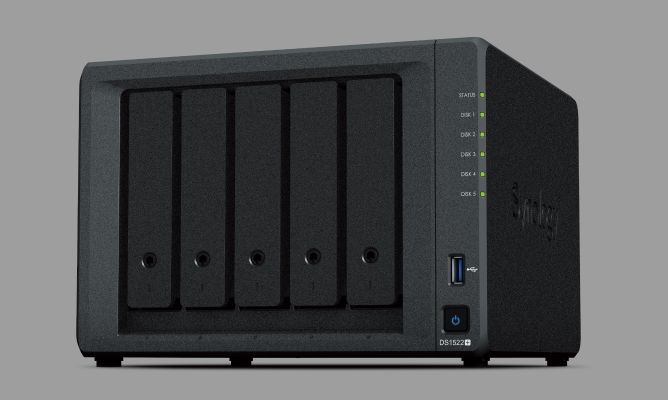
What is a Synology NAS?
A NAS, or network-attached storage, is a dedicated file storage device that connects to a local area network (LAN) and makes files accessible over the network. This allows multiple authorized users and devices on the network to access and share files on the NAS. NAS devices typically run their own operating system (OS) optimized for providing file services and storage management.
Synology is a major vendor of NAS devices for both home and business use. Synology NAS runs the Synology DiskStation Manager (DSM) OS. Some key Synology NAS product lines include:
- XS+/XS Series – High performance enterprise NAS models
- Plus Series – Midrange NAS focused on excellent performance
- Value Series – Cost-effective entry level NAS models
- J Series – Compact and economical NAS for personal cloud storage
Synology NAS provides extensive media streaming, backup, virtualization, and collaboration capabilities powered by DSM and Synology’s applications. Models vary in terms of storage capacity, memory, processor performance, and high availability features for business use. Most Synology NAS devices have hot-swappable drive bays to conveniently add and replace hard drives.
Sources: https://www.synology.com/products, https://www.synology.com/support/nas_selector
SSD Compatibility with Synology NAS
When choosing an SSD to use in your Synology NAS, it’s important to select a model that is compatible. Synology maintains a compatibility list that specifies which SSD models and sizes have been tested to work with each NAS model.
Some key points on compatibility:
- Synology NAS models support both SATA and M.2 SSDs depending on the specific device. The larger desktop and rackmount models tend to have more SSD slots and compatibility.
- For SATA SSDs, 2.5″ drives in sizes up to 8TB are commonly supported. M.2 SSDs in the M.2 2280 form factor up to 2TB are typically compatible.
- Synology maintains a comprehensive compatibility list you can search to verify your specific NAS model and SSD candidates are compatible.
- Some of the most commonly compatible SATA SSD brands include Samsung, Crucial, WD, Seagate, and SanDisk. For M.2, Samsung, WD, and Crucial SSDs have broad compatibility.
In summary, always cross-reference your specific NAS and chosen SSD against Synology’s compatibility list before purchasing. This will ensure maximum performance and avoid any issues with drive detection or operation down the road.
Benefits of Adding an SSD to a NAS
One of the main benefits of adding an SSD to a Synology NAS is much faster data access speeds. SSDs have no moving parts and can access data almost instantly, compared to the moving read/write heads of traditional hard disk drives (HDDs) that add latency. This translates to significantly improved overall system performance.
According to this article, some of the key benefits of an SSD NAS include:
- Improved read and write speeds – SSDs are capable of sequential read/write speeds over 500MB/s compared to ~100MB/s for HDDs.
- Faster access to applications and files stored on the NAS.
- Reduced noise and power consumption due to no moving parts.
- Better performance for demanding applications like video editing or gaming servers.
By installing even a small SSD as a cache drive, you can see major improvements in the overall responsiveness of a Synology NAS. Files and applications will load faster, and transfers will complete quicker.
Considerations When Adding an SSD
There are a few key considerations to think about before adding an SSD to a Synology NAS.
One of the biggest is cost. SSD storage is more expensive per gigabyte compared to traditional HDDs. A 1TB SSD may cost around $100-150, while a 1TB HDD is around $40-60. Make sure your budget allows for SSDs before purchasing.
Another factor is the number of available drive bays in your NAS. Most Synology models only have space for 2-4 drives. Since SSD capacities are lower than HDDs, you’ll get less total storage from SSDs. Consider whether you have enough bays for both HDDs and SSDs.
RAID configuration also matters. For the best performance, SSDs should be set up in a RAID 0. However, RAID 0 offers no redundancy. A RAID 1 or 5 is recommended if using SSDs for primary storage. Consider which RAID mode makes the most sense for your use case.
Overall, adding an SSD to a NAS can boost performance – but only if your budget, drive bays, and RAID setup allow it. Carefully weigh these factors before making a purchase.
How to Install an SSD in a Synology NAS
Installing an SSD in a Synology NAS is a straightforward process that can be done whether the NAS is powered on or off. The main steps are:
- Prepare the SSD – Make sure it is compatible with your NAS model and firmware version. Solid state drives come in different form factors like 2.5″, M.2 SATA or M.2 NVMe. Refer to Synology’s compatibility list to pick the right SSD.
- Gather tools – No special tools are required. All you need is a Philips screwdriver to open the NAS chassis and access the drive bays.
- Follow ESD safety – Take steps to avoid electrostatic discharge like working on a wooden or tiled surface and using an anti-static wristband.
- Open the NAS chassis – Unscrew and remove the case cover to expose the drive bays.
- Install the SSD – Locate an empty 3.5″ or 2.5″ drive bay to install the SSD depending on its form factor. Slide it in gently till its connector interfaces with the SATA port.
- Close the chassis and power on – Secure the case cover and power your NAS back on. The new SSD should be detected automatically.
The above process works whether you shutdown the NAS first or hot-swap the SSD while the device is running. Hot swapping is quicker but you must avoid abruptly disconnecting drives to prevent data loss. Refer to Synology’s tutorial for step-by-step visual guidance.
Configuring the SSD as a Cache or Volume
When adding an SSD to a Synology NAS, you have two main options for configuring it: as a cache or as an independent volume. Setting up the SSD as a cache can improve performance by caching frequently accessed data, while using it as a standalone volume gives you faster raw storage. There are tradeoffs to consider with each approach.
Configuring the SSD as a cache uses Synology’s SSD cache technology to store copies of frequently accessed data from HDD volumes. This caches hot data on the fast SSD storage for reduced latency. Reads first check the SSD cache before going to the slower HDDs. Writes still go to the HDDs first before being updated in the cache. Overall, this can deliver a performance boost for random IO [1].
However, there are some limitations with SSD caching. The size of the cache is limited to the SSD capacity, so it can fill up. Cache is also unaware of which specific files a user may want prioritized. You don’t get the full speed of the SSD, just a caching performance bump. The system manages what data gets cached automatically.
Setting up the SSD as an independent volume gives you a dedicated fast storage pool for important data. You have full control over what data gets stored on the SSD volume versus HDDs. Critical data like databases or virtual machines can be placed directly on SSD storage for consistently low latency.
The downside is that only data residing on the SSD volume itself benefits. Data stored on HDD volumes doesn’t improve. So you have to be selective about what apps or shares are configured to use the SSD storage pool. SSD lifespan may also be a concern if used heavily as primary storage.
In summary, SSD cache can provide an overall boost for random IO across traditional HDD volumes. Dedicated SSD volumes give maximize performance for targeted data, but require more planning for ideal placement and workload separation.
Optimizing the NAS OS for SSD Performance
To get the most out of an SSD cache or volume in a Synology NAS, it’s important to optimize the DiskStation Manager (DSM) operating system. According to the Synology whitepaper “Increasing the System Performance of Synology NAS/IP SAN”, enabling TRIM support is crucial for maintaining SSD performance over time.
TRIM allows the operating system to inform an SSD which blocks of data are no longer in use and can be wiped internally. This helps the SSD maintain high write speeds by avoiding having to erase unused blocks before writing new data, which is a slower process. Enabling TRIM prevents write speed degradation over time.
In addition to TRIM, the whitepaper recommends adjusting certain DSM settings for SSD optimization including:
- Disabling scheduled integrity checks on SSD volumes/caches
- Enabling SSD read/write cache
- Adjusting ext4 volume settings like auto-delete and lazy-itable-init for faster truncates and deletes
Properly configuring these options ensures maximum performance and endurance when using SSDs in a Synology NAS.
Source: Increasing the System Performance of Synology NAS/IP SAN
SSD Maintenance and Monitoring
Properly maintaining and monitoring SSDs in a NAS can help maximize their lifespan and performance. Here are some tips:
Check SSD health regularly using tools like Synology’s built-in S.M.A.R.T. monitoring or third party tools. Watch for indicators like high bad sector counts that can predict failure.
Monitor SSD lifespan using utilities that show total bytes written, like these third party options. Compare to SSD endurance ratings to estimate remaining life.
Keep firmware up-to-date on SSDs and NAS to ensure maximum compatibility and performance.
Set up RAID mirroring or a hot spare drive if uptime is critical. This protects against SSD failure.
Consider overprovisioning to extend SSD lifespan. Limit writes to 70-80% of total SSD capacity.
Keep NAS operating temperature low if possible to avoid impacting NAND flash longevity.
Back up important data regularly in case of SSD failure. Backups protect against data loss.
Monitor for I/O errors, latency spikes and slowdowns that can indicate issues.
Frequently Asked Questions
Here are some common questions and answers about adding an SSD to a Synology NAS:
Is it worth adding an SSD to my Synology NAS?
Adding an SSD can significantly improve the performance of a Synology NAS by providing faster read/write speeds and lower latency. The benefits are most noticeable for operations like database access, virtual machines, intensive workloads, and applications that require frequent access to storage. However, SSDs have lower capacity compared to HDDs. So it may not make sense financially to use SSDs for bulk storage of media files or backups. Overall, adding an SSD as a cache or for specific workloads can provide a nice boost in NAS performance.
What’s the best way to configure an SSD in my Synology NAS?
The most common ways to utilize an SSD in a Synology NAS are as a read/write cache or as a separate volume. Configuring it as a read-only or read-write cache will provide across-the-board improvements in performance. Creating a separate SSD volume allows you to store specific data on the SSD that needs fast access, while keeping bulk storage on the HDDs. This approach requires more planning but can maximize the benefits of the SSD.
Will adding an SSD increase the storage capacity of my NAS?
No, adding an SSD will not directly increase the overall storage capacity or available space on your NAS. SSDs typically have much lower capacity compared to HDDs. The SSD should be seen as a performance upgrade rather than a storage expansion.
Can I add an SSD to any Synology NAS model?
Most modern Synology NAS models have one or more slots where you can install an SSD, either SATA or M.2 NVMe. However, some older models may not be compatible. It’s important to check the specific SSD compatibility for your NAS model before purchasing.
How difficult is it to install an SSD in a Synology NAS?
For most Synology NAS devices, installing an SSD is quite straightforward. You simply insert the SSD in the appropriate slot, boot into the DiskStation Manager (DSM) OS, and configure the SSD as a cache or volume using the intuitive Synology interface. No advanced technical knowledge is required. As always, it’s wise to back up your NAS before making any hardware changes.