What is Tablo?
Tablo is a DVR specifically designed for over-the-air TV signals. It lets you record live TV from an antenna and stream it to devices around your home. With Tablo, you can watch and record free local broadcast channels like ABC, CBS, NBC, FOX and others without a cable or satellite subscription.
The Tablo DVR connects to an HD antenna and your home network. It then streams live and recorded TV to devices like Roku, Fire TV, Apple TV, smartphones and more. Tablo works with web browsers, tablets, computers and other connected devices. This allows you to enjoy antenna TV on all your screens without running wires from the antenna to multiple TVs.
Some key features of Tablo DVRs include:
- Recording live TV from an over-the-air antenna
- Streaming live and recorded TV to devices
- Pausing, rewinding and fast-forwarding live TV
- Scheduling recordings for future shows or series
- Creating customizable channel lineups
- Watching TV on smartphones, tablets, computers, streaming boxes and smart TVs
- Accessing Tablo apps and stored recordings remotely while traveling
In summary, Tablo acts as a central hub to distribute free OTA TV throughout your home so you can cut the cord on cable TV costs and contracts.
Why Use a Hard Drive with Tablo?
The main purpose of connecting an external hard drive to your Tablo DVR is for storage. The hard drive is what actually stores all of your recordings from live TV. Without a hard drive connected, Tablo has nowhere to save the recordings, so you won’t be able to record any shows.
Tablo is designed to work with an external USB hard drive specifically for storing your recordings. The hard drive essentially acts as the “memory” for the Tablo, allowing you to record live TV and save it to watch later just as you would with a traditional DVR. Tablo needs the external storage, as the device itself does not have any built-in storage for recordings.
Some key points about the Tablo hard drive:
- It stores all of your recordings from live TV to watch later.
- Without it connected, Tablo has no way to save recordings, so you cannot record shows.
- The hard drive capacity determines how many hours of recordings you can store.
- Tablo is designed to work with external USB hard drives for storage.
In summary, the external hard drive is a crucial part of the Tablo system, as it provides the necessary storage space to record and save shows from live TV.
Can Tablo Work Without a Hard Drive?
Yes, Tablo can work without a hard drive installed, but it will have limited functionality[1]. The Tablo DVR allows you to watch and record live TV by connecting an HD antenna and USB hard drive. While the hard drive is not required for basic operation, it enables key features like pausing live TV and recording programs[2].
Without a hard drive, you will only be able to watch whatever channel the Tablo tuner is currently tuned to. You won’t have the ability to pause or rewind live TV since there is no storage to buffer the video stream. You also won’t be able to schedule recordings or store any programs to watch later[3].
So in summary, Tablo can technically operate without a hard drive for live TV viewing only. But you would be missing out on major DVR functionality that requires external storage. Most Tablo owners do connect a USB hard drive to unlock Tablo’s full capabilities.
Sources:
[1] https://community.tablotv.com/t/is-external-hard-drive-necessary-for-live-tv/12280
[2] https://community.tablotv.com/t/is-external-drive-required/24992
[3] https://support.tablotv.com/hc/en-us/articles/115002894423-How-Does-Onboard-Recording-Storage-Work-on-Tablo-Devices-
What You Can Do Without a Hard Drive
Even without a hard drive connected, the Tablo DVR allows you to do a few key functions:
- Watch live TV on the Tablo app – You can stream live TV to devices running the Tablo app without a hard drive attached. However, you will be limited to one tuner for live TV streaming. According to the Tablo community forums, “The folks above are correct! The Tablo will work fine with live TV without a hard drive connected. However, you’ll be limited to one tuner, and…” (source)
- View the channel guide – The Tablo app allows you to browse channel listings without a hard drive installed.
- Schedule recordings – You can still use the Tablo app to schedule future recordings even with no hard drive attached. However, without a drive to store recordings, any scheduled recordings will not actually be saved.
So in summary, you have basic DVR functionality to watch and browse live TV, but no ability to play back recordings without a hard drive installed.
What You Can’t Do Without a Hard Drive
There are a few key Tablo functions that require a hard drive to work properly:
Record Live TV – Tablo needs a hard drive to save your recordings. Without one, you won’t be able to record any live TV content.
Store Recordings – All of your recorded shows are saved directly onto the connected hard drive. Without it, Tablo has nowhere to store recordings.
Watch Recordings – In order to watch anything you’ve previously recorded, you need access to the hard drive where those recordings are stored. No hard drive means no access to saved recordings.
So in summary, without a hard drive connected Tablo can still stream live TV but loses the ability to record and playback DVR content. A hard drive is required for the full Tablo experience.
Sources:
https://community.tablotv.com/t/is-external-hard-drive-necessary-for-live-tv/12280
https://support.tablotv.com/hc/en-us/articles/15709939286804-Hard-Drive-Specifications-Recommendations
Tips for Using Tablo Without a Hard Drive
While a hard drive is recommended for the full Tablo experience, there are some tips for using Tablo without a permanently attached hard drive:
Connect an external USB drive – You can connect a USB flash drive or portable external hard drive to Tablo temporarily to enable recording capabilities. This gives you DVR functionality without a permanently installed hard drive. Just be aware that USB flash drives tend to be slower and may limit the number of simultaneous recordings.
Stream live TV instead of recording shows – Without a hard drive, you won’t be able to schedule recordings or series recordings. However, you can still stream live TV through Tablo as it airs. This allows you to watch live television without needing storage for recording.
Only use one tuner – Tablo units with multiple internal tuners require a hard drive to enable all tuners. Without a drive, Tablo will limit you to one active tuner at a time for live TV streaming.
Check recording space regularly – If using temporary attached storage, keep an eye on the remaining space for recordings. You don’t want to run out of space unexpectedly if Tablo is set to delete oldest recordings first.
Considerations Before Removing the Hard Drive
There are some important considerations to keep in mind before deciding to remove the hard drive from your Tablo DVR:
You’ll lose all stored recordings – One of the main benefits of Tablo is the ability to record and store content on the internal hard drive. Without the drive, you won’t be able to record or store any shows or movies. Any existing recordings will be lost if you disconnect the hard drive (1).
Live TV streaming requires strong internet – Tablo relies on your home’s internet connection for streaming live TV. Without the ability to buffer content on a hard drive, you’ll need a fast and reliable internet connection capable of smooth streaming. This could be an issue if your internet is slow or unstable.
Can’t timeshift or pause live TV – Another great Tablo feature is timeshifting live TV, essentially using the hard drive as a temporary DVR to pause and rewind live content. This is not possible without a hard drive installed, so you won’t be able to pause or rewind live TV streams.
When to Remove the Hard Drive
There are a few scenarios when you may want to remove the hard drive from your Tablo device:
Upgrading to a Larger Drive
If you find you need more recording capacity, you can upgrade to a larger hard drive. First you’ll want to remove the existing drive, then install the new larger capacity drive and format it through the Tablo interface. This allows you to increase your storage space for recordings.
Replacing a Failed Drive
Hard drives can fail over time. If your Tablo begins showing signs of a failed drive like playback issues or recordings not saving properly, you’ll want to replace it. First remove the bad drive, insert a new one, and format it in Tablo to get back up and running.
Troubleshooting Performance
In some cases, removing the hard drive can help diagnose problems. According to users on the Tablo Community forums, removing the drive and rebooting allows you to watch live TV without issues if the drive itself is causing lag or buffering problems. Once the drive is removed, you can monitor performance before reinstalling the drive to isolate any problems.
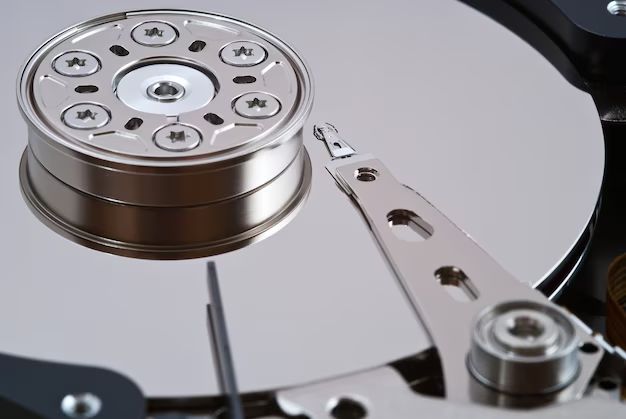
How to Remove and Reinstall the Hard Drive
If you need to replace or upgrade the internal hard drive in your Tablo device, the process is straightforward but does require powering down the Tablo first. Here are the steps to safely remove and reinstall the hard drive:
1. Shut down the Tablo properly by going to Settings > Maintenance > Shut Down. This ensures any recordings or guide data are saved before powering down.
2. Unplug the power cord from the Tablo to power it off completely.
3. Open up the Tablo case to expose the internal drive bay. This may require removing screws or panels depending on the Tablo model.
4. Locate the hard drive and unplug it from the SATA connector inside to remove it.
5. Install the new hard drive by sliding it into the drive bay and connecting the SATA cable.
6. Close up the Tablo case and plug the power back in.
7. When the Tablo boots up, it will prompt you to format the new drive before syncing guide data. Follow the on-screen instructions.
Once completed, the new hard drive will be formatted and set up for recordings. Be sure to transfer any existing recordings from the old drive if needed.
Conclusion
Tablo needs a hard drive to record and store live TV shows, movies, and other content. The internal or external hard drive essentially acts as the DVR, allowing you to record programs and watch them later on-demand. Without a hard drive installed, Tablo loses a major component of its functionality.
However, even without a hard drive, Tablo does still work for streaming live TV. So if you only care about watching live TV and don’t need to record or time-shift any content, Tablo can operate without a hard drive. You just won’t have any DVR capabilities.
In summary, a hard drive is required for the full Tablo experience of watching, recording, and time-shifting live TV. But in a limited capacity, Tablo can still stream live TV even without a hard drive installed. Just don’t expect full DVR functionality if you choose to remove the drive.
