What is RAID 1?
RAID 1, also known as disk mirroring, is a storage technology that duplicates data across two or more hard disk drives. The main benefit of RAID 1 is data redundancy – if one drive fails, the data is still accessible from the other mirrored drive(s). This protects against data loss due to drive failure.
In a two-disk RAID 1 array, the disks contain identical copies of the same data. All reads and writes go to both drives simultaneously. The usable storage capacity is equivalent to the capacity of one member drive, as the other drive contains duplicate data. For example, two 1TB drives in a RAID 1 array provide 1TB of usable storage.
What does “degraded” mean?
A degraded RAID 1 array means one of the mirrored drives has failed or been temporarily removed, but the data is still accessible from the remaining drive. For example, if you have a two-disk RAID 1 array and one of the drives fails, the array is considered degraded but still functional in a reduced redundancy state.
When a RAID 1 array is degraded, it is at risk of data loss if the remaining drive also fails. It’s important to replace the failed drive and rebuild the array as soon as possible to regain redundancy and fault tolerance.
How can I tell if my RAID 1 is degraded?
There are a few ways to identify a degraded RAID 1 array:
– Check the status lights on your RAID controller or enclosure. A faulty or missing drive will typically be indicated with an LED color code or error light.
– Look for alerts or errors in the RAID management software. Most RAID controllers have software that will prominently warn you of a degraded array.
– Run the RAID management utility and inspect the array status. This will clearly indicate whether the RAID 1 array is degraded or online.
– Check the array status in your operating system. In Windows, access the Disk Management utility. In Linux, tools like mdadm can show array status.
– Performance will be slower on a degraded array as all reads and writes go to a single drive only.
– The available storage capacity shown in your operating system will match the smaller capacity of a single drive. With RAID 1, this is a clue that one drive may be missing or failed.
So in summary, warning lights, software alerts, slow performance, reduced capacity, and directly checking the RAID status using management tools are good ways to identify a degraded RAID 1 array.
What causes a RAID 1 array to become degraded?
The most common causes of a degraded RAID 1 array include:
– Hard disk drive failure – This is the #1 cause. Drives can fail due to mechanical issues, logical/firmware problems, etc. In a two-drive mirror, this leaves just one functioning drive.
– Accidental removal – Physically removing one drive from the array, without properly marking it offline first. For example, pulling out a hot swap drive without using the RAID management software.
– Missing drive – Forgetting to install both mirrored drives, or leaving a failed drive out of the array. This leaves just one drive where there should be two.
– Cable issues – Problems with cables or backplane connectors can cause drives to disappear from the array, seeming like a failed drive.
– Software issues – Bugs, power outages, crashes, or accidental deletion of a RAID volume can corrupt the array.
– Unclean shutdowns – Improperly shutting down the system can cause drive synchronization issues, corrupting the mirrored set.
Any of these issues can result in one drive becoming inaccessible, causing a degraded state. The solution is to identify and replace the failed drive to rebuild the mirror.
How can I fix a degraded RAID 1 array?
To fix a degraded RAID 1 array:
1. Identify and replace the failed hard drive. The failed or missing drive must be replaced with a new drive of equal or greater capacity.
2. Make sure the new replacement drive is connected properly. Install it in the appropriate bay or connect the cables firmly.
3. Add the new drive to the degraded array. In the RAID management software, select the option to add or designate the new drive as part of the existing degraded array.
4. Rebuild the array. The RAID controller will rebuild the data by copying the contents of the working drive to the replacement drive. This synchronizes the drives into a redundant mirrored set again.
5. Check the rebuild status until it completes. The rebuild process can take hours or days depending on the size of the array. Wait until it finishes.
6. Verify the array is back to normal redundant operation. The status should show as online or OK when both mirrored drives are synchronized and redundant again.
The whole process requires just a few clicks in the RAID management software, but allow enough time for the rebuild to fully complete. This repairs the degraded array and restores fault tolerance.
Tips for preventing degradation:
– Use enterprise-grade hard drives designed for RAID. Look for features like TLER for better error handling.
– Monitor drive health metrics using tools like S.M.A.R.T. statistics. Watch for warning signs of impending failure.
– Ensure proper airflow and cooling across drives to prevent overheating.
– Keep firmware and RAID management software up to date. Use supported versions and configurations.
– Use an uninterruptible power supply (UPS) to avoid damage from power outages.
– Always shut down the system properly following the manufacturer’s instructions. Avoid force powering off.
– Back up important data regularly in case multiple drives fail.
Following best practices for RAID setup and maintenance will minimize the chances of a degraded array occurring. But a sound backup strategy is still essential in case data is lost.
Can I run RAID 1 in a degraded state?
You can technically continue to use storage and access data while a RAID 1 array is degraded. The performance penalty may be negligible in some cases. However, it is strongly advised to fix a degraded RAID 1 array as soon as possible.
Running long-term in a degraded state leaves the array vulnerable to complete failure from a second drive issue. It also means you are without the redundancy and fault tolerance that RAID 1 was implemented for.
Brief periods of degraded operation during the drive replacement and rebuild process are expected. But you should begin the drive swap immediately when degradation occurs, rather than delaying for an extended period.
Attempt to run in a degraded state only if absolutely necessary and be sure to initiate the rebuild process at the earliest opportunity. The goal should always be to return to normal redundant operation as quickly as possible.
Can I recover data from a failed RAID 1 drive?
In most cases, you can recover data from a failed drive in a RAID 1 array. Because data is mirrored between the drives, the data still exists intact on the healthy surviving drive. Simply replace the failed drive and rebuild the array to restore redundancy.
However, if both mirrored drives fail simultaneously before a rebuild, it becomes trickier to recover lost data. You may need professional data recovery help to attempt to salvage data from the failed drives.
If a drive shows early signs of failure like reallocated sectors, you may be able to read data before total failure and copy it to another healthy drive as a precaution. But once mechanical issues render a drive completely dead, DIY recovery is improbable.
To maximize chances of data recovery, have a sound backup plan for your RAID arrays. Also respond swiftly to signs of drive problems before they escalate to complete failure. But in most cases, RAID 1 protects well against physical drive failure thanks to the mirrored data copies.
Should I use RAID 1?
RAID 1 remains one of the most popular choices for data protection and fault tolerance. The simple mirroring concept provides good performance plus redundancy against drive failure. It’s easy to understand and implement.
The downsides include higher cost since matching drives are needed for mirroring, and 50% of total capacity is lost to redundancy. But for small to medium storage sizes, RAID 1 delivers excellent protection and is relatively inexpensive to set up compared to some other RAID levels.
For home users and small offices who value simplicity and data protection, RAID 1 is often a great choice when used correctly. Just be sure to follow best practices, regularly back up data, monitor drive health, and take prompt action if the array becomes degraded. This will maximize uptime and make drive failures painless to recover from.
When should you avoid RAID 1?
RAID 1 may not be the best choice when:
– You need maximum storage capacity and can’t afford to lose 50% to redundancy.
– Uptime and redundancy are less important. For example, in low-risk environments like home PC storage for media files.
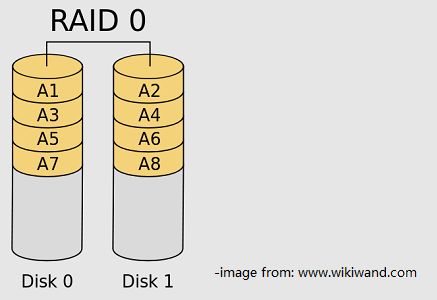
– You need speed and are working with very large files, like video editing. RAID 0 outperforms RAID 1.
– You already have another form of redundancy like daily cloud backups. The mirroring may be overkill.
– Your data volume is very large. More advanced RAID 5/6 become more cost effective at scale.
– You have a demanding enterprise environment with no downtime tolerance. Consider advanced RAID plus hot spares.
The redundancy overhead makes RAID 1 inefficient for very large or cost-sensitive storage needs. And the two-drive mirror lacks scalability compared to bigger RAID sets. But for typical small to medium deployments, RAID 1 hits a sweet spot.
Conclusion
In summary, degraded RAID 1 arrays are easily fixed by identifying and replacing the failed drive, then rebuilding the mirror set. This restores redundancy quickly with minimal downtime. Stay vigilant for early signs of drive problems, follow best practices, and have backups, and you can painlessly recover from most failures. While degraded, limit risks by starting the rebuild process ASAP. For most use cases, RAID 1 delivers excellent balance of performance, capacity, and fault tolerance.
