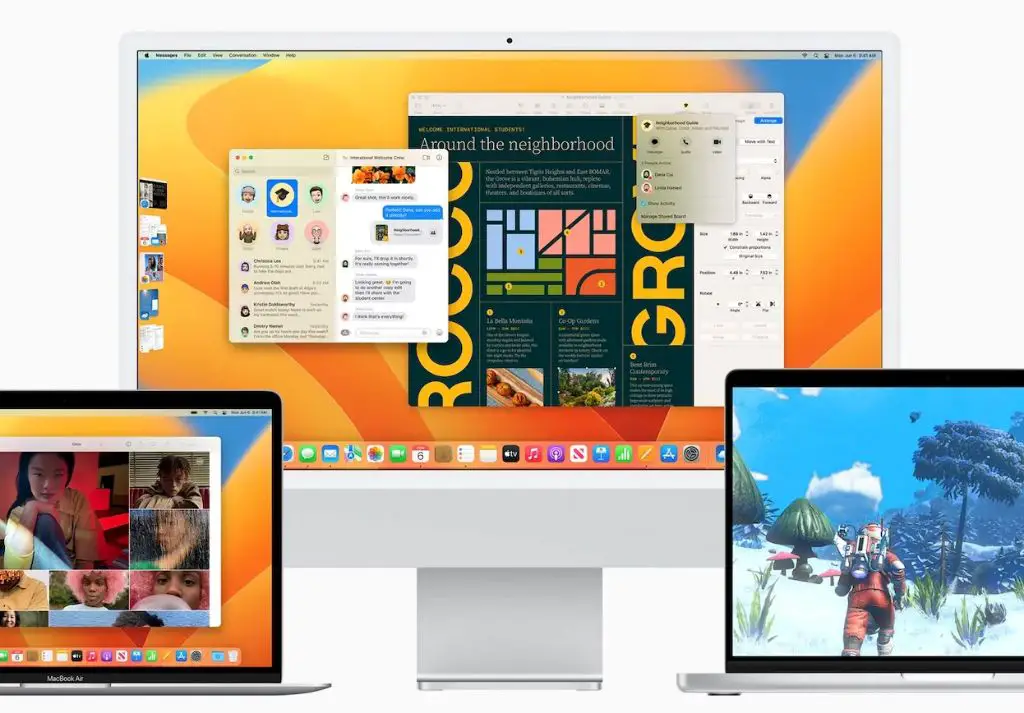
Yes, it is possible to upgrade from macOS Monterey to macOS Ventura. Apple generally allows users to upgrade to the latest macOS version as long as their Mac meets the minimum system requirements. Upgrading provides access to the newest features and security updates.
Overview of macOS Monterey and macOS Ventura
macOS Monterey (version 12) was released in 2021 as a free upgrade for compatible Macs. Key new features included Shortcuts automation, Focus modes, AirPlay to Mac, and expanded Continuity capabilities. macOS Ventura (version 13) followed in 2022 with additions like Stage Manager multitasking, Handoff for FaceTime, new Weather and Clock apps, and other improvements.
While macOS Ventura offers useful new capabilities, macOS Monterey remains a refined and capable operating system. Many users continue to run it happily. Upgrading is optional, although encouraged by Apple to gain the latest features and security patches.
Checking compatibility for upgrading
The first step is checking your Mac model’s compatibility with macOS Ventura. Most Macs released within the last several years support the upgrade. In general, Ventura can be installed on 2017 and newer MacBook models, 2018 and newer MacBook Air/Pro models, 2017 and newer iMac models, 2019 and newer iMac Pro models, 2017 and newer Mac Pro models, and 2017 and newer Mac Mini models. Older Macs likely cannot upgrade.
Refer to Apple’s macOS Ventura compatibility list to confirm your specific machine is supported: https://support.apple.com/en-us/HT212551
If your Mac is not listed, then you will be unable to upgrade to Ventura. You will need to remain on macOS Monterey.
Checking current macOS version
Before attempting to upgrade, determine your Mac’s current macOS version. To check, go to the Apple menu and select “About This Mac.” The window that opens will display the version number below the Mac model name.
If your Mac is already running macOS Ventura, then no upgrade is needed. If your Mac is running macOS Monterey or an earlier version, then upgrading to Ventura is possible provided it meets the system requirements.
Backing up your Mac
Upgrading your operating system is a major change. Apple recommends backing up your Mac before installing macOS Ventura, just in case anything goes wrong or you decide to revert to Monterey. Time Machine is an excellent backup option that periodically saves copies of your files.
To enable Time Machine backups to an external hard drive, follow these steps:
- Connect an external HDD or SSD drive with enough storage capacity to your Mac.
- Open System Preferences and go to the Time Machine section.
- Click “Select Backup Disk” and choose your external drive.
- Toggle the switch at the top to “On” to start automatic hourly backups.
Be sure the external drive connects to your Mac so Time Machine can run regularly. The initial backup may take hours depending on your drive speed and storage usage.
Downloading the macOS Ventura installer
With your Mac backed up, it’s time to download the macOS Ventura installer application. This app allows you to upgrade from macOS Monterey to Ventura. Follow these steps:
- Open the App Store app on your Mac.
- Search for “macOS Ventura” in the App Store search bar.
- When the macOS Ventura listing appears, click “Download.”
- Enter your Apple ID password when prompted.
- Allow the approximately 12+ GB installer to download completely.
The Ventura installer may take a while to fully download depending on your internet connection speed. You can monitor progress in the App Store app. The installer will be saved to your Applications folder once finished.
Installing macOS Ventura cleanly
With the installer downloaded, you can now upgrade from macOS Monterey to Ventura. A clean install method is recommended to avoid any potential bugs caused by upgrading in-place over your existing system.
Follow these best practices for a clean install upgrade to macOS Ventura:
- Use Time Machine to create a full system backup first.
- Restart your Mac into macOS Recovery mode by holding Command+R on reboot.
- Select “Install macOS” from the macOS Utilities window.
- Choose “Continue” then select the Ventura installer previously downloaded.
- Agree to license terms and select your Mac’s internal drive to install to.
- Allow the installer to run – this may take over an hour.
- Your Mac will reboot to a fresh Ventura setup assistant – follow the prompts.
- Restore your apps and files from the Time Machine backup.
This clean install process will ensure Ventura starts completely fresh while still retaining your apps, data, and settings from Monterey.
What if I change my mind about upgrading?
If after upgrading to macOS Ventura you decide you would rather revert to macOS Monterey, that is completely doable thanks to Time Machine:
- Boot your Mac into macOS Recovery again by holding Command+R at startup.
- Go to the Time Machine backup in the macOS Utilities window.
- Find the Monterey backup you want to restore and select it.
- Click “Restore” and confirm to revert your Mac back to Monterey.
Downgrading is quick and easy using Time Machine. Just be sure you have a complete Monterey system backup before upgrading to Ventura.
Conclusions
Here are some key takeaways about upgrading from macOS Monterey to Ventura:
- Check your Mac model supports Ventura before attempting to upgrade.
- Always backup your entire system using Time Machine first.
- For best results, do a clean install of Ventura over your current OS.
- Time Machine also allows easy reversion back to Monterey if needed.
- Upgrading provides new features and better security.
Overall, upgrading from macOS Monterey to macOS Ventura is recommended for most compatible Macs. Following Apple’s best practices for backups and clean installs will ensure the safest, most seamless transition possible.

