Quick Answers
Yes, it is often possible to recover photos from a dead, damaged, or unresponsive iPhone, even if the phone won’t turn on. There are a few different methods you can try:
- Connect the iPhone to a computer and use data recovery software to access the files
- Remove the iPhone’s memory card and insert it into another device
- Use cloud backup services like iCloud to restore photos
- Take the iPhone to a repair shop and have them extract the data
The feasibility depends on the extent of the phone’s damage and whether you backed up photos previously. But in many cases, pros can bypass the phone’s lock and operating system to pull data directly from the memory components.
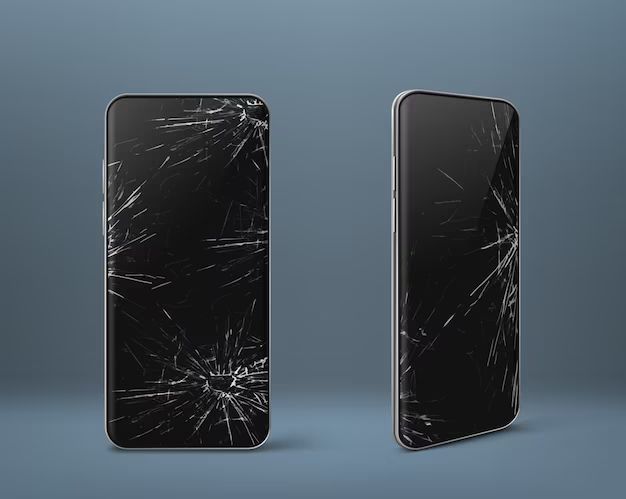
Assessing the iPhone’s Condition
The first step is to examine the iPhone and identify why it’s not turning on. Common reasons include:
- Dead battery – The battery lost its charge and needs to be recharged or replaced
- Crashed operating system – A software glitch or corrupted files are preventing startup
- Broken or damaged hardware – Such as a cracked screen, bad logic board, faulty connection port, etc
- Liquid damage – e.g. the phone was dropped in water
You’ll have the best chance of getting the photos off if the issue is just a drained battery, software crash, or repairable hardware damage. But there are still options if the phone is completely dead due to liquid or catastrophic physical damage.
Checking Cloud Backups
Before anything else, see if the photos were backed up to iCloud or another cloud storage service. This is the easiest way to retrieve them if available:
- On a working iPhone, log into iCloud and view photos
- Restore from a third-party cloud backup like Google Photos
- Check the cloud recycle bin for deleted photos
If you use iCloud Photo Library, every picture you take should automatically upload there. So unless syncing was disabled, your photos may be accessible in the cloud.
Charging the Battery
For an iPhone that won’t turn on due to a dead battery:
- Try charging for at least 1 hour using the original charger and cable
- Force restart the phone while charging by holding the Power and Home buttons
- Have the battery replaced if charging doesn’t work
Being completely dead often takes multiple charge cycles to revive the battery. If the phone still won’t turn on, the battery may need to be swapped out for a new one by a repair shop.
Bypassing the Lock Screen
If the phone turns on but you can’t get past the lock screen, there are a couple options:
- Enter your passcode incorrectly 10 times to force Face ID/Touch ID reset
- Erase the phone completely through iTunes restore on a computer
- Take it to a shop to have the lock screen bypassed
The first method will wipe the device after too many failed attempts. The second option will erase everything but allow you to access and backup photos before restoring the software. Professional unlocking services can crack the screen lock while preserving data.
Connecting the iPhone to a Computer
Once you’re able to turn the iPhone on, the next step is to connect it to a computer. This will allow you to access the file system and backup photos.
What You’ll Need
- iPhone data cable
- Computer (Mac or PC)
- Optional: External hard drive
Use the original charging/data cable that came with the iPhone. You may also need an external hard drive if transferring photos to another device.
Connecting with a USB Cable
To connect the iPhone to a computer:
- Plug the iPhone cable into the computer’s USB port
- Connect the other end to the iPhone
- Unlock the iPhone if prompted
- Open iTunes or Finder (Mac) / File Explorer (Windows)
- Allow access to the iPhone data when prompted
This will mount the iPhone storage as an external device on the computer. Next you can use data recovery software or manual file transfer to get the photos.
Accessing Files in OSX/MacOS
On a Mac computer:
- Open Finder and click the iPhone under Locations
- Go to the DCIM folder
- Copy the photo folders to the Pictures folder or external drive
The Photos app may also automatically import images if enabled under Preferences > General.
Accessing Files in Windows
On Windows:
- Open File Explorer and go to This PC
- Click on the iPhone drive icon
- Open the Internal Storage > DCIM folder
- Select and copy over the photo folders
Check the Imports folder in Photos app to see if images copied over automatically.
Using Data Recovery Software
Specialized data recovery programs provide another way to access photos on an unresponsive iPhone. They can recover data even from phones that won’t turn on.
How It Works
Data recovery software can interface with an iPhone’s storage at the disk level to copy data. This allows it to bypass the operating system and access files directly. Even with physical damage, it can often extract files from memory chips that are still intact.
Some of the top iPhone data recovery apps include:
- Tenorshare UltData
- Stellar Data Recovery
- EaseUS MobiSaver
- iMyFone D-Back
- Dr.Fone
Using Recovery Software
To use data recovery software:
- Download and install on a computer
- Connect the iPhone via cable
- Select the iPhone drive and scan for photos
- Preview recoverable photos
- Select images to restore and save to the computer
Programs like Dr.Fone also offer advanced screen unlocking and lost data restoration features. But the basic process involves scanning the iPhone, choosing photos, and recovering them to another device.
What Photos Are Recoverable?
Data recovery should retrieve photos still present in the memory, including:
- Camera roll images
- Saved photos and screenshots
- Cached photos from messaging apps
- Deleted photos that weren’t overwritten
But it can’t recover photos unless traces still exist in the data storage. So the more you used the iPhone after losing photos, the lower the chances of full recovery.
Removing the Memory Card
If your iPhone has a removable memory card (rare except for some models), you may be able to take it out and access photos directly.
Locating the Card
Memory cards are typically located behind the SIM card tray or battery:
- Eject the SIM tray – may have a microSD slot inside
- Remove the battery – look for a slot on the exposed components
Refer to teardown guides to find your iPhone’s card location specifically. Be very careful not to damage any connections when removing components.
Inserting the Card Into Another Device
Once extracted, insert the memory card into another phone, computer, or memory card reader device. The photos should appear as a portable storage drive or become accessible in the phone’s gallery.
You can also use data recovery software on the memory card by connecting the reading device to a computer. This provides an extra layer of protection against corrupted files.
Copying Photos From the Card
With the card contents visible:
- Open the DCIM folder
- Select all photos/albums to copy
- Paste or save the photos onto the new device or computer
Ensure photos are fully transferred to permanent storage before doing anything else with the memory card.
Taking the iPhone to a Repair Shop
For an iPhone that’s completely dead or severely damaged, professional data recovery services may be your best chance for getting photos back.
Service Options
There are a few types of shops that can help:
- Apple Store – Genius Bar data recovery
- iPhone repair shops
- Recovery specialists like DriveSavers
- Local computer shops
General electronics repair shops often provide iPhone data recovery alongside fixing hardware like screens and batteries. Dedicated data recovery firms have the most advanced tools.
What They Can Do
Store and shop pros have access to advanced hardware/software to extract data from failed iPhones. Capabilities include:
- Bypassing screen locks, encryption, and passwords
- Repairing phones enough to switch them on
- Imaging storage chips and drives
- Extracting data from chips removed from damaged phones
They work directly with the iPhone’s storage components, so have the best chance of rescue even if the phone is smashed or dead.
Cost of Professional Recovery
The cost for pro iPhone data recovery varies a lot by shop and how severe the issues are:
- Minor – $100 to $300+
- Moderate – $300 to $800
- Severe – $800+
It ultimately comes down to the time and effort involved. More extreme recovery from smashed or drowned phones costs in the $1000 to $2000 range in some cases.
Preventing Data Loss in the Future
While you can take steps to rescue photos from a dead iPhone, it’s much easier to avoid the situation altogether. Some tips:
- Back up regularly to iCloud or other cloud services
- Sync photos to a computer periodically
- Maintain iPhone backups on a computer through iTunes/Finder
- Enable automatic photo syncing to apps like Google Photos
- Save individual photos to cloud drives if needed
Making duplicate copies of photos in the cloud and on external devices provides redundancy. That way a dead phone won’t mean losing your photos forever.
Always Make Backups
No matter what iPhone recovery method you use, backing up your data is critical to avoid catastrophe. Ideally you’ll have multiple automatic backups as well as manual exports for key files.
While an iPhone dying causes panic, you’ll have peace of mind if your photos exist elsewhere. Make regular cloud and local backups part of your routine.
Conclusion
Despite some challenges, you can typically get photos off an unresponsive iPhone in one way or another. The key is finding a method that works based on your specific situation:
- Cloud backups – Recover if photos were synced online
- Data recovery apps – Pull files directly from storage
- Memory card removal – Extract physical storage card
- Professional repair – Hardware and software solutions
With persistence and the right tools, even a shattered or waterlogged iPhone can give up its photos. But ideally you’ll avoid the stress entirely by backing up regularly – giving yourself the peace of mind that your memories are safe.
