When transitioning from a Windows PC to a Mac, one of the first questions that comes up is whether you need to reformat the solid state drive (SSD) you’re moving over to work with the Mac operating system. The short answer is yes, you will need to reformat an SSD that was previously formatted for Windows to make it compatible with Mac OS. However, the reformatting process is relatively straightforward. In this article, we’ll go over when and why you need to reformat an SSD for Mac, how to do it, and what the reformatting process entails.
When Do You Need to Reformat an SSD for Mac?
If you are switching from a Windows PC to a Mac and want to move the SSD from your old computer to your new one, you will need to reformat the drive. Here are some of the most common scenarios that will require reformatting your SSD:
- Upgrading from a Windows PC to a Mac – SSDs formatted for Windows (NTFS or exFAT format) are not natively readable by Mac OS. To use your existing SSD as a startup disk or secondary internal drive, you’ll need to reformat it to a Mac compatible format.
- Repurposing an external SSD for Mac – External SSD drives formatted for Windows will also need to be reformatted to work optimally with Macs.
- Fresh installing Mac OS – If you are doing a clean install of Mac OS on a new SSD, formatting is required to create the necessary APFS (Apple File System) partitions.
- SSD is having performance issues – Reformatting and starting fresh can sometimes resolve SSD corruption issues or performance problems.
In general, if you plan on using an SSD that was previously associated with Windows on a Mac, reformatting it is recommended. The Mac operating system prefers different file system formats than Windows does, so restructuring the drive’s partitions is necessary.
Why Reformat an SSD for Use with Mac?
There are a few key reasons why an SSD needs to be reformatted to work properly with Macs:
- Incompatible file systems – Windows uses NTFS and exFAT formats, while Macs rely on APFS or HFS+. Reformatting the drive allows data to be stored in a Mac compatible format.
- Optimize performance – Reformatting enables SSD partitions to be structured optimally for Mac and eliminates fragmentation issues.
- Resolve corruption – A reformat can fix file system corruption that may be hindering SSD functionality on Mac.
- Erase existing data – Reformatting wipes the SSD completely clean, which is required for fresh OS installation.
- Tighten security – A quick reformat removes all previous files/partitions and can help protect sensitive data when repurposing an SSD.
While Macs can technically read some Windows formatted drives, performance is limited compared to drives formatted natively for Mac. Reformatting the SSD to APFS or HFS+ ensures full compatibility and the best performance.
How to Reformat an SSD for Mac
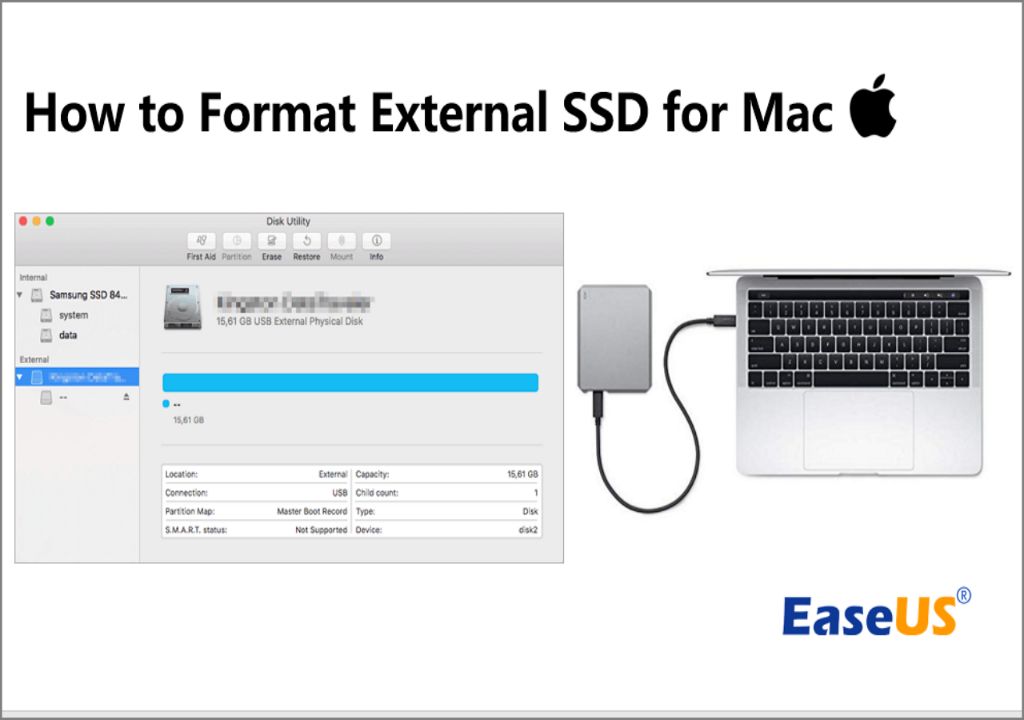
Reformatting an SSD for Mac is a straightforward process using Disk Utility. Here is a step-by-step guide:
- Backup data – Before erasing, be sure to backup any needed data on the SSD to another location.
- Connect SSD to Mac – Use a USB 3.0 connection for best results.
- Open Disk Utility – Found in Applications > Utilities.
- Select SSD – Choose the disk name of SSD from the left side pane.
- Click Erase – Top toolbar option.
- Choose format type – APFS or Mac OS Extended (HFS+).
- Name drive – Enter desired name for SSD.
- Click Erase – Wipes the drive clean.
- Partition (optional) – Add partitions if needed for your setup.
- Eject/disconnect – Safely disconnect SSD when done.
The steps above will reformat your SSD into a clean blank slate, ready to be used for Mac bootup, storage, or whatever your intended purpose is. The reformatting process only takes a few minutes typically. Just be absolutely sure to backup your data beforehand!
What Happens When Reformatting an SSD?
Reformatting a solid state drive essentially restructures how the data is organized and stored on the drive. Here’s an overview of the key things that happen:
- Existing partitions are deleted – This erases all previous partitions on the SSD.
- A new single partition is created – The drive is reformatted as a single partition.
- File system is changed – From NTFS/exFAT to APFS or HFS+ for Mac compatibility.
- Data is erased – All files and folders are wiped clean.
- Disk errors are fixed – Reformat resolves some SSD errors and corruption.
- Free space is maximized – With one blank partition, all space is made available.
Essentially, the reformat gives the SSD a fresh start. The drive is restructured from the ground up into an ideal formatting situation for Mac OS. Any remnants of previous Windows partitions are eliminated.
Common Reformat Options for Mac SSDs
When reformatting an SSD for Mac, you will typically choose between the following formats:
APFS (Apple File System)
- The default format for modern Mac OS versions.
- Optimized specifically for solid state drives.
- Supports strong encryption and partition flexibility.
- Ideal for SSDs used as internal Mac boot drives.
Mac OS Extended (HFS+)
- Legacy Mac format used before APFS.
- Compatible with older Mac OS versions.
- Lacks some APFS benefits but is still quite reliable.
- Good option for external SSDs used for Mac backup.
For most Mac users, APFS will be the best choice. But HFS+ offers wider backwards compatibility if you need to use an external SSD with older Macs. Both formats work very well and are far superior to NTFS for Mac SSDs.
How to Partition an SSD for Mac
In addition to choosing a file system format, you also have the option to partition your Mac SSD if desired. Here are some things to know about Mac SSD partitioning:
- Adds separate disk partitions to organize files.
- Enable sections for different operating systems.
- Helpful for combining Mac OS and Windows installs.
- Done through Disk Utility during or after initial format.
- Up to 16 partitions possible on newer APFS drives.
If keeping a dual Mac/Windows setup, partitioning makes it simple to have distinct sections for each OS. And partitions can help organize categories like personal files, backups, applications, etc. Just be sure to leave enough space for each section based on your needs.
Choosing the Right SSD Format for Your Needs
Deciding whether to use APFS or HFS+ depends on how you intend to use the SSD:
| Use Case | Recommended Format |
|---|---|
| Startup disk on modern Mac | APFS |
| External SSD for new Macs | APFS |
| macOS time machine backup disk | HFS+ |
| External SSD for old Macs | HFS+ |
| Dual boot drive Mac/Windows | APFS partitioned |
The key points are that APFS is best for internal SSDs on newer Macs. While HFS+ offers wider compatibility if the external SSD will be used with older Mac OS versions.
Tips for Reformatting an SSD for Mac
Here are some tips to keep in mind when reformatting an SSD for use with Mac:
- Backup data first – Crucial to avoid permanent data loss. Copy files to another drive or cloud storage.
- Use USB 3.0 or Thunderbolt – Faster connectivity speeds up reformatting.
- Pick your partitions wisely – Plan partition sizes and formats based on need.
- Secure erase for selling SSDs – Use Disk Utility’s secure erase option when passing along old SSDs.
- Be patient – Large SSDs take longer to reformat. Let the process complete.
- Reformat again if issues – Try reformatting again if the SSD has errors or problems.
Following these best practices helps avoid headaches and ensures you complete the reformat successfully. Don’t skip backing up your data! With a quality USB 3.0/Thunderbolt connection and partition plan, reformatting an SSD for Mac takes just minutes.
Frequently Asked Questions
Is reformatting an SSD bad for it?
No, reformatting an SSD is not harmful. Solid state drives are designed for thousands of erase cycles and can be reformatted many times over. As long as you follow the proper steps, reformatting does not negatively impact SSD reliability or lifespan.
Can you convert an SSD from Windows to Mac without reformatting?
Technically yes, there are some workarounds like using a third party NTFS driver for Mac. However, directly reformatting is definitely the preferred method for full compatibility and performance.
Do I lose all my files when reformatting an SSD?
Yes, reformatting erases all data on the SSD. That’s why it’s critical to backup any important files you want to keep before starting the reformat process.
What is the best SSD format for a Mac Time Machine backup?
Mac OS Extended (HFS+) is generally recommended for Time Machine backup drives. It has the needed support for the backup software.
How long does it take to reformat an SSD for Mac?
It depends on the drive’s capacity, but most SATA-based SSDs reformat in 5 minutes or less. NVMe PCie SSDs reformat faster in 1 to 3 minutes in many cases.
Conclusion
While reformatting an SSD may seem intimidating, it’s a necessary and very doable step when transitioning from Windows to Mac. Following the best practices outlined here, the process is straightforward through Mac Disk Utility. Just be absolutely diligent with backing up important data before erasing the drive. With some planning and patience during reformatting, you’ll then have an SSD optimized and ready to serve your needs on Mac.