What is an External Hard Drive?
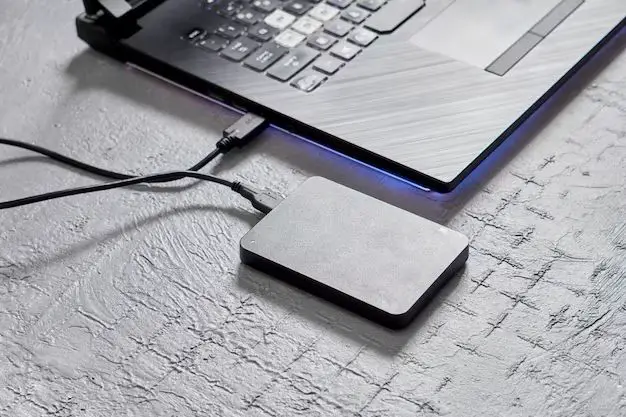
An external hard drive is a storage device located outside of a computer that connects through a USB cable or wireless connection (Source). It provides additional storage space and allows users to back up data or transfer files between computers. External hard drives come in varying storage capacities and can be a portable solution for expanding the storage of a laptop or desktop computer.
Some key features of external hard drives include:
- Portability – They are portable and easy to move between computers.
- Capacity – They come in capacities ranging from a few hundred gigabytes to 10 terabytes or more.
- Connectivity – Most connect via USB, but some may use Thunderbolt, eSATA, or wireless technology.
- Uses – External storage for backups, file transfers, expanding limited capacity of internal drives, data portability.
Overall, external hard drives provide a convenient way to add high-capacity storage and data portability to desktop and laptop computers (Source).
When to Initialize an External Hard Drive
Initializing a new external hard drive is an important step that needs to be done before the drive can be used to store files and data. An external hard drive in an uninitialized state will not show up or be accessible in Windows File Explorer or Mac Finder.
There are a few key situations when you will need to initialize a new external hard drive:
- When setting up a brand new external hard drive for the first time.
- If you purchase an external hard drive and connect it but it does not show up or cannot be accessed on your computer.
- When reformatting an external hard drive after it was used on another operating system or computer.
- If you get an error message telling you the disk needs to be initialized when trying to access the external drive.
The initialization process prepares the drive by defining a partition and selecting a file system so that the operating system can recognize it and assign it a drive letter. This allows you to properly store, read, and write data to the external hard drive. Without initializing it first, the drive will remain RAW, unallocated, and unusable for file storage.
In most cases, initializing a new external hard drive is required and is the first step to prepare it for usage. The process only takes a few minutes through the operating system’s disk management utility.
How to Initialize an External Hard Drive on Windows
Here are the steps to initialize a new external hard drive on a Windows PC:
- Open the Disk Management utility. You can access this by right-clicking the Start menu and selecting “Disk Management”.
- Locate the disk you want to initialize in the lower panel. It may show up as “Unknown” and “Not Initialized”.
- Right-click on the disk and select “Initialize Disk”.
- Select the partition style – MBR or GPT. MBR is compatible with older operating systems while GPT supports larger disk sizes.
- Allow the initialization process to complete. The disk should now show up as “Online”.
- You can now create a new partition on the disk and format it before storing files.
For more details, refer to this Microsoft guide: Initialize new disks.
How to Initialize an External Hard Drive on Mac
Initializing and formatting an external hard drive on a Mac is done through the Disk Utility application. Here are the steps to initialize a new external hard drive on a Mac computer:
1. Connect the external hard drive to your Mac using a USB cable and allow some time for the drive to be recognized by the system.
2. Open Disk Utility. You can find this via Spotlight or by going to Applications > Utilities > Disk Utility.
3. Select the external drive you want to initialize from the left side pane in Disk Utility. Make sure you select the correct drive.
4. Click the Erase button at the top of the Disk Utility window.
5. Rename the drive if desired and select a format like APFS or Mac OS Extended (Journaled).
6. Choose a scheme – GUID Partition Map is recommended for most users.
7. Click Erase. This will quickly initialize the drive.
Once initialized, the external drive will be ready to use with your Mac computer. The whole process should only take a minute or two. You can then partition or format the drive further depending on your needs.
For more details, refer to Apple’s guide on initializing a storage device in Disk Utility.
Choosing a File System for Initializing
When initializing an external hard drive, you will need to choose a file system. The file system determines how data is stored and retrieved on the drive. Some common file system options for external drives include:
- NTFS – Developed by Microsoft, NTFS is widely compatible with Windows PCs. It supports large partition sizes and file sizes. However, it has limited compatibility with Mac and Linux without additional software.
- exFAT – A proprietary Microsoft file system that is compatible with both Windows and Mac. It supports large file sizes but doesn’t have as many security features as NTFS.
- HFS+ – Also known as Mac OS Extended, HFS+ was developed by Apple. It offers full compatibility with Macs but limited Windows support without additional software.
- FAT32 – An older file system that is compatible across Windows, Mac, and Linux. However, it has limits on partition sizes and individual file sizes.
For external hard drives that will be used across both Windows and Mac, most experts recommend using exFAT. It works universally between Mac and Windows with no additional software required. However, NTFS is also a strong option if you are willing to install NTFS drivers on the Mac. Both offer good performance for large media files which are common on external drives. FAT32 can also work but may be limiting for larger partitions and file transfers.[1]
Quick vs Full Format for Initializing
The main difference between a quick format and full format when initializing a hard drive is the amount of time each takes to complete. As the names suggest, a quick format is significantly faster, while a full format takes much longer.
A quick format simply removes the file table and directory structure on the disk, but does not actually overwrite the existing data on the drive. It just marks all space as available for new data to be written over the old. This takes seconds to complete.
A full format performs a sector-by-sector scan of the entire drive space, overwriting all old data with zeroes to truly wipe and sanitize the disk. The overwriting process makes a full format much slower, often taking hours depending on the drive size.
According to LaCie, Microsoft explains that “quick formatting a disk simply empties the root folder and marks all clusters as unallocated space. Full formatting a disk completely erases all information in all sectors of the disk.”
In most cases, a quick format will suffice when initializing a new drive. But if completely wiping all old data for security purposes, a full format is required.
Initializing and Partitioning
When initializing a new external hard drive, you have the option to partition the drive or use the full capacity as a single partition. There are pros and cons to both approaches.
Partitioning divides the hard drive into separate logical sections that function as independent drives. This allows you to organize your data more efficiently. For example, you could have one partition for backups, another for media files, and a third for documents. According to Partition External Hard Drives: A Guide to How & Why, partitioning is useful if you plan to use the external drive for multiple purposes or operating systems.
However, there are some downsides to partitioning. Each partition has its own file system overhead, which takes away from the total available storage space on the drive. There are also restrictions on how you can access and allocate partitions later on. As How to Partition External Hard Drives – Shred Cube explains, you may not be able to expand a partition after creating it without reformatting the entire drive.
If you don’t need to organize or segment your data and plan to use the external drive for a single purpose, a single partition may be preferable for simplicity and maximum usable space.
Encrypting an External Hard Drive
Encrypting an external hard drive can provide an added layer of security and prevent unauthorized access to your data. There are a few options for encrypting an external drive when initializing it:
VeraCrypt (Freeware) – Provides strong encryption and is free, open source software. It allows you to create an encrypted container or encrypt the entire external drive.
BitLocker (Proprietary software) – Built into Windows 10 Pro and Enterprise editions. Provides full drive encryption and integrates with Windows for simplified encryption.
FileVault (Proprietary software) – Full disk encryption tool built into MacOS. Enables encryption on external drives connected to Macs.
When initializing an external hard drive, you can choose to encrypt it fully during the formatting process for added security. Just be sure to remember the password or key, or you may lose access to the drive.
Encrypting an external drive does add time to reading and writing data, so it’s ideal for drives used for long term storage versus frequent use. But for sensitive data, encryption helps keep it protected if the drive is lost or stolen.
Best Practices for Initializing
Here are some tips for successfully initializing an external hard drive:
- Back up your data first – Before initializing, be sure to back up any important data on the drive you want to initialize. Initializing will erase all data.
- Choose the right file system – For Windows, NTFS is recommended. For Mac, use Mac OS Extended (Journaled). exFAT has compatibility with both Windows and Mac.
- Perform a quick format – A quick format is faster and sufficient in most cases. Only use full format if you suspect drive errors.
- Use disk management tools – On Windows use Disk Management, on Mac use Disk Utility. These provide a graphical interface for initializing.
- Select the correct disk – Be sure to select the correct external drive you want to initialize. Initializing the wrong disk could result in data loss.
- Use encryption if desired – Tools like BitLocker on Windows allow you to encrypt the drive for added security.
- Partition if needed – Initialize as a single partition unless you specifically want to create multiple partitions.
- Check for errors – After initializing, check the drive for errors before copying data back.
Following these best practices helps ensure the external hard drive is initialized properly for reliable usage and prevents accidental data loss.
Potential Issues When Initializing
There are a few common issues that can occur when trying to initialize an external hard drive:
Not recognized – If your external hard drive is not showing up in Disk Management at all, it likely is not being detected properly. Try connecting it to another USB port or computer to see if it shows up. You may need to update your USB or motherboard drivers as well.
Read-only – Sometimes an external drive will show up as read-only in Disk Management. This is often due to a corrupted file system or physical damage. You may need to run CHKDSK or a disk repair utility to fix errors.
Not enough space – Initializing and formatting requires a certain amount of free space on the disk. If you do not have enough, it can result in errors. Try deleting unused files or partitions to free up space.
Input/Output errors – If you see I/O device errors, there could be a problem with the USB bridge of the external enclosure, or the drive itself may be failing. Try a different cable or external housing if possible.
Access denied – Error messages about access denied or insufficient privileges means you may need administrator rights to initialize the disk. Try running Disk Management as an admin.
The disk is offline – Sometimes a disk will show as offline in Disk Management. Right-click it and choose Online to change its status.
Disk unknown, not initialized – If your disk shows as unknown and not initialized, you will need to initialize it. This should allow Disk Management to recognize it.
Damaged file system – A corrupted file system may prevent proper initialization. You can attempt to fix errors with CHKDSK first before initializing.
If you still cannot initialize your external drive after troubleshooting, you may need professional data recovery to access the disk and recover your files. Solutions like [1] can help diagnose external drive problems.