Quick Answers
You can use your old laptop hard drive as an external drive by getting an external hard drive enclosure and connecting the hard drive to your computer via USB. This allows you to access the data on the old drive like a regular external drive.
What You’ll Need
- Old laptop hard drive
- External hard drive enclosure
- USB cable
- Screwdriver
Choosing an External Enclosure
The first thing you’ll need is an external hard drive enclosure. This is an inexpensive box-like device that your laptop hard drive fits into. It converts the hard drive into an external drive with a USB port so you can plug it into any computer.
Enclosures are made for different sized hard drives, so you’ll need to get one that matches the size of your laptop hard drive. The most common sizes are:
- 2.5″ – For laptop hard drives
- 3.5″ – For desktop hard drives
Make sure to check the size compatibility before purchasing an enclosure. Also consider the interface – USB 3.0 and USB-C enclosures will provide faster data transfer speeds but may cost more.
2.5 vs. 3.5 Enclosures
Most laptops use 2.5″ hard drives while desktop computers use 3.5″ drives. This refers to the physical size of the drive. An easy way to tell is that 2.5″ drives are smaller and sleeker while 3.5″ drives are larger, bulkier drives.
For laptop drives, you’ll want a 2.5″ external hard drive enclosure. Some popular options include:
- Inateck 2.5″ USB 3.0 External Hard Drive Enclosure
- Sabrent Ultra Slim 2.5-Inch SATA External Aluminum Hard Drive Enclosure
- UGREEN 2.5″ Hard Drive Enclosure
If you happen to have an old 3.5″ desktop drive you want to use, then a 3.5″ enclosure is needed. Some options to consider are:
- Sabrent USB 3.0 to SATA External Hard Drive Lay-Flat Docking Station
- Inateck USB 3.0 External Hard Drive Enclosure
- ORICO USB3.0 to SATA III 2.5″ & 3.5″ External Hard Drive Enclosure
Installing the Hard Drive in the Enclosure
Once you have your external hard drive enclosure, it’s time to install the old laptop hard drive inside. This process is fairly simple:
- Open the enclosure and slide the hard drive into the proper bay, making sure it is securely in place.
- Attach any interface cables or connectors that are required between the drive and the enclosure’s circuit board.
- Put the enclosure casing back on and securely screw it into place.
Most enclosures are tool-free and only require putting the hard drive into the enclosure bay and closing the case back up. However, some may require a screwdriver to install the hard drive and connect any interfaces or rails.
Take your time when inserting the hard drive to avoid any damage. Also ensure that it is connected properly inside the enclosure and that the enclosure case is firmly closed.
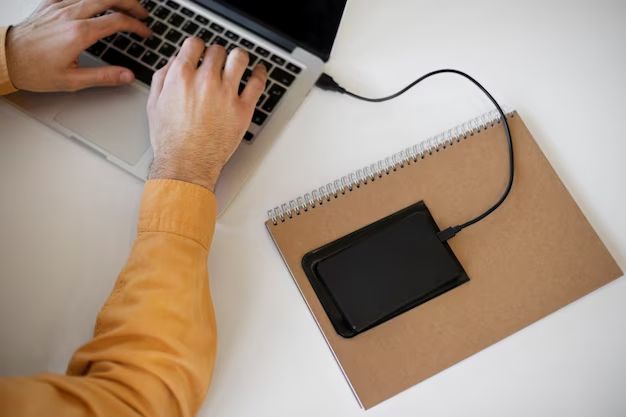
Connecting and Using the External Hard Drive
With the drive installed, you can now use the enclosure’s USB cable to connect it to your computer. Simply plug it into an open USB port on your computer.
In most cases, the external drive will be recognized automatically by your computer. It will appear just like any other external USB drive.
On Windows, you can find the drive under My Computer or This PC. On Mac, an icon will appear on the desktop or you can find it under Devices in the Finder.
You can access all the files and folders on the external hard drive just like with a regular drive. You can copy files back and forth or open and edit files directly from the external drive.
Using on Mac vs PC
Using an external hard drive enclosure allows the drive to be plugged into either a Mac or Windows PC. However, the way the drive is formatted needs to match the computer OS for full compatibility:
- For Mac – Format the drive as HFS+ (Mac OS Extended)
- For Windows – Format the drive as NTFS
If the drive is formatted for Mac, it will only be readable on a Mac. And if formatted for Windows, it will only work properly on a Windows PC.
To make the external drive compatible with both, you can format it as exFAT. This allows it to be read and written to by both Macs and PCs.
Formatting the External Hard Drive
In some cases, you may want or need to format the external hard drive after connecting it. Formatting completely erases all data on a drive and reconfigures it for use. This can be useful if you want to wipe old data off and start fresh.
Formatting can also help fix issues like errors, crashes, or slow performance that can occur if the drive was not properly ejected or disconnected previously.
To format the external hard drive on Windows:
- Open File Explorer and right-click the drive.
- Click “Format…”
- Choose the file system – exFAT is recommended for cross-platform compatibility.
- Give the drive a name and click “Start” to begin formatting.
On Mac:
- Open Disk Utility.
- Select the external drive on the left.
- Click “Erase” at the top.
- Choose a name, format (exFAT is recommended), and scheme.
- Click “Erase” to format the external drive.
Precautions When Formatting
Remember that formatting permanently erases all data on the drive. So copy any important files or folders from the external drive to your computer before formatting.
You should also make sure to eject and properly disconnect the external drive before formatting it. This helps prevent any errors or data issues.
Using the External Hard Drive
Once connected and formatted, you can use your external hard drive just like any other drive. You can:
- Store personal documents, photos, music, and other media files.
- Transfer files between computers – Windows to Mac or vice versa.
- Back up important data for safekeeping.
- Free up space on your main hard drive.
- Boot up or run portable software from the external drive.
The external drive gets its own drive letter and name that shows up separately from your computer’s internal drive. So use it just as you would your regular drive – open files, edit, copy, move, save new files and folders, etc.
Tips for Using an External Hard Drive
Here are some tips for safely using and managing your new external hard drive:
- Safely eject the drive – Always properly eject an external drive before unplugging it to avoid data issues.
- Create backups – Use the drive to backup your important files in case they are lost or damaged.
- Encrypt sensitive data – Use security features like encryption to protect private or sensitive data.
- Watch for malware – Scan for malware if connecting the drive to multiple computers.
- Handle with care – Don’t drop or mishandle external hard drives which could damage them.
Benefits of Using an External Laptop Hard Drive
Turning your old laptop hard drive into a portable external drive provides several useful benefits:
- Data recovery – Access data from an old laptop if the computer is damaged or unusable.
- Additional storage – External laptop drives are inexpensive ways to expand your storage.
- Backups – External drives make it easy to backup your important files.
- Privacy – Keep private files securely on an external drive separate from your main computer.
- File transfer – Move files between computers with an external drive.
- Portability – External drives are small enough to easily carry between locations.
So if you have an unused laptop hard drive, putting it in an external enclosure can give it a new life while providing you with tons of useful storage and access to old data.
Potential Issues When Using an External Laptop Hard Drive
While external hard drives provide lots of benefits, there are also some potential downsides to be aware of:
- Overheating – External drives can sometimes overheat with heavy use. Make sure it has adequate ventilation.
- Disconnected – A disconnected external drive during file transfer could lead to lost or corrupted data.
- Damage – External drives are vulnerable to physical damage if dropped or mishandled.
- Incompatibility – Older drives may have compatibility issues with newer computers.
- Power reliance – External drives rely on power from the USB port, so won’t work if unplugged.
- Malware risk – Portable drives used on multiple computers have higher malware risk.
While inconvenient, most of these issues can be avoided by handling the drive properly, ejecting it before disconnecting, scanning for malware, and being careful when transporting the drive.
Troubleshooting Common External Hard Drive Problems
In some cases, you may encounter issues like the external drive not showing up or not working properly. Here are some potential solutions to common problems:
External hard drive not showing up
- Try connecting to a different USB port on your computer.
- Reconnect the USB cable to ensure it’s properly plugged in.
- Try connecting the drive to a different computer.
- Check for the drive in Disk Management (Windows) or Disk Utility (Mac).
- If still not showing up, try another USB cable.
External hard drive not recognized
- Try a different USB port or computer if the drive isn’t being recognized.
- Check if the external drive shows up in Disk Management but not File Explorer.
- You may need to initialize the disk before it can be accessed.
External HDD slow transfer speeds
- Plug the drive into a USB 3.0 port since they are faster than USB 2.0.
- Use a USB cable shorter than 3 feet for faster speeds.
- Transfer smaller batches of files at a time.
- Defragment the drive if it has excessive fragmented files.
External storage drive not showing correct capacity
- Check Disk Management to see if the full capacity is listed there.
- The drive may need to be formatted before its full capacity is usable.
- Large capacity drives may have a small portion reserved for formatting.
If you are still experiencing issues, you may need to contact the manufacturer for additional troubleshooting help or a potential warranty replacement.
Conclusion
By inserting an old laptop hard drive into an external enclosure, you can easily use it as a portable external storage drive. This provides a way to reuse a functioning hard drive that otherwise might just collect dust.
With an external drive, you can access old files, expand your available storage, prevent data loss with backups, transport files between computers, and more. Just be sure to get an appropriate sized enclosure for your drive and format it properly for the operating system you are using.
Following the steps outlined, you’ll find the process is simple and cost-effective. So dig out that old laptop drive you have lying around and give it new purpose with an external hard drive enclosure.