What is an external SSD?
A external solid-state drive (SSD) is a portable data storage device that uses flash memory and has no moving parts (unlike a traditional hard disk drive). An external SSD connects to a computer, laptop, or mobile device typically via a USB cable. It provides fast read and write speeds compared to HDDs due to the nature of flash memory.
Some key characteristics of external SSDs include:
- Small, portable form factor – similar in size to a smartphone
- Interface connectivity like USB 3.2 Gen 2 for fast data transfer
- Storage capacities from 250GB up to 2TB
- Much faster speeds than external hard drives with read/write speeds up to 1050/1000 MB/s
- More durable and shock-resistant than HDDs since no moving parts
- Lower power consumption and typically bus-powered so no extra power cable needed
External SSDs provide a number of advantages over traditional hard drives like durability, performance, and portability. This makes them ideal for on-the-go content creators, gamers, or business users who require fast file transfers or boot ups. Key benefits include faster loading/transfer of large files, quicker system/app response times, and general performance gains over HDDs (source).
Requirements for Using an External SSD on Windows 11
To use an external SSD on Windows 11, there are some minimum requirements that need to be met in terms of hardware compatibility and supported file systems.
Windows 11 requires that the external SSD connects via a USB 3.2 Gen 2×2 port with a minimum read speed of 2000MB/s for optimal performance. Connecting via USB 2.0 or USB 3.0 will work but result in slower speeds. The external SSD itself should have a sequential read speed of at least 450MB/s for the best experience.
As for file systems, Windows 11 supports NTFS, FAT32, exFAT, and ReFS formats on external drives. NTFS is recommended as it is the native Windows file system and provides the best performance, security, and reliability. FAT32 has a maximum individual file size of 4GB, making it unsuitable for larger files. exFAT removes FAT32’s file size limit while maintaining compatibility with Macs.
In summary, for optimal use with Windows 11, an external SSD should connect via USB 3.2 Gen 2×2, have read speeds of at least 450MB/s, and be formatted with NTFS or exFAT file systems.
Connecting the external SSD
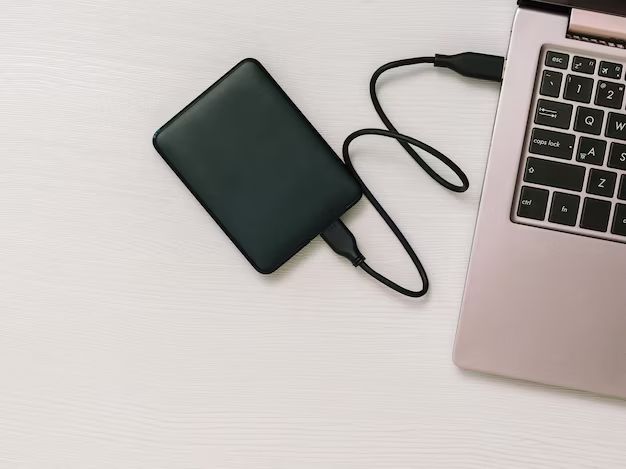
Connecting an external SSD to your Windows 11 computer is straightforward. Here are the steps:
1. Plug the USB cable that came with your external SSD into the drive.
2. Plug the other end of the cable into an available USB port on your computer. USB 3.0 or USB-C ports are recommended for maximum speed and performance.
3. If your external SSD came with an external power supply, plug it into a power outlet and then into the drive.
4. Check for an indicator light on the external SSD to confirm it is powered on.
Most external SSDs today connect via USB and do not require any special drivers or software. However, refer to your drive’s manual if you need specific instructions.
Some tips for connecting your external SSD:
- Avoid connecting through a USB hub for best performance.
- Connect directly to a USB port on your computer if possible.
- Make sure cable connections are snug and secure.
Once physically connected via USB, your Windows 11 PC should automatically detect the external SSD drive, at which point you can initialize, format, and start using it.
Turning on the external SSD
Once you have connected the external SSD to your Windows 11 PC, the drive should power on automatically. Most external SSDs do not require a separate power cable and will draw enough power through the USB cable to operate. This allows for a compact and portable design without an extra power adapter.
When you first plug in the external SSD, you may see an LED indicator light up showing that the drive is now powered on. The location and color of this LED can vary based on the specific drive model, but it usually acts as a simple visual confirmation that the drive is ready for use.
Some higher capacity external SSDs with very fast transfer speeds may need additional USB power or even an external power source to provide enough consistent power. But this is less common with standard external SSDs designed for basic everyday use and storage. If your drive does not seem to turn on or is not being recognized by Windows, you may need to use a Y-cable, connect to a different higher power USB port, or connect separate power.
Overall, turning on an external SSD is as simple as connecting it to your Windows 11 PC via the USB cable. The drive will either turn on automatically or have a power button you need to briefly press. Then you can look for an LED indicator to confirm the drive is powered on and ready to be used. (Source: https://www.quora.com/Can-a-solid-state-drive-be-powered-from-a-USB-port-or-will-the-drive-require-an-external-power-supply)
Initializing and formatting the external SSD
Before you can use a new external SSD, you need to initialize and format it first using Disk Management in Windows 11. Here are the steps:
- Open Disk Management – right click the Start button and select “Disk Management”.
- Locate the external SSD, it will likely show up as “Unknown” and “Not Initialized”.
- Right click on the disk and select “Initialize Disk”.
- Select either MBR or GPT partitioning and click OK.
- Right click on the volume and select “New Simple Volume”.
- Follow the wizard to specify volume size, drive letter, file system (NTFS is recommended), etc.
- Click “Format” to format the volume when prompted.
The external SSD should now show up with a drive letter assigned and data can be transferred to it. Make sure to safely eject the disk before unplugging it.
For more details, refer to this guide: https://www.sweetwater.com/sweetcare/articles/how-to-format-an-external-hard-drive-on-windows-10/
Assigning a drive letter
Once the external SSD is initialized and formatted, you will need to assign it a drive letter in order to access it in Windows File Explorer. This is done using the Disk Management utility.
To assign a drive letter:
- Open Disk Management by right-clicking the Start menu and selecting Disk Management.
- Locate the external SSD under the Disk Drives section. It may show up as an Unknown device without a drive letter.
- Right-click on the external SSD and select Change Drive Letter and Paths.
- Click Add to assign the next available drive letter.
- Click OK to save the changes.
The external SSD will now show up with the assigned drive letter and you can access it like any other drive in File Explorer. Make sure to assign a letter that is not already in use on your system to avoid conflicts.
For more details, refer to Microsoft’s guide on changing a drive letter.
Accessing the external SSD in File Explorer
Once the external SSD is connected and assigned a drive letter, you can access it in File Explorer on Windows 11.
To navigate to the external SSD:
- Open File Explorer by pressing the Windows key and E on your keyboard.
- In the left pane, you should see your external SSD listed under “This PC” with the drive letter you assigned.
- Click on the external SSD drive letter to open it and view the contents.
You can now transfer files back and forth by dragging and dropping between your internal drives and external SSD. Files saved to the external SSD will be accessible from any Windows PC you connect it to.
For quick access, you may want to right-click on the external SSD in File Explorer and select “Pin to Quick access” to pin it to the Quick access section in File Explorer.
Transferring files to the external SSD
Once your external SSD is connected, initialized, and assigned a drive letter, you can begin transferring files and folders to it. The easiest way to move files is by dragging and dropping.
To drag and drop files:Move your files to a new Windows PC using an external storage device
- Open File Explorer and navigate to the location of the files you want to move.
- Select the files and folders you want to transfer. To select multiple items, hold down the Ctrl key while clicking.
- With your files and folders highlighted, click and drag them to your external SSD drive letter in the navigation pane.
- Let go of the mouse button to drop the files into the new location.
The files will begin copying over. You can view the transfer progress by opening the destination drive in a new File Explorer window. Dragging and dropping allows you to quickly migrate files to your external SSD.
Safely ejecting the external SSD
It’s important to safely eject the external SSD before disconnecting it from your Windows 11 computer. Simply unplugging the SSD without ejecting it first can lead to data loss or corruption.
To safely eject the external SSD:
- Locate the Safely Remove Hardware icon in the notification area at the far right of the taskbar.
- Click on the icon, and a menu will pop up listing hardware devices connected to your computer.
- Click on the name of your external SSD in the menu to select it.
- A message will appear notifying you that it is safe to remove the hardware device.
You can now physically disconnect the SSD from your computer. According to Digital Citizen, this process “tells Windows to make sure that all pending write operations to the drive are completed before you unplug it. If you don’t safely eject the drive, you risk losing data or damaging the disk.”
Alternatively, you can eject the external SSD from File Explorer. Right-click on the external SSD and select “Eject”. Just make sure the eject process fully completes before unplugging the SSD.
Troubleshooting Tips
If you are having issues accessing your external SSD on Windows 11, here are some troubleshooting tips to try:
First, check your cable connections. Disconnect both ends of the cable and reconnect them firmly. Use the cable that came with the external SSD if possible. Try connecting to another USB port on your computer as well.
If the drive is still not recognized, try a different cable if you have one available. Faulty cables are a common cause of external SSD issues.
You can also try connecting the external SSD to a different computer. If it works on another computer, the issue may be with the original computer’s USB ports.
Go into Windows Disk Management and see if the external SSD shows up there but does not have a drive letter assigned. If so, you can assign a drive letter to it so Windows can access it.
Update the drivers for the external SSD if possible. Check the manufacturer’s website for the latest drivers.
If none of these tips work, the external SSD may be damaged or corrupted. You can try running the manufacturer’s diagnostic software to check for errors.
As a last resort, you may need to reformat the external SSD to repair any filesystem errors. Just be aware this will erase all data currently on the drive.
If the external SSD is still not recognized or accessible after trying all applicable troubleshooting, it’s likely a hardware issue and the drive may need to be replaced.