What Does It Mean to Access a Phone via USB?
A USB (Universal Serial Bus) connection allows data to be transferred between two devices. When you connect your phone to a computer with a USB cable, it opens up communication between the phone and computer. This allows you to access files and data on your phone through the computer.
There are a few different types of USB connections used on phones and computers: USB-A, USB-B, USB-C, and micro-USB. Phones typically use a micro-USB or USB-C port. Computers usually have USB-A or USB-B ports. So a USB cable between a phone and computer often has different connectors on each end (like USB-A to micro-USB).
When you plug your phone into your computer with a USB cable, it opens up a data connection. This allows you to access the phone’s storage, files, photos, videos, music etc. directly from the computer. You can browse the phone’s contents and copy files between devices. Many phones also support syncing data like contacts, calendars, and music libraries over a USB connection.
In summary, accessing a phone via USB means using a USB cable to connect your phone to a computer. This opens up communication between the devices, allowing you to transfer files, media, and data.
When Would You Want to Access Your Phone via USB?
There are several key reasons why you may want to connect your phone to your computer via USB cable:
Transferring photos/videos from phone to computer – One of the most common reasons is to transfer photos and videos you’ve taken on your phone over to your computer for safekeeping and easier editing. Going through USB is much faster for large batches of media than using wireless options.
Managing files stored on phone through computer – When your phone’s storage starts to fill up, it can be useful to connect it to your computer and directly access, organize, move, and delete files and folders. This gives you more control through your computer’s larger screen and interface.
Syncing data between phone and computer – A direct wired connection allows you to efficiently sync contacts, calendars, music, documents, and other data between your phone and computer. This keeps everything backed up and consistent across devices.
Overall, a USB connection makes transferring files faster, gives you more control over phone storage, and simplifies syncing data across devices. It takes your phone/computer integration to the next level compared to wireless options. (Source)
What You’ll Need
To access your phone via USB, you’ll first need a USB cable that is compatible with your specific phone model. Phones use different USB cable types depending on the manufacturer:
- Android phones typically use either micro USB or USB-C cables.
- iPhones and other Apple devices use Lightning cables.
- Some newer Android models may also use USB-C.
You’ll want to check the port on your phone to determine which type of USB cable you need. The most common are micro USB, USB-C, and Lightning. Make sure not to force a cable into the port if it doesn’t match.
In addition to a compatible USB cable, you’ll also need a computer with an available USB port that you can connect your phone to. Most modern Windows PCs and Macs have USB ports. With the right cable and computer, you’ll be ready to connect your phone.
Connect Your Phone to Your Computer
Connecting your Android phone to a computer is usually as simple as using a USB cable to plug the phone into the computer. Here are the basic steps:
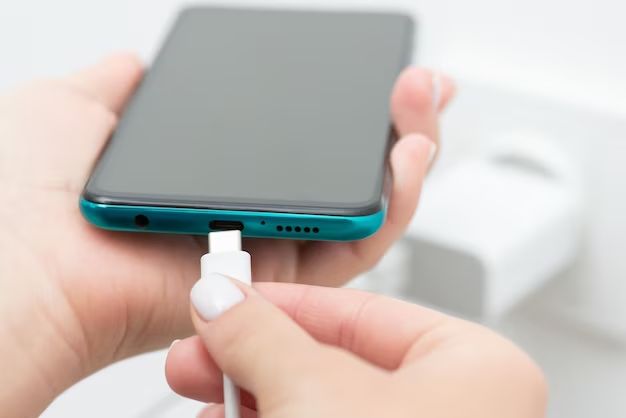
- Take a USB cable and plug the larger end into an open USB port on your computer.
- Plug the smaller end of the cable into your phone’s charging port, which is usually located on the bottom or side of the phone.
- If your phone has a removable back cover, ensure it is on properly.
- Turn on your phone’s screen and unlock it if necessary (for example by swiping or entering your passcode). You may see a notification that a USB connection has been detected.
- Tap on this notification and select the option that allows data transfer or file access. Common options are “File Transfer” or “Transfer Files”. This allows your computer to access files on your phone.
Once connected via USB, your computer will recognize your Android phone. You may get prompted on your computer to choose what to do when the device is detected, like opening a folder to view files or importing media. If you don’t see prompts, you may need to open the folder on your computer that represents the connected Android device.
With the physical USB connection made between devices, and your phone unlocked and allowing data access, you are ready to start transferring files or accessing media and data on your Android phone from the computer.
Transfer Files and Media
You can easily transfer files like photos, videos, music, and documents between your Android phone and computer using a USB connection.
To get started, first connect your phone to your computer using a USB cable. Once connected, open the file explorer app on your computer, such as Windows Explorer or Finder on Mac. Your phone storage should show up as an external drive or device.
You can now simply drag and drop files between your computer and phone storage. For example, you can copy photos from your phone to your computer by dragging the files from your phone’s storage to a folder on your computer. Similarly, you can transfer files in the other direction – from your computer to your phone storage.
This allows you to quickly transfer your media files and documents between devices via USB. Just remember to safely eject the phone drive once you are done transferring files to avoid any issues.
For more details, see: https://support.google.com/android/answer/9064445?hl=en
Sync Data Between Devices
You can sync data like contacts, calendars, and photos between your Android phone and computer to keep everything up to date on both devices. This allows you to access the same information whether you are on your phone or computer.
One way to sync data is to use the backup software that comes with your phone manufacturer, like Samsung Smart Switch or LG Mobile Switch. These programs will back up your phone data to your computer so you have a copy stored there. When you connect your phone via USB, it can sync the new data from the computer backup over to your device.
Another option is to use a cloud storage service like Google Drive or Dropbox. Install the app on both your computer and Android phone, then enable syncing in the app’s settings. The cloud service will then automatically sync files and data between the phone and computer when they are both connected to the internet.
Certain apps like Google Contacts also provide syncing directly between your Google account on the web and the app on your Android device. This allows you to manage contacts from either your computer or phone and have that updated information sync to the other device.
Overall, syncing data from your Android to computer (and vice versa) via USB is a convenient way to access the latest information on both devices. Relying on backup software or cloud services enables this process to happen automatically each time you connect the phone.
Access Phone Files on Computer
One of the main benefits of connecting your phone to your computer via USB is the ability to directly access, browse, and manage files stored on your phone.
Once connected, your phone will show up in your computer’s file explorer as an external drive. You can click on this drive to view all the folders and files just like you would with any other storage device. This gives you full access to documents, photos, videos, music, and more that are saved on your phone.
From your computer you can view, open, edit, copy, delete and organize any files stored on your phone. For example you can:
- View and edit documents or spreadsheets stored on your phone using desktop apps like Microsoft Word or Excel.
- Browse photos and videos saved on your phone and import them to your computer.
- Delete any unwanted files to free up storage space.
- Move or copy files between your phone and computer.
- Organize your files into folders on your phone.
Having this direct access makes file management much easier compared to wireless options like cloud storage or email. It allows for faster, more flexible, and unlimited transfers between devices without needing an internet connection.
Just be careful not to accidentally delete or move important files while managing content on your phone from your computer.
Troubleshooting Connection Issues
If your phone won’t connect to your computer via USB, there are a few things you can try to troubleshoot the issue:
– Try a different USB cable. The cable that came with your phone is recommended, as some third-party cables may not transfer data properly. Make sure the cable is not frayed or damaged (https://www.makeuseof.com/tag/fixes-android-connect-computer/).
– Plug the USB cable directly into a USB port on your computer rather than a USB hub. Hubs can sometimes interfere with the connection.
– Check that the USB port on your computer is working properly by connecting other devices like a USB flash drive.
– Make sure you have the proper USB drivers installed for your phone model on your computer’s operating system (Windows, Mac, etc). You may need to manually install or update the drivers (https://www.t-mobile.com/support/devices/device-troubleshooting/computer-doesnt-connect-to-device-or-file-transfer-with-usb).
– Toggle your phone’s USB connection modes if possible (e.g. MTP, PTP, file transfer mode). Try switching to a different mode.
– Restart both your phone and computer to clear any software issues.
– On your phone, check that USB debugging and file transfer modes are enabled in the developer options.
– As a last resort, reset your phone to factory default settings to troubleshoot any OS-level connection problems.
Safely Disconnect Your Phone
It’s important to properly eject your phone before unplugging the USB cable to avoid potential data loss or corruption. Here are the steps for safely disconnecting your phone on Windows vs. Mac:
Windows
On Windows, follow these steps to safely disconnect your Android phone:
- Open the File Explorer window that shows your connected Android phone.
- Right click on your phone name and select “Eject”.
- Wait for the confirmation message saying it’s safe to remove the device.
- Unplug the USB cable from your phone.
If you don’t see an “Eject” option, look for a “Safely Remove Hardware” icon in your Windows taskbar. Click this, choose your Android phone, and then unplug the cable after getting the safe to remove message.
Mac
On Mac, follow these steps:
- Click the eject icon next to your Android phone name on the desktop or in the Finder sidebar.
- Wait for the confirmation message that the phone can be safely removed.
- Unplug the USB cable from your phone.
This ensures all data transfers have completed before disconnecting your phone, avoiding any file corruption issues.
Summary
Connecting your phone to your computer via USB allows you to access and manage files stored on your device. In this guide, we covered the key steps to take:
- Connect your phone to your computer using the charging cable that came with your phone.
- On your phone, enable USB file transfer mode, which allows your computer to access files.
- On your computer, your phone will appear as an external drive where you can copy, add, or delete files.
- You can also sync data like contacts, calendars, and photos between your phone and computer.
- When done, safely eject your phone before disconnecting to avoid any data loss.
Accessing your phone via USB is useful for managing files and media, doing backups, installing software updates, and synchronizing data. It provides a simple wired connection to transfer and manipulate data directly from your computer.
We covered the essential steps to get connected and start accessing your phone’s storage from your computer. With some handy file management and synchronization, you can keep your phone working smoothly.
