Disk Management is a built-in tool in Windows that allows you to manage hard disks and the volumes or partitions on those disks. With Disk Management, you can view disk properties, create and delete volumes, change drive letters and paths, format volumes, and more.
Opening Disk Management is easy – you just need to know where to find it. In this 5000 word guide, we’ll cover everything you need to know about opening Disk Management on Windows 10, 8, 7, Vista, and XP. We’ll provide quick answers to common questions about accessing Disk Management, explain what the tool does, walk through the steps to launch it on different Windows versions, look at alternative ways to open it, and discuss troubleshooting options.
Whether you’re a Windows expert looking to tweak your disk configurations or a casual user that needs to occasionally check disk properties, this comprehensive article will teach you how to reliably open the Disk Management utility with step-by-step instructions and visual guides. Let’s get started!
Quick Answers on Opening Disk Management
Here are quick answers to some common questions about opening Disk Management in Windows:
How do I open Disk Management on Windows 10?
On Windows 10, the easiest way to open Disk Management is to right-click the Start button or press Windows + X and select “Disk Management” from the menu.
How do I access Disk Management on Windows 8/8.1?
On Windows 8/8.1, right-click the Start button or press Windows + X and click “Disk Management” from the app list.
What is the shortcut to open Disk Management on Windows 7?
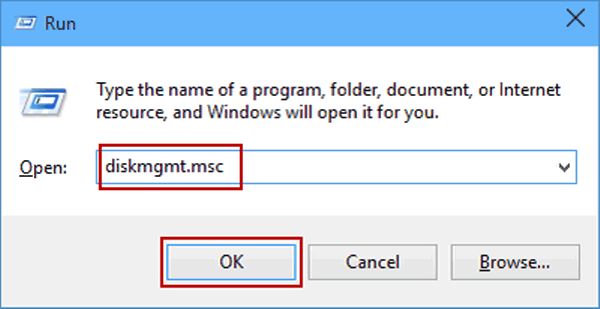
The keyboard shortcut to open Disk Management on Windows 7 is Windows + R, type “diskmgmt.msc” and hit Enter.
Where do I find Disk Management on Windows Vista?
On Windows Vista, you can open Disk Management by going to Start > Control Panel > System and Maintenance > Administrative Tools > Computer Management > Disk Management.
How can I launch Disk Management in Windows XP?
To open Disk Management on Windows XP, press Windows + R, type “diskmgmt.msc” and press Enter. You can also go through Control Panel.
What is Disk Management?
Before we dive into the steps on opening Disk Management, let’s briefly look at what this tool actually does in Windows.
Disk Management is a system utility built into Windows that enables you to view and manage hard disk drives and their volumes or partitions. Essentially, it allows you to perform various disk and volume operations like:
- View disk properties like capacity, partition style, etc.
- Create, delete, format, shrink or extend volumes (partitions)
- Change volume labels, drive letters and paths
- Convert between basic and dynamic disks
- Create striped, spanned or RAID-5 volumes
- Mark partitions as active
- Import and export disk configurations
So in summary, Disk Management gives you full control over your hard drives and volumes. You can use it to create new partitions if you want to dual boot operating systems, expand a volume if it’s running out of space, assign specific drive letters to volumes, and lots more.
It’s one of the most essential system tools for managing disks and partitions on a Windows PC. So whether you just need to quickly check disk properties or want to reconfigure volumes for advanced operations, knowing how to open Disk Management is a must.
How to Open Disk Management in Windows 10
Windows 10 offers a couple quick ways to open the Disk Management utility. Let’s go through each method.
Method 1: Open from Start Menu
The easiest way to open Disk Management on Windows 10 is through the Start menu:
- Click the Start button or press the Windows key on your keyboard.
- In the Start menu, right-click anywhere on the empty space.
- A menu with various system tools will appear. Select “Disk Management” to launch the utility.
Method 2: Use Windows + X Menu
Alternatively, you can use the Windows + X menu shortcut:
- Press the Windows logo key + X on your keyboard.
- The Windows tools menu will pop up. Click “Disk Management” to open it.
Method 3: Search for Disk Management
You can also simply search for Disk Management from the Start menu:
- Click the Start button or press Windows key.
- Type “disk management” in the search box.
- Select “Create and format hard disk partitions” from the results.
And that’s it! Disk Management will open up so you can start managing your disks and volumes.
How to Open Disk Management in Windows 8/8.1
Much like Windows 10, Windows 8 and 8.1 also provide a couple quick access points for Disk Management:
Method 1: Open from Start Screen
- On the Start screen, right click anywhere on an empty space.
- Click “All apps” at the bottom to open the apps list.
- Scroll down and select “Disk Management.”
Method 2: Use Windows + X Menu
- Press the Windows key + X on your keyboard.
- Select “Disk Management” from the system tools menu.
Method 3: Search for Disk Management
- Go to the Start screen and start typing “disk management.”
- Click “Create and format hard disk partitions” from the search results.
And you’re in! Use these simple steps to quickly access Disk Management on Windows 8 and 8.1.
How to Open Disk Management in Windows 7
Windows 7 has a couple different quick access methods for Disk Management as well. Here are the steps:
Method 1: Keyboard Shortcut (Windows + R)
The fastest way to launch Disk Management in Windows 7 is using the Windows + R keyboard shortcut:
- Press the Windows logo key + R on your keyboard.
- Type “diskmgmt.msc” and hit Enter.
This will immediately open the Disk Management utility.
Method 2: Start Menu Search
Alternatively, you can search for it from the Start menu:
- Click the Start orb.
- Type “disk management” in the search box.
- Select “Create and format hard disk partitions” from the results.
Method 3: Navigate through Administrative Tools
You can also access Disk Management by navigating to it:
- Go to Start > Control Panel > System and Maintenance.
- Click “Administrative Tools > Computer Management.”
- In the Computer Management window, select “Disk Management” under Storage.
And you’re in! Use any of these quick methods to open Disk Management on Windows 7.
How to Open Disk Management in Windows Vista
The steps to open Disk Management on Windows Vista are very similar to Windows 7:
Method 1: Start Menu Navigation
- Go to Start > Control Panel > System and Maintenance.
- Click “Administrative Tools > Computer Management.”
- Select “Disk Management” under Storage in the Computer Management window.
Method 2: Keyboard Shortcut (Windows + R)
- Press Windows logo key + R.
- Type “diskmgmt.msc” and hit Enter to launch Disk Management.
Method 3: Search from Start Menu
- Click the Start orb.
- Type “disk management” in the search box.
- Click “Create and format hard disk partitions” in the search results.
Follow any of these sets of steps to quickly open Disk Management on your Windows Vista PC.
How to Open Disk Management in Windows XP
The process to access Disk Management is very similar on Windows XP as well. Here are a couple ways to open it:
Method 1: Keyboard Shortcut (Windows + R)
- Press the Windows logo key + R on your keyboard.
- Type “diskmgmt.msc” and hit Enter to launch Disk Management.
Method 2: Navigate through Administrative Tools
- Go to Start > Control Panel > Performance and Maintenance.
- Click “Administrative Tools > Computer Management.”
- In Computer Management, select “Disk Management” under Storage.
And that’s all you need to quickly access Disk Management on a Windows XP PC!
Alternative Ways to Open Disk Management
Beyond the main standard methods covered already, there are a couple alternate ways to open Disk Management as well:
- Use the Run dialog box – Press Windows + R, type “diskmgmt” and hit Enter.
- Open through My Computer – Right-click My Computer and select “Manage” > “Disk Management.”
- Use File Explorer – Right-click the Start button or press Windows + X, select “File Explorer”, right-click “This PC”, and choose “Manage > Disk Management.”
- Open from the Command Prompt – Type “diskmgmt.msc” and press Enter.
So in summary, you can launch Disk Management through the Run dialog, Computer/This PC, File Explorer, or Command Prompt as well. But the standard Start menu methods are usually the fastest.
Troubleshooting Issues Opening Disk Management
In most cases, Disk Management should open up without any issues if you follow the steps outlined in this guide. But sometimes you may encounter errors or problems launching it. Here are some troubleshooting tips:
- Make sure you’re logged into an Administrator account. Disk Management requires admin privileges.
- Try running the Disk Management snap-in (diskmgmt.msc) directly from the Run dialog box.
- Restart your computer and try again. This can resolve temporary glitches.
- Type “diskmgmt.msc /s” in Run to reset the snap-in and reload it.
- Open Command Prompt as Admin and run “DISM /Online /Cleanup-Image /RestoreHealth” to repair Windows image.
- Check for disk errors with CHKDSK using Command Prompt.
- Update your Windows system and disk drivers to latest versions.
- Boot into Safe Mode and try opening Disk Management.
- Try disabling antivirus temporarily to rule out interference.
If Disk Management still won’t open, it’s possible there is a hardware failure or critical system error preventing it from launching. You may need advanced troubleshooting support in such cases.
Conclusion
In this detailed guide, we covered everything you need to know about opening the Disk Management utility across different Windows versions:
- Provided quick answers to common questions on launching Disk Management.
- Gave an overview of what Disk Management is and what it allows you to do.
- Walked through step-by-step instructions to open Disk Management on Windows 10, 8, 7, Vista and XP.
- Covered alternative launch methods through File Explorer, My Computer, etc.
- Discussed troubleshooting tips for fixing errors opening Disk Management.
Whether you need to create a new partition, change a drive letter, format a volume or just check disk properties, you now have all the information required to reliably open Disk Management on your Windows PC.
The tool provides essential disk and volume management features accessible to both novice and power users. So bookmark this guide for a handy reference on launching Disk Management anytime you need to access its capabilities.
