What is an SD card?
An SD card, or Secure Digital card, is a small removable flash memory card used for storing data in portable devices such as digital cameras, phones, and tablets. The SD standard was introduced in 1999 by the SD Card Association as an improvement over MultiMediaCards and has become the most widely used memory card format.
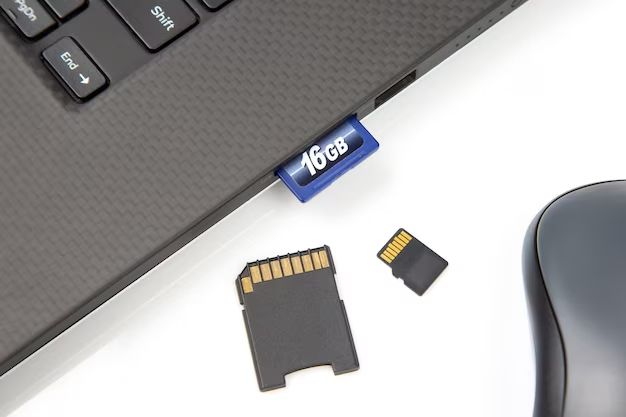
SD cards come in three form factors: standard size, mini size, and micro size. The cards contain flash memory chips that store data digitally with no moving parts. SD cards use non-volatile memory, so data is retained when power is removed. They offer high storage capacity in a small footprint and make transferring data between devices convenient.
Some key moments in the history and evolution of SD cards include:
- 1999 – SD card standard introduced with capacities up to 2GB initially.
- 2003 – MiniSD and MicroSD sizes added for smaller devices.
- 2006 – SDHC introduced for capacities between 4GB and 32GB.
- 2009 – SDXC added capacities up to 2TB.
- 2018 – SD Express combines SD interface with PCI Express and NVMe interfaces.
SD cards continue to evolve with faster transfer speeds and higher storage capacities while maintaining backwards compatibility with earlier standards.
Why do you need to access an SD card on a computer?
There are several key reasons you may need to access files on an SD card using your computer:
View photos and videos – One of the most common reasons to access an SD card on a computer is to view photos and videos from a digital camera. Connecting the SD card to your computer allows you to easily transfer and view media files at their full resolution on a larger screen.
Transfer files – An SD card enables you to transfer files between devices. You can free up space on your camera or phone by moving files to your computer. It also allows you to add files like music and ebooks to your SD card from your computer.
Manage data – Accessing the SD card via your computer makes it easier to organize, edit, back up, and manage your files. You can create folders, delete unwanted content, and ensure your important files are safely stored on another device.
Overall, the main reasons revolve around the ability to view, transfer, and manage photo, video, document, and other media files between your SD card storage and computer. (Source)
Insert the SD card into your computer
To access files on your SD card, you first need to insert it into your computer. Here are the steps:
- Locate the SD card slot on your computer. On laptops, the SD card slot is typically located along one of the sides. On desktop computers, it may be on the front or back panel.
- Before inserting the SD card, make sure the metal contacts are facing down and point toward the computer. The contacts should face the direction you insert the card.
- Gently insert the SD card into the slot until it clicks into place and is secured. Do not force it in.
- If your computer has a spring-loaded slot, insert the card until it clicks, then allow the spring to pull it in the rest of the way.
- Do not remove the card while it is being accessed or writing files, as you could lose data.
Once inserted properly, your computer will recognize the SD card and you can access the files on it. If you have issues inserting the card or your computer not recognizing it, make sure it is oriented correctly and fully inserted. Reference your computer’s manual for details on the SD card slot location and insertion.
Initialize and format the SD card
Before you can use a new SD card, it often needs to be initialized first. This prepares the card for use with your computer’s file system. To initialize an SD card on Windows, you’ll need to use the Disk Management utility.
Insert your new SD card into your computer if you haven’t already. Then access Disk Management by right-clicking the Start menu and selecting “Disk Management”. You should see your SD card listed. Right-click on the disk and choose “Initialize Disk”. Accept the default settings and the card will be initialized for use.
In some cases, you may also need to format the SD card before you can store files on it. Formatting erases any existing data on the card. To format, right-click the SD card in Disk Management again and choose “Format”. Pick your desired file system, give it a volume label if desired, and start the formatting process.
Once complete, your SD card will be ready for saving files. Initialization and formatting prepares the card to work properly with Windows and organizes it into sectors for file storage. Refer to this guide for more details on using Disk Management to format an SD card on Windows.
Access the SD card files
Once the SD card is inserted into your computer, the next step is to access the files stored on it through File Explorer. Here are the steps:
1. Open File Explorer on your Windows computer. You can do this by clicking the File Explorer icon on the taskbar or pressing Windows Key + E.
2. In the left pane of File Explorer, look for the section labeled “This PC.” Click on it to expand the section.
3. Under “Devices and drives,” you should see a listing for your SD card. It will likely be labeled as the brand and storage capacity, like “SanDisk 32GB” or something similar. Double click on the SD card drive to open it.
4. The right pane will now display the contents of the SD card. You’ll see any folders, photos, videos, documents or other files stored on the card. You can now view, copy, move or modify the files as needed.
If you don’t see the removable SD card drive listed under “This PC,” make sure it is properly inserted and try rebooting your computer. The SD card should then show up and be accessible in File Explorer. For more guidance, refer to Microsoft’s instructions on accessing an SD card on Windows 10.
Copy files to and from the SD card
Once your SD card is inserted and accessible on your computer, you can easily copy files back and forth using your mouse.
To copy files from your computer to the SD card:
- Open the SD card drive in File Explorer (Windows) or Finder (Mac).
- Find the files you want to copy on your computer.
- Drag and drop the files into the SD card drive window.
To copy files from the SD card to your computer:
- Open the SD card drive in File Explorer (Windows) or Finder (Mac).
- Find the files you want to copy on the SD card.
- Drag and drop the files to a location on your computer like the Desktop or Documents folder.
You can also use the copy and paste keyboard shortcuts to copy files back and forth:
- Ctrl + C (Windows) or ⌘ + C (Mac) to copy files
- Ctrl + V (Windows) or ⌘ + V (Mac) to paste files
On Windows, you can go to the Import Photos and Videos option to quickly transfer media files from the SD card to your Pictures folder.
Eject the SD Card Safely
It’s important to always safely eject the SD card before removing it from your computer. Improperly ejecting the card can lead to file corruption or data loss. To safely eject the SD card on Windows:
- Locate the “Safely Remove Hardware and Eject Media” icon in the Windows taskbar notification area.
- Click on the icon and select the SD card drive.
- Wait for the “Safe To Remove Hardware” notification.
- Remove the SD card from the computer.
On Windows 10, you can also right-click on the SD card in File Explorer and select “Eject”. This will safely disconnect the drive before removing it (source). Avoid pulling out the SD card while it’s still in use by the system.
Safely ejecting the SD card flushes any cached writes and allows the operating system to properly disconnect it. This prevents any risks of corrupting the data or damaging the card.
Troubleshooting SD Card Access
If your computer is not detecting or accessing your SD card, there are a few troubleshooting steps you can try:
Check to make sure the card is inserted properly into the card reader slot. It should click into place and not be loose.
Inspect the card reader slot for any obstructions or damage that could prevent the SD card from sitting flush.
Try inserting the SD card into a different card reader slot if you have one available. The original slot may be damaged.
Update or reinstall the driver for the card reader device in Device Manager. Outdated drivers can prevent card detection.
Change or assign a drive letter to the SD card in Disk Management if it is showing up but not accessible. Refer to this Microsoft forum post for steps.
Use a different USB cable if connecting via a separate card reader. The original cable could be defective.
Try your SD card on a different computer or device to rule out corruption or other issues with the card itself.
As a last resort, initialize and format the SD card to wipe it clean. This will erase all data but may resolve detection issues.
Tips for Using SD Cards
When using SD cards, there are some best practices you can follow to optimize performance and increase the lifespan of your cards:
Avoid removing the card when it’s actively being written to – this can corrupt the data. Instead, properly eject the card first. On Windows, use the “Safely Remove Hardware” option. On Mac, drag the card icon to the Trash before removing.
Only use one device to write to a card at a time. Connecting a card to multiple devices simultaneously can cause file system corruption.
Store cards properly when not in use. Keep them in a protective case away from heat, water, and magnets. Improper storage can damage cards over time.
Regularly reformat your card in-camera for best performance. This helps prevent fragmentation and clears out any corrupted data.
Avoid dropping, bending, or exposing cards to extreme cold/heat. Physical or temperature damage can ruin the cards.
Don’t remove a card during formatting or while the camera is accessing files. Wait for the camera to complete any processes first.
Use reputable brand name cards from trusted retailers. Counterfeit cards often underperform and fail prematurely.
Be careful of static electricity when handling cards. Static discharge can corrupt data. Ground yourself first by touching metal.
Don’t use file recovery software on damaged cards, as it may make the corruption worse. Send damaged cards to a data recovery service instead.
When disposing of cards, perform a low-level format or destroy them. This protects deleted personal data from being recovered.
Alternative methods for access
If your computer does not have a built-in SD card slot, you can use an external SD card reader or USB adapter to access the files on your SD card. Here are some options:
SD card reader
An SD card reader is a simple device that connects to your computer’s USB port and provides slots for inserting SD cards. Once connected, your computer will detect the SD card like any other drive. SD card readers are inexpensive, portable, and convenient for accessing cards from multiple devices.[1]
USB adapter
There are USB adapters made specifically for SD cards that allow you to plug the card directly into your computer’s USB port. For microSD cards, the adapter is required to provide the proper physical size. A USB adapter can read both SD and microSD cards. This is a handy option if you only need to access one card occasionally.[2]
Using an external SD card reader or USB adapter allows you to access your SD card files on any computer without built-in SD slots. Just make sure to safely eject the card before removing it from the reader or adapter.
[1] https://www.quora.com/How-can-I-read-my-memory-card-without-a-card-reader
[2] https://www.partitionwizard.com/partitionmanager/put-micro-sd-card-in-computer-without-adapter.html
