Allocating hard drive partitions allows you to organize and separate different types of data on your hard drive. When you allocate separate partitions on your hard drive, you can keep your operating system files separate from your personal data files. This article will provide a step-by-step guide to allocating hard drive partitions in Windows 10.
Why would I want to allocate partitions on my hard drive?
There are several benefits to allocating separate partitions on your hard drive:
- Isolation – Keeping your operating system files separate from your personal data allows you to reinstall or upgrade your OS without affecting your data.
- Organization – Partitions allow you to logically group different types of data.
- Performance – You can split resource intensive applications onto separate partitions from your OS for better performance.
- Security – If one partition becomes corrupted, the other partitions are unaffected.
- Backup – It’s easier to backup partitions individually rather than the whole drive.
How many partitions should I create?
For most basic home PC setups, having at least two partitions is recommended:
- System Partition – Contains Windows operating system files and installed programs. Aim for 30-50GB of storage.
- Data Partition – Contains your personal files like documents, photos, videos, music etc. You can use the rest of your available hard drive space for your data partition.
More advanced users may want to add additional partitions like a Recovery Partition for system restore files or partition just for games. But for simplicity, starting with two partitions is fine.
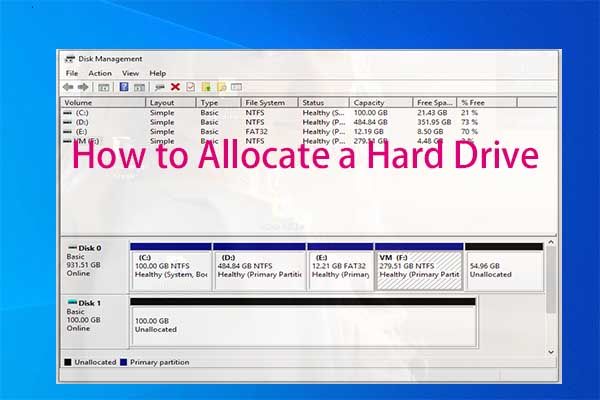
How to check your current drive partitions
Before you can allocate new partitions, you’ll want to see if your hard drive already has any existing partitions and free space.
To view your current hard disk configuration and partitions in Windows 10:
- Open the Start menu and type “Disk Management”.
- Click on the “Create and Format Hard Disk Partitions” option.
- This will open the Disk Management utility.
- Here you will see a graphical overview of your disk drives and their partitions.
- Check to see if your hard drive already has multiple partitions allocated.
How to delete existing partitions
If your hard drive already has multiple partitions configured, you will need to delete them before you can create new partitions from scratch.
Warning: This will delete all data on existing partitions so make sure you backup any important data first!
To delete a partition:
- Open Disk Management utility.
- Right-click on the partition you want to delete and select “Delete Volume”.
- Check the “Delete partitions and data” checkbox.
- Click “OK” to confirm deletion.
- Repeat steps for any other partitions you want to remove.
This will leave you with the full unallocated space on the hard drive to create new partitions.
How to create a new partition
Once you have unchecked disk space, you can create new partitions.
To create a new partition:
- Open the Disk Management utility.
- Right click on the Unallocated space on your hard drive where you want to create the partition.
- Click “New Simple Volume”.
- Follow the wizard to configure the new partition:
- Specify the partition size.
- Assign a drive letter like C: or D:
- Select NTFS for the file system.
- Click “Finish” to create the new partition.
Repeat these steps to create multiple partitions. Make your System partition first, then create your Data partition in the remaining free space.
How to format new partitions
After creating the new partitions, you’ll need to format them before you can start storing files.
To format a partition:
- Open Disk Management.
- Right click on the partition and select “Format”.
- Under File System, select NTFS.
- Check “Quick Format” option.
- Click OK.
Repeat the formatting process for each new partition you have created.
How to assign drive letters to partitions
By default, Windows will assign the first partition the “C” drive letter. But you can customize the drive letters if desired:
- Right click on the partition and click “Change Drive Letter and Paths”
- Click “Change”
- Select the desired drive letter from the drop-down menu.
- Click OK to save changes.
For example, you may want to set your first partition to C for the OS, D for your Data partition, E for Recovery etc.
How to mark a partition as active
For a partition with your Windows OS installed, you need to mark it as “Active” so that the system knows where to boot from.
To mark a system partition as active:
- Right click on the partition
- Select “Mark Partition as Active”
- Click Yes to confirm changes
Only one partition can be marked as active at a time, so if you change the active partition, be sure to deactivate the previous one first.
How to change partition sizes
If you want to resize existing partitions, it’s possible but a bit more complicated:
- You cannot resize partitions that have data stored on them already. Back up any data first.
- You can only resize adjacent partitions into contiguous free space.
- Use a third party partition manager like EaseUS Partition Master for more flexibility.
- Right click partition and select “Shrink” or “Extend” to change size.
- Click OK to confirm changes.
Take caution when resizing partitions as it can cause data loss if not done properly. Consider reformatting and starting fresh instead.
Should I use MBR or GPT for partition style?
When allocating partitions, you need to choose between two partitioning styles:
- MBR (Master Boot Record) – Traditional style used for BIOS systems. Limited to 4 primary partitions without extending.
- GPT (GUID Partition Table) – Newer style used for UEFI. No primary partition limit. Improved error checking.
For new computers with UEFI, GPT is recommended. MBR is best for older BIOS/legacy systems. To check if your system uses UEFI or BIOS, go to Control Panel > System.
MBR vs GPT Comparison
| Feature | MBR | GPT |
|---|---|---|
| Max primary partitions | 4 | Unlimited |
| Max partition size | 2TB | 9.4 ZB |
| Required for boot? | Yes | No |
| Error checking | Limited | CRC32 checksum |
How to convert MBR to GPT
To convert your drive’s partitioning scheme from MBR to GPT:
- Open command prompt as administrator.
- Type “mbr2gpt /convert /allowFullOS” and press Enter to run conversion.
- Type “Y” and press Enter on the warning prompt to confirm.
- Restart your PC – GPT conversion requires a reboot.
Converting from GPT back to MBR is not recommended and usually requires erasing all partitions and data first.
How to install Windows 10 on new partition
After allocating partitions, you can install Windows 10 fresh on your new System partition:
- Boot from the Windows 10 installation media.
- When prompted, select the Custom install option.
- Select the partition you want to install Windows on.
- Click Format to erase/prepare the partition.
- Click Next to begin the clean OS install.
This will install Windows 10 directly onto your new system partition, separate from any data on other partitions.
How to view files across multiple partitions
With your files split between multiple partitions, how can you easily access them in one place?
Windows File Explorer provides a couple options to view all your files together:
- Open File Explorer and click “This PC” in the left pane – This consolidates all drives/partitions in one view.
- Locate the folder you want and select “Include folders from all subfolders” in the top right.
This will merge the contents of all partitions together into one File Explorer window for easy access.
How to optimize partitions for performance
Here are some tips for optimizing your partitions:
- Put OS and programs on faster SSD drive and data on HDD.
- Split data across multiple partitions to reduce size for faster scans.
- Keep at least 15-20% free space on each partition.
- Put temp files, caches, logs on separate partition from OS.
- Disable hibernation and reduce pagefile size to reduce C: drive space.
Properly allocated partitions can improve start up times, storage organization and overall system performance.
Conclusion
Allocating partitions on your hard drive takes some careful planning but can optimize your storage performance and organization. Follow the steps outlined to view your current disk configuration, create new partitions, format them, assign drive letters, and install Windows 10. With everything compartmentalized on separate partitions, you can operate smoothly and securely.