File backup refers to the copying and archiving of computer files to another storage device, such as an external hard drive. Regular backups provide an essential way to protect your data against loss from computer crashes, hardware failure, ransomware attacks, accidental deletion, natural disasters, theft and more. Backups allow you to restore your files and data if anything happens to your computer’s main storage drive.
There are two main approaches to backing up files: cloud-based backup and external hard drive backup. With cloud backup services like Google Drive or Dropbox, your files are uploaded and stored on servers over the internet. External hard drive backups involve copying your files to a physical external storage device connected to your computer via USB or other interface.
An external hard drive like Western Digital’s My Book line provides a simple local backup solution. WD drives come in a range of large capacities to handle backups for both home and business. They connect via USB 3.0/3.1 for fast file transfer speeds. In this guide, we’ll walk through how to setup automatic file backups to a Western Digital external hard drive on Windows 10.
What You’ll Need
There are a few key things you’ll need to set up automatic file backups to a Western Digital (WD) external hard drive:
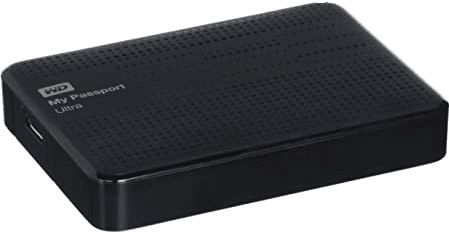
- A Western Digital external hard drive – WD makes reliable and affordable external hard drives in various storage capacities. Some popular models are the My Passport and My Book lines. Choose an external drive with enough storage for your backup needs.
- A computer with files to backup – The computer should have the files you want to backup, whether documents, photos, videos, music etc. The computer must also have enough ports to connect the external drive, like a USB 3.0 port.
- Backup software – To automate backups, you’ll need software that can schedule and run regular backups. Windows has built-in backup software, or you can use a third party tool like Macrium Reflect or EaseUS Todo Backup.
With these key items, you’ll have what you need to get started backing up files to the WD external drive.
Connecting the External Hard Drive
Connecting a Western Digital (WD) external hard drive to your computer is easy. Simply follow these steps:
- Plug the USB cable that came with your WD external hard drive into the USB port on the back of the drive.
- Plug the other end of the USB cable into an available USB port on your computer. Most modern laptop and desktop computers have multiple USB ports. USB 3.0 ports are preferable for faster data transfer speeds.
- Turn on the external hard drive if it has a separate power switch. Some WD external drives are powered entirely through their USB connection.
- Your computer will automatically detect the new USB device and install any required drivers. You may get a notification that new hardware was detected.
- The WD external hard drive should now be visible in your computer’s file explorer. The default name is usually “WD My Book” or something similar.
- If your drive is brand new or recently formatted, you may be prompted to initialize and format it for first use. This prepares the hard drive to store files.
Once connected via USB and recognized by your computer, the WD external hard drive is ready to use. You can now copy files to it manually or configure backup software to automatically copy important files from your system drive to the external drive.
Sources:
[1] https://www.sweetwater.com/sweetcare/articles/getting-started-with-external-hard-drives/
Choosing Backup Software
There are a few options for backup software on Windows machines. The most basic is to use the built-in tools like File History or Backup and Restore. File History automatically saves copies of files in libraries, desktop, contacts, and favorites folders to an external drive [1]. It allows you to restore previous versions of files and works well for basic backup needs. Backup and Restore creates system image backups to recover your entire system if needed.
For more advanced backup capabilities, third party software is recommended. Some top options include Acronis True Image, Macrium Reflect, EaseUS Todo Backup, and Veeam Agent for Microsoft Windows [2]. These programs offer features like flexible scheduling, compression to save space, encryption, incremental backups to only capture changes, and the ability to backup specific files and folders. They also provide features to backup to local drives, network locations, or cloud storage.
When evaluating backup software, consider how easy it is to configure backups, scheduling capabilities, compression levels to save space, ability to backup open or locked files, mobile app access for remote monitoring, drive imaging, and bare metal restore for full system recovery [3]. Testing restores is also crucial to ensure your backup strategy is solid.
Configuring Backup Settings
When setting up automatic backups to an external hard drive, you’ll need to configure the backup settings to specify what files to back up, the backup schedule, whether to perform incremental or full backups, and the destination location on the external drive.
For what to back up, you’ll typically want to select important user files like documents, pictures, videos, and music. You can also choose to back up program files and system settings, but this will take more space. Focus on backing up irreplaceable user files.
The backup schedule controls how often backups are performed. For automatic backups, you’ll generally want to choose daily or weekly. Daily covers more potential data loss, while weekly uses less drive space over time. You can also schedule incremental backups in between full backups.
Incremental backups only copy new or changed files since the last backup. This saves drive space but makes restores more complex. Full backups copy all selected files each time, using more space but with simpler restores. For automatic backups, a weekly full + daily incremental schedule is common.
Finally, choose a backup destination folder on your external drive. Make sure it has adequate space for the backup schedule you configured. The software will automatically manage backing up to this location on the schedule you set.
With these core settings configured, your backups will run automatically on the schedule you chose to the external drive destination.
Running Initial Manual Backup
The first time you run a backup to your external hard drive, it’s best to do a manual backup instead of relying on a scheduled backup. This allows you to walk through the process step-by-step and make sure the backup completes fully without issues.
To run an initial manual backup:
- Open your backup software (such as File History in Windows or Time Machine on Mac).
- Select the files or folders you want to backup. Choose your entire hard drive or specific folders to get a full backup. http://backupeverything.co.uk/how-to-backup-external-hard-drive/
- Select your external hard drive as the backup destination.
- Click “Back Up Now” or similar to start the backup process.
Depending on how much data you are backing up, this first backup could take hours to complete. An external hard drive can backup at speeds of up to 5 Gb/s. For example, backing up 200GB would take approximately 40 minutes on a USB 3.0 drive. Be prepared for the initial backup to run overnight if you have terabytes of data!
Monitor the backup periodically and allow it to complete fully until no further activity is reported. Do not disconnect the external drive until the process has completely finished.
Monitoring Backups
It’s important to monitor your backups regularly to ensure they are completing properly. Here are some key ways to keep an eye on your backup jobs:
Confirm scheduled backups are completing properly. Check that scheduled backup jobs show a completed status without any errors. Review backup logs to verify the full backup completed and all expected files were included.
Check backup logs regularly. Backup software generates logs for each backup job. Review these logs to spot any issues or failures. Look for error messages and warnings that may indicate problems.
Receive notifications for backup errors. Configure your backup software to send email, SMS or push notifications when there are backup failures. This enables you to respond promptly to any issues.
Handle backup errors appropriately. If a scheduled backup job fails, investigate the cause in the logs. Try running the job manually to troubleshoot it. Restore any missed backups once errors are resolved.
Use backup monitoring software for oversight. Solutions like Backup Radar provide continuous monitoring, reporting and alerts for backups across multiple locations and platforms. This gives greater visibility and control.
Managing Backup Drive
It’s important to properly manage your external backup drive to ensure the backups remain accessible and the drive operates smoothly. Here are some tips:
Safely Disconnecting Drive After Backups
Always safely disconnect the external drive before unplugging it from your computer. In Windows, right-click the external drive icon in File Explorer and select “Eject.” Allow any pending writes to finish before unplugging. Improperly disconnecting the drive can corrupt data or damage the drive.
After the initial backup, Windows may continue writing data in the background. It’s best to wait 5-10 minutes before disconnecting. Avoid disconnecting during a scheduled backup.
Drive Maintenance and Care
Follow the drive manufacturer’s instructions for proper care and maintenance. Keep the drive in a cool, dry place and avoid shocks, drops, or excessive vibration. Periodically scan for errors using the drive utilities. Defragment the drive if necessary. Refer to the manufacturer’s suggested replacement cycle; drives typically last 3-5 years.
Replacing or Upgrading Drive
When replacing or upgrading your backup drive, first run a final backup on the old drive for redundancy. Safely disconnect the old drive and connect the new one. Restore the latest backup to the new drive. Reconfigure the backup software to recognize the new drive. Schedule regular backups. Periodically check backups until confident the new drive is working properly.
Restoring from Backup
Once you have backups set up on your external hard drive, you may eventually need to access those files to restore your system or recover lost files. The first step is accessing the backup files on your external drive.
To do this, connect the external hard drive to your computer via USB. Then open File Explorer and navigate to the drive location where your backups are stored. The default folder is usually named something like “Backup” or uses the name of the backup software.
You’ll then need to decide whether you want to do a full system restore, or just restore specific files. A full system restore will completely revert your computer back to a previous state. This is useful for major system crashes, hard drive failures, or malware infections. But it takes time to fully restore a system image.
To restore specific files or folders, navigate to the backup location on the external drive and copy the items you want to retrieve back to your main hard drive. The interface to browse and restore backups varies depending on software.
For Windows File History, you can access backups using the “Restore personal files” option in the Control Panel. File History also allows you to browse through file versions and restore an earlier copy of a file if needed [1].
Third party backup tools like Macrium Reflect have their own restore wizards to guide you through full or selective file restores. It’s important to understand how your specific software handles restores before you actually need to use it.
Conclusion
In summary, setting up automatic backup to an external hard drive involves connecting the drive, choosing backup software, configuring the settings, performing an initial manual backup, and then letting the software take over with scheduled incremental backups. With a good backup solution in place, your important files are continuously protected and can easily be restored if needed.
The key benefits of having reliable automatic backups include: avoiding data loss from hardware failure, accidental deletion, malware, and other threats; saving time by automating the backup process; ensuring access to current file versions; and giving peace of mind knowing your data is safely stored.
For readers interested in implementing a similar backup system, the next steps would be to choose a large enough external hard drive, select backup software suited to your needs, schedule regular backups, and occasionally check that the backups are completing successfully. With an automated backup in place, you no longer need to worry about manually backing up your important files.