Quick Answer
Backing up everything on your computer to an external hard drive involves a few key steps:
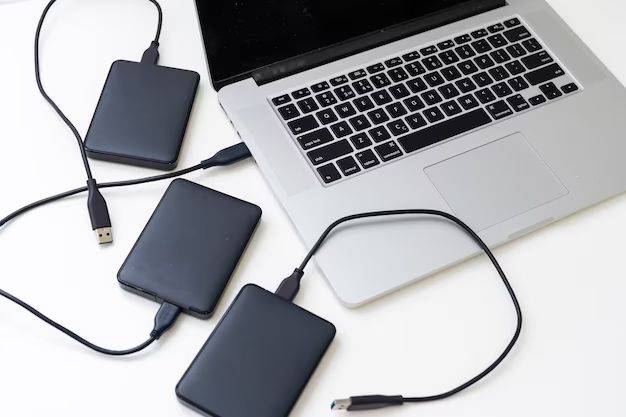
- Connect the external hard drive to your computer via USB, Thunderbolt, or other connection type.
- Use the built-in backup software on Windows or macOS to schedule regular, automatic backups. On Windows this is File History and on macOS it is Time Machine.
- Select the folders and files you want to back up. Choose “Backup everything” or at minimum your personal files like Documents, Pictures, Videos, Music, Desktop, and any other important data.
- Allow the backup software to complete an initial full backup. This may take hours depending on the amount of data.
- Going forward, your backup software will perform incremental backups that only copy new or changed files.
Be sure to use an external hard drive with sufficient storage capacity for all your data. Test restoring files from the backup periodically to ensure it is working correctly.
Choosing an External Hard Drive for Backup
When choosing an external hard drive for backups, you’ll want one that:
- Has enough storage capacity for all your data. Aim for at least 1TB or larger.
- Uses USB 3.0, Thunderbolt, eSATA, or USB-C connections for fastest transfer speeds.
- Is from a reputable brand like Western Digital, Seagate, LaCie, Samsung, etc.
- Is designed for reliability with features like shock resistance and backup software.
Portable external hard drives are convenient for travel and working across multiple computers. Desktop external hard drives typically offer larger storage capacities.
Some key specifications to look at when choosing an external backup drive:
| Specification | What to Look For |
|---|---|
| Storage Capacity | 1TB or larger |
| Connections | USB 3.0, Thunderbolt, eSATA, USB-C |
| Drive Speed | 5400 RPM or 7200 RPM |
| Durability | Solid state or durable disk drives |
| Warranty | At least 2 years |
| Price | Around $50 – $150 for 1TB – 4TB |
Some good options to consider:
– WD My Passport Portable HDD
– Seagate Backup Plus Slim Portable Drive
– WD My Book Desktop HDD
– LaCie Rugged Mini Portable HDD
– Samsung T5 Portable SSD
Look for an external hard drive that meets your capacity needs while also offering fast transfer speeds, durability, portability, and reliability for regular backups.
Using Windows Built-in Backup Software
Recent versions of Windows (including Windows 10 and 11) have a built-in feature called File History that can automatically backup your data to an external drive. Here’s how to use it:
- Connect your external hard drive to your PC and ensure it is detected.
- Go to Settings > Update & Security > Backup.
- Under Backup Using File History, click “Add a Drive” and select your external hard drive.
- Click “More options” to select folders and libraries to back up. Choose “Back up everything” or select the specific folders you want.
- Toggle File History to On.
- Windows will run an initial full backup. This may take hours depending on data size.
- Going forward, File History performs periodic incremental backups, storing file versions as they are changed.
File History will by default store file versions from previous 30 days. You can change this to adjust how long backup history is retained.
To restore files from a File History backup:
- Go to Settings > Update & Security > Backup > More options.
- Under Restore files from a current backup, browse and locate the file version you want.
- Click the green “Restore” button to retrieve the file version.
File History makes it easy to backup your files and restore previous versions when needed.
Using macOS Time Machine for Backup
Time Machine is the built-in backup software in macOS. To use it with an external hard drive:
- Connect the drive to your Mac and ensure it is detected.
- Open System Preferences > Time Machine.
- Click Select Backup Disk and choose your external hard drive.
- Toggle Time Machine to ON.
- Choose “Back Up Automatically” or “Back Up Now” to start an initial full backup.
- Going forward, Time Machine performs periodic incremental backups.
By default, Time Machine saves hourly backups for the past 24 hours, daily backups for the past month, and weekly backups until the drive runs out of space.
To restore files from a Time Machine backup:
- Open Finder and click Time Machine in the menu bar.
- Navigate through file history and backups in the Time Machine interface.
- Select a file version and click Restore to retrieve the file.
Time Machine makes automatic backups effortless and gives you an easy way to recover lost files if needed.
Choosing Which Folders and Files to Backup
When setting up your backup, you have options in the software to choose which folders and libraries to include. Here are some recommendations on what to backup:
- Documents – Backup all files in your Documents folder.
- Pictures – Backup photos and images in the Pictures folder.
- Music – Backup music files and playlists.
- Videos – Backup home movies, downloads, and other video files.
- Desktop – Backup everything on the desktop.
- Downloads – Backup software downloads and other internet downloads.
- Projects – Backup project files from apps like GarageBand, iMovie, etc.
You may also want to consider backing up:
– Emails and email attachments
– Application files and settings
– System settings
– Network drive files
– Cloud storage folders that sync local copies of files
To be comprehensive, choose “Backup Everything” or all disk drives and folders. For a more selective backup, choose your user account folders and any others that contain important documents and files.
How to Restore Files from Backup
Here are the general steps to take to restore files and folders from your backup:
- Connect the external drive to your computer if it is not already.
- Open your backup software like File History or Time Machine.
- Browse and locate the files or folders you wish to restore from the backup history.
- Select the files/folders and click the restore button.
- Choose the restore destination – typically the original or new location.
- Allow the restore process to complete.
- Verify the files have been properly restored to the destination.
Things to keep in mind when restoring files:
– Restoring overwrites the current version.
– You can restore different historical versions of files.
– Restoring system files may require restarting your computer.
Take care when restoring system files from backup as this could impact applications and settings. Always test restoring some files before attempting a full system restore.
Tips for Successful Backups
Follow these tips for a streamlined backup process:
- Keep the external drive connected regularly so backups run automatically.
- Use the same drive for all computers to have all data in one place.
- Test restoring files periodically to verify it works.
- If using a laptop, connect it regularly to the drive for updates.
- Invest in a high quality drive from a reliable brand.
- Encrypt your backup drive for extra security.
- Have multiple backups in more than one location.
- Monitor disk space – don’t let backups fail due to a full disk.
Automating backups is ideal – set and forget. But also manually run backups periodically before major events like travel or system updates.
Potential Backup Issues and Solutions
Here are some common backup issues and troubleshooting tips:
| Issue | Solutions |
|---|---|
| External drive not detected | – Check USB connections – Try another USB port – Try on another computer – Update computer USB drivers |
| Slow backup speed | – Use USB 3.0, Thunderbolt, eSATA for fastest speeds – Don’t use drive for other tasks during backup – Consider backup software settings |
| Large file copy failures | – Copy file separately – Verify drive has sufficient space – Enable “ignore errors” setting in backup software |
| Scheduled backups not running | – Ensure drive is connected – Check backup software settings – Reboot computer if necessary |
| Can’t find files to restore | – Browse timeline/history carefully – Search backup software for file names – Restore from different backup version |
Getting error messages or warnings? Search online for the specific message for troubleshooting help.
Alternative Backup Methods
While external hard drives are great for local backups, there are other options to consider as well:
- Cloud storage – Back up to the cloud using services like Dropbox, Google Drive, iCloud, etc. This protects against local drive failure.
- Online backup – Use a backup service like Backblaze, IDrive, Acronis, etc. They offer unlimited cloud storage and automated backups.
- Network attached storage – Use a NAS device connected to your home network for backups accessible from all devices.
- USB flash drives – Small USB sticks can provide portable backups, but are not ideal for large backups.
- Burn DVDs or Blu-ray discs – Write files to optical discs for long-term archival, but is very slow.
Consider supplementing your external hard drive backups with another method like cloud storage for offsite protection. Or have multiple external drives that you alternate between.
Conclusion
Backing up your computer to an external hard drive gives you a local copy of your important files for protection and recovery when needed.
Automate backups using built-in software like File History or Time Machine for hands-off continuous protection. Store backup history for multiple file versions.
Remember to regularly connect the drive and test restores. Look for a high capacity fast drive from a reliable brand. Maintain organized backups across multiple drives.
With an effective backup process using external hard drives, and optionally other backup methods too, you can safeguard your files from loss and ensure peace of mind.
