Booting into UEFI (Unified Extensible Firmware Interface) mode allows you to access advanced startup options on your PC. UEFI replaced the old BIOS firmware starting in the early 2010s and offers improvements like faster boot times and support for larger hard drives. If you need to change boot order, launch diagnostic tools, or modify UEFI settings, you’ll need to access the UEFI menu.
What is UEFI?
UEFI (Unified Extensible Firmware Interface) is a type of system firmware used on most modern PCs. It replaced the clunky old BIOS (Basic Input/Output System) firmware that was used for decades on older PCs and offers some advantages:
- Faster boot and resume times from hibernation.
- Support for drives larger than 2.2TB without needing to use MBR partitioning.
- Improved security features like Secure Boot and Trusted Platform Module (TPM).
- Better graphical interface for configuring settings.
Nearly every PC manufactured after 2010 uses UEFI firmware instead of BIOS. The UEFI menu allows you to configure boot order, change hardware settings, access diagnostics tools, and more.
How to Boot into UEFI Mode
Booting into UEFI mode is fairly straightforward. Here are the steps:
- Restart your computer and press the appropriate key to open the boot menu when your manufacturer’s logo appears. This is usually F2, F8, F10, F12 or Delete, but can vary depending on your system. Consult your computer or motherboard manual for the proper key.
- Select UEFI Firmware Settings or a similar option from the boot menu.
- This will open up the UEFI menu. It may have a slightly different appearance or name depending on the system manufacturer, but you’ll know you’re in the right place if you see options for boot order, secure boot, TPM, and other firmware settings.
If the system boots normally into Windows without opening the boot menu, you’ll need to access the UEFI menu through Windows instead:
- Open the Start menu and search for “Change advanced startup options” and click on it.
- Click “Restart now.”
- After restarting, the system will boot into the advanced startup options screen. Click “Troubleshoot.”
- From here click “Advanced options” and then “UEFI Firmware Settings” to boot into the UEFI menu.
Booting into UEFI may look slightly different depending on your system manufacturer, Windows version, and UEFI firmware version, but the general process will be the same on most modern PCs.
Key Differences Between UEFI and Legacy BIOS Systems
There are a few key differences between UEFI and the old legacy BIOS firmware:
| UEFI | Legacy BIOS |
|---|---|
| More modern graphical interface | Older text-based interface |
| Faster boot times | Slower boot times |
| Supports drives over 2.2TB | Limited to 2.2TB without MBR partitioning |
| Enhanced security features | Less robust security |
The move from BIOS to UEFI firmware over the last decade has brought a number of benefits for system performance and capabilities.
Using the UEFI Menu
The UEFI menu allows you to configure a number of system settings and startup options. Here are some of the most common uses for the UEFI firmware interface:
- Changing boot order – You can specify the order of boot devices, like setting your primary hard drive or a USB drive as the first boot option.
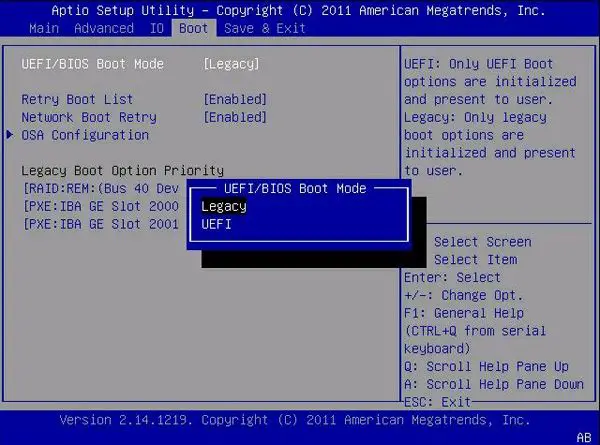
- Selecting legacy BIOS or UEFI boot – For boot devices that support both UEFI and legacy BIOS, you can select which mode to use.
- Configuring hardware – Many system hardware settings like enabling/disabling devices, setting RAM speed, managing onboard devices, etc can be changed through UEFI.
- Launching diagnostics – Most UEFI firmware includes options to launch diagnostic and hardware testing tools for troubleshooting.
- Installing an OS – UEFI supports booting Operating System installer drives like Windows Setup media.
- Updating firmware – New UEFI firmware updates can be applied from within the UEFI interface.
- Resetting default settings – If needed, you can restore firmware options back to their defaults from the UEFI interface.
These are just a few examples – UEFI firmware can manage many aspects of your system configuration and hardware. The options will vary depending on your exact system make and model.
Common UEFI Menu Settings
While the UEFI interface will differ across manufacturers, there are some common settings you’re likely to encounter:
- Boot sequence – Sets the boot order of different internal hard drives or external boot devices.
- Secure Boot – Enables UEFI Secure Boot to help protect against malware by verifying boot drivers.
- TPM – Manage the Trusted Platform Module, which enables drive encryption and enhanced system security.
- Fast boot – Enable or disable fast boot to skip certain POST checks and reduce boot time.
- SATA controller – Enable or disable onboard SATA controllers and configure SATA modes.
- Graphics adapter – Configure settings for integrated or discrete GPUs.
- Enabling legacy OS support – Allow legacy BIOS mode for older operating systems if needed.
- Virtualization support – Enable hardware virtualization support for hypervisors.
Most systems will have common options like these for managing boot order, security, storage, graphics, power, and various onboard devices. Consult your motherboard manual for details on any vendor-specific UEFI settings.
Accessing UEFI Settings in Windows
Aside from the UEFI menu itself, you can also access some firmware settings from within Windows:
- System Information (Msinfo32) – Provides info on BIOS mode, secure boot state, and some other details.
- Task Manager – The Startup tab lists UEFI and legacy BIOS boot drivers.
- System Configuration – Can be used to enable/disable UEFI drivers.
- Command Prompt – Utilities like bcdedit and diskpart can provide some BIOS/UEFI info.
- Registry Editor – Includes some configurable OEM UEFI settings under HKEY_LOCAL_MACHINE\SYSTEM\CurrentControlSet\Control\PlatformConfiguration.
While limited, you can glean some UEFI details without rebooting directly into the firmware interface. Changing settings still requires entering the UEFI menu at startup however.
Reasons to Use the UEFI Interface
Here are some of the most common reasons you might need to boot into the UEFI firmware menu:
- Changing boot order – Set a different default boot device, like a USB drive or secondary hard drive.
- Selecting UEFI vs legacy BIOS boot mode – Choose between UEFI and legacy boot for dual-boot devices.
- Diagnosing issues – Accessing diagnostics tools to test components like RAM for errors.
- Clearing CMOS – Reset BIOS settings to default values by clearing CMOS memory.
- Updating firmware – Install the latest UEFI firmware update from within the interface.
- Enabling/disabling devices – Manage onboard hardware controllers and devices.
- Configuring peripherals – Set options for integrated graphics, Wi-Fi, RGB lighting etc.
These are some examples of why you might need to get into the UEFI menu. The extent of available options depends on your motherboard and OEM firmware.
Tips for Using UEFI Settings
When navigating the UEFI interface, keep these tips in mind:
- Consult your motherboard manual for manufacturer-specific settings and shortcuts.
- Changing too many settings at once can potentially cause boot issues – tweak cautiously.
- Reset to optimized defaults or clear CMOS if you run into problems booting.
- Back up important data before making major firmware changes.
- Note original values before changing anything so you can revert back if needed.
- Don’t change settings you don’t understand – unsupported adjustments could cause instability.
- Search for the setting name if you have trouble finding a particular option.
While the UEFI interface is generally user-friendly, changing the wrong settings can lead to boot failures or other issues. Reference your motherboard manual and only modify necessary options.
Conclusion
Booting into UEFI firmware settings remains fairly straightforward – just restart and press the appropriate hotkey to access the menu. Once in the interface, you can adjust boot order, manage onboard hardware, update firmware, launch diagnostics, and access many other system settings.
UEFI provides added performance, capabilities, and security over legacy BIOS systems. However, some care should be taken when changing values. In general, don’t touch settings you don’t fully understand. Reset to optimized defaults or clear CMOS if you experience abnormal behavior after UEFI adjustments.
With great power comes some responsibility. Access your system’s UEFI configuration options cautiously and reference your motherboard documentation for vendor specifics. But used properly, UEFI grants you granular control over many aspects of your PC’s hardware and firmware environment.