Connecting an SSD (solid state drive) to your motherboard is a straightforward process that can be done easily with the right cables and ports. In this guide, we’ll walk you through the steps for properly installing an SSD in your PC.
What You’ll Need
Before connecting your SSD, make sure you have the following:
- SSD drive
- SATA data cable
- An available SATA port on your motherboard
- Screwdriver
- Mounting screws (often included with SSD)
Step 1: Locate an Open SATA Port
First, you’ll need to locate an open SATA port on your motherboard where you can plug in the SATA data cable. SATA ports are rectangular shaped and usually black or dark brown in color. Most modern motherboards have at least 4-6 SATA ports.
Make sure the SATA port you choose is not already occupied by another drive. If all SATA ports are full, you may need to disconnect another non-essential drive to free up a port for your SSD.
Step 2: Mount the SSD
Once you’ve located an open SATA port, you can now mount the SSD in your computer case. Most SSDs come with mounting screws and brackets to securely screw them into place inside your case.
Find an open drive bay and slide the SSD into place, lining up the screw holes on the side. Use a screwdriver to install the screws and securely fasten the SSD in place.
Step 3: Connect the SATA Cable
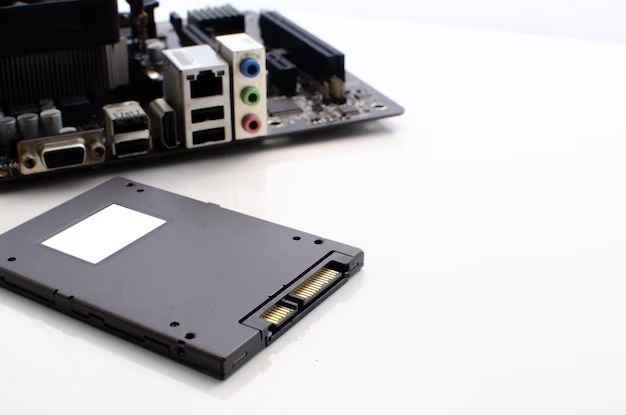
With the SSD mounted, it’s time to connect it to the motherboard using a SATA data cable. One end of the SATA cable plugs into the back of the SSD, while the other end connects to the open SATA port on the motherboard.
When inserting the SATA cable, make sure the L-shaped edge is pointed in the proper direction. The L-shape should match up with the indent in the SATA port. Push the cable ends in firmly until they click into place.
Step 4: Connect the Power Cable
In addition to the SATA data cable, you’ll also need to connect a power cable from your PC’s power supply unit (PSU) to the SSD. This cable is usually labeled “HDD” or “SATA.”
Connect one end to the back of the SSD drive, and plug the other end into an open power connector coming from the PSU. This will provide consistent power to operate the SSD.
Step 5: Re-assemble the Computer Case
After all connections are made, you can re-assemble the computer case. Close up the side panel and screw it back into place. Make sure any loose cables are neatly tucked away to promote sufficient airflow.
Step 6: Initialize the SSD in BIOS
With the physical connections complete, it’s time to initialize the drive so your system recognizes it. Boot up your computer and enter the system BIOS, usually by pressing the Delete key as soon as the computer turns on.
In the BIOS menu, look for options related to storage or drive configuration. Make sure your new SSD is detected in the list of drives. You may need to enable AHCI mode for the SATA controller to properly detect the SSD.
Save changes and exit BIOS. Your SSD should now be detectable by the operating system.
Step 7: Partition and Format the Drive
Once in Windows, you’ll need to partition and format the new drive before you can start using it.
Use the Disk Management utility to create a new partition on the drive. Select the full capacity and format it to NTFS file system. Give the volume a drive letter like F: or G:.
The drive will now show up in File Explorer ready for you to store data. You can migrate your operating system or install games and applications on the super fast SSD.
Tips for Connecting an SSD
Follow these tips for a seamless SSD installation:
- Update motherboard drivers and BIOS before installing SSD.
- Handle SSD carefully by edges to avoid ESD damage.
- Keep SATA and power cables securely connected.
- Double check SATA port alignment before inserting data cable.
- Initialize and format SSD in BIOS/OS after physical connection.
Troubleshooting SSD Connection Issues
If your SSD is not being detected properly by the BIOS or operating system, here are some troubleshooting steps:
- Re-seat SATA cable connections on both ends.
- Try a different SATA data cable if possible.
- Verify SATA controller mode is set to AHCI in BIOS.
- Try connecting SSD to another SATA port on motherboard.
- Check for latest SSD firmware and update if needed.
- Disable antivirus temporarily to eliminate conflict.
- Clear CMOS by removing motherboard battery for 30 secs.
In most cases, connection issues can be fixed by carefully re-checking all physical connections and motherboard BIOS settings. Consult your motherboard manual for SSD installation steps specific to your model.
Initializing an SSD After Connection
After you have physically connected your SSD to the motherboard, there are a few steps required to initialize it and prepare it for usage.
Enable AHCI Mode in BIOS
You need to make sure the SATA controller mode is set to AHCI (Advanced Host Controller Interface) in the BIOS. This allows the operating system to detect and communicate properly with the SSD.
Detect Drive in BIOS
In the BIOS, check that your newly connected SSD is being detected. This will confirm the physical SATA connection is working.
Create Partition
Using the Windows Disk Management tool, create a partition on the full capacity of the SSD drive.
Format Volume
In Disk Management, format the new partition to an NTFS file system. This prepares the SSD to store files.
Assign Drive Letter
Assign a drive letter like F: or G: to the new volume so it shows up as a drive in Windows File Explorer.
Install OS or Applications
With the SSD now initialized, you can choose to install your operating system, games, or applications on it. Enjoy the speed boost from your new SSD!
Cloning Existing Hard Drive to New SSD
For the easiest transition to your new SSD, you may want to clone your existing hard drive contents over to the new drive.
Here is the general process for cloning a drive:
- Connect both old and new drive to computer.
- Download drive cloning software.
- Select old drive as source.
- Select SSD as destination.
- Start cloning process.
- Swap SSD into old drive’s SATA port.
- Boot up computer from SSD.
Popular drive cloning software includes free options like Macrium Reflect, EaseUS Todo Backup, and Clonezilla. This makes migrating your OS, data, and applications to the new SSD quick and seamless.
SSD vs HDD: Key Differences
SSDs and HDDs store data differently, leading to differences in performance and longevity. Some key differences include:
| SSD | HDD | |
|---|---|---|
| Storage medium | NAND flash memory | Magnetic platters |
| Read/write speeds | Very fast, 500+ MB/s | Slower, 80-160 MB/s |
| Cost per GB | More expensive | Cheaper |
| Lifespan | Limited write cycles | Longer lasting |
| Power consumption | Lower | Higher |
| Noise level | Silent | Spinning plates audible |
SSDs excel at faster read/write speeds while HDDs have larger capacities for the price. Choosing SSD or HDD depends on your budget, performance needs, and use case.
Conclusion
Installing and connecting an SSD drive provides a great performance boost over traditional hard disk drives. By following the steps outlined in this guide, you can add an SSD to your PC build and get it up and running quickly.
The process involves connecting the data and power cables to open ports on the motherboard and PSU. After the physical connections are made, remember to initialize and format the drive in BIOS and OS. Take care when handling the SSD and double check all connections.
With your shiny new SSD installed, you can enjoy faster boot times, quicker application launches, and a snappier overall user experience. As SSD costs continue to decrease, they are becoming the default storage choice for modern computer builds.
