What You’ll Need
To copy an entire hard drive to a flash drive, you will need the following:
- The external or internal hard drive you want to copy. Hard drives come in a range of storage capacities, from small 16 GB drives to drives up to 16 TB or more. For copying an entire drive, your flash drive will need sufficient storage space to hold all the contents of the hard drive you want to copy.
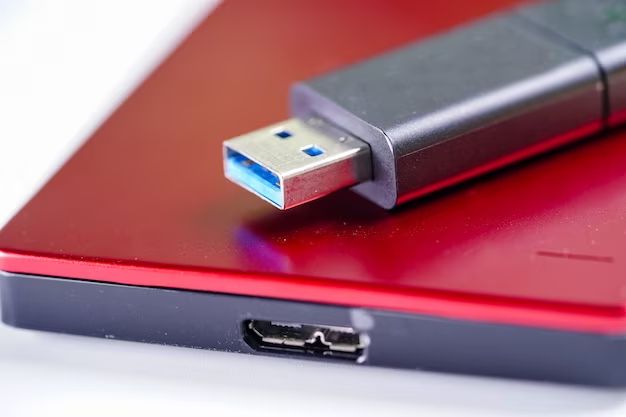
- A USB flash drive with enough storage capacity to hold the entire contents of the hard drive you want to copy. USB flash drives are available in capacities from 4 GB up to around 2 TB currently. Make sure to choose a flash drive that has at least as much storage space as the hard drive you want to copy.
- A computer with administrative access. You will need admin access on the computer in order to run disk imaging software and access all the files and folders you want to copy from the hard drive.
With these three key things – the hard drive you want to copy, a sufficiently large flash drive, and a computer you have admin rights on, you will have the basic equipment needed to copy an entire hard drive over to a flash drive.
Back Up Important Files
Before copying the entire hard drive, it’s a good idea to separately back up any crucial files and folders you don’t want to risk losing. This provides an extra layer of protection in case anything goes wrong during the drive copy process. According to SuperUser, many data copying tools will only copy active and undeleted data, so any archived or deleted files may not transfer over.
To back up important files:
- Identify any documents, photos, videos, or other data that cannot be replaced and would cause significant issues if lost.
- Copy these files to a separate external hard drive or cloud storage like Google Drive or Dropbox. This safeguards your most crucial data.
Backing up your most important files first ensures you have copies stored safely aside from the hard drive you’ll be copying. This way, even if something goes wrong later, you won’t lose anything critical.
Check Drive Health
Before copying your hard drive, it’s important to check for and repair any errors to ensure a successful copy. Issues like bad sectors, corrupted files or a failing drive can lead to copying errors or incomplete transfers.[1]
Use your operating system’s disk utility software (such as Windows’ CHKDSK or macOS Disk Utility) to analyze the hard drive and identify any problems. These tools can check for bad sectors, file system errors, and other issues. If any errors are found, try using the repair function to fix them.[2]
It’s best to fix any major hard drive problems before attempting to copy it. For example, if CHKDSK detects bad sectors, running a full format on the drive can remap those sectors. Repairing errors ensures your files and data will copy over intact and minimizes the chances of anything going wrong during the transfer process.
Formatting the hard drive will also wipe it clean, making sure there’s enough free space for the full backup. Once the drive checks out as healthy, move onto the next steps for a successful copy.
[1] https://recoverit.wondershare.com/computer-problem/common-hard-drive-problems-and-solution.html
[2] https://www.ontrack.com/en-us/blog/common-hard-drive-error-codes
Format the Flash Drive
Before formatting your flash drive, it’s important to back up any important files on it that you want to keep (1). This ensures you don’t lose data in the formatting process. According to Kingston, formatting a flash drive deletes the file system table and root folder to free up space (2). However, formatting also wipes all data, so back up what you need first.
To format the flash drive on Windows, use the Disk Management utility. Right click the Start menu and select “Disk Management”. Right click your flash drive and choose “Format”. On Mac, use the Disk Utility app. Click on your flash drive in the sidebar and click “Erase” at the top. Choose a name, format, and scheme, then click “Erase” to format the drive.
Formatting the drive before copying the hard drive allows you to wipe it completely and customize the format. This can improve performance, fix any corruption issues, and prepare the flash drive to receive the copied data.
Use Disk Imaging Software
Disk imaging software allows you to make an exact sector-by-sector copy of a hard drive. This perfectly duplicates the entire drive contents including the operating system, installed programs, settings, and files. Popular free disk imaging options include:
- Clonezilla – An open source disk imaging tool that supports cloning drives and partitions. It offers a simple interface and both GUI and command line versions (Software Testing Help).
- EaseUS Todo Backup – Provides scheduled backups, disk cloning, and flexible restore options. The free version can clone drives up to 300GB (Comparitech).
To image a drive using disk imaging software:
- Install and open the disk imaging program on your computer.
- Select the source drive to image. This is the hard drive you want to copy.
- Choose the destination drive. This is where the disk image will be created.
- Configure any options like compression level or sector-by-sector copy.
- Start the disk imaging process. This will fully copy the contents of the entire source drive.
- When finished, shut down and disconnect the source drive.
- Boot the computer from the destination drive to verify it works.
Imaging software provides an easy, automated way to fully duplicate a drive. Follow the steps carefully and allow time for creating large images.
Copy the Drive
Using disk imaging software is the most efficient way to make an exact copy of your entire hard drive. Popular free options include Clonezilla, Macrium Reflect Free, and AOMEI Backupper. Here are the steps to copy your drive using disk imaging software:
1. Connect the destination flash drive to your computer. Make sure it has enough storage space for the entire contents of your hard drive. The flash drive will be erased in the copying process.
2. Launch your disk imaging software. Select the source drive (your hard drive) and the destination drive (your flash drive).
3. Select the cloning option to make an exact duplicate. The software will copy all contents from the hard drive to the flash drive.
4. The time this takes depends on your drive size. For example, cloning a 1 TB hard drive to a USB 3.0 flash drive takes 2-4 hours typically [1]. With USB 2.0, it can take 6+ hours.
5. Once complete, safely eject the flash drive and you have your cloned backup.
Follow your software’s specific instructions for optimal drive cloning. The advantage of disk imaging is it copies the structure and partitions intact for an exact clone.
Verify the Copy
After the cloning process is complete, it’s crucial to verify that the entire hard drive was copied over successfully without any errors. You can do this by comparing the file structures between the original hard drive and the flash drive copy.
First, connect both drives to the computer. Open up File Explorer and navigate to the root directories of each drive. Look through the folders and subfolders to confirm that the structure on both drives matches exactly. Every folder and file from the original should now exist on the flash drive. If any files or folders are missing from the flash drive, then there was an issue with the cloning process.
Next, you can scan both drives for errors using the Error-checking tool in Windows. Right-click on each drive letter, select Properties > Tools > Check. This will scan the drive and alert you of any errors found. The flash drive copy should have no errors reported after verification.
Checking both the file structures and error logs will confirm whether the entire hard drive cloned over successfully without any data corruption or transfer issues. It’s important to be thorough in validating the cloning process before relying on the flash drive as your backup copy. If any discrepancies are found, you may need to repeat the disk imaging process until a complete and accurate clone is achieved. For more information, see this StackExchange post on detecting file transfer errors.
Troubleshooting
The hard drive cloning process can sometimes encounter errors that prevent a successful copy. Here are some common troubleshooting solutions if your clone fails or data is lost:
If you get an error about bad sectors, try running a disk check to identify and repair any issues on the source drive before attempting the clone again. On Windows, use the CHKDSK utility. Bad sectors are physical defects on the hard drive and need to be mapped out.
If some files fail to copy or seem corrupted on the flash drive, the target drive may be faulty. Try re-formatting the flash drive and run a disk check on it as well before trying another clone. The flash drive should be in good health to receive the copied data.
If the cloning software encounters read errors from the source hard drive, the drive itself could be failing. Try a different SATA/USB cable or port connection to rule out a bad cable. Failing drives can develop bad sectors over time.
If critical files don’t make it to the flash drive, you may be able to recover them using data recovery software. Stop using the source and target drives to avoid overwriting the lost data. Recovering data from the original hard drive has the best chance of success.
Lastly, you can contact a professional data recovery service for assistance if DIY solutions are unsuccessful. They use specialized tools to repair drives and extract lost data.
Maintain the Flash Drive
Properly ejecting and storing the flash drive are important steps for maintaining its health and lifespan. Before unplugging the flash drive from your computer, be sure to use the “Safely Remove Hardware” option to avoid potential data corruption.
When not in use, store the flash drive in a cool, dry place away from heat, liquids, and magnetic fields. Avoid touching the metal contacts to prevent transfer of oils from your fingers onto the drive.
Making incremental updates instead of full drive copies can help extend the flash drive’s lifespan. Each time you write data to a flash drive, it causes a small amount of deterioration. Frequent full drive copies can wear it out faster over time. Instead, just periodically copy over any files that have changed since the last backup.
You can use the “modified date” filters in your backup software to only copy newer or changed files. This reduces unnecessary writes and preserves the longevity of the flash drive.
Alternative Methods
There are other tools available besides disk imaging software that can be used to clone a hard drive. Two popular alternatives are using the command line and file syncing.
The command line can be a quick way to clone drives in Windows. Some common command line tools include xcopy, robocopy, and the native Windows tool DiskPart. These allow you to copy or mirror the contents of one drive to another via the command prompt. The command line works best for simple drive cloning tasks and advanced users.
File syncing tools like FreeFileSync can also synchronize the contents of one drive to another. This copies new or changed files incrementally after the initial clone. File syncing is useful for routine backups or keeping an external clone drive updated, but may not be the best choice for a full one-time clone.
In summary, disk imaging software provides the most complete and foolproof drive clones. But the command line or file syncing can be quicker alternatives depending on your specific needs and level of computer expertise. The best approach depends on the scenario.
