Keeping your Windows PC running smoothly is important. Over time, unnecessary files and system data can build up and slow down your computer. Doing a disk cleanup regularly can free up valuable storage space and improve system performance.
What is Disk Cleanup?
Disk cleanup is a built-in Windows tool that searches for and deletes unnecessary files and system data. This includes temporary internet files, offline webpages, downloaded program files, temporary files, and more. By removing this data, disk cleanup frees up storage space on your hard drive and helps keep your computer running efficiently.
Why Should I Do a Disk Cleanup?
Here are some key reasons to do a regular disk cleanup on your Windows PC:
- Frees up storage space – Disk cleanup can help recover gigabytes of storage space on your hard drive by removing unnecessary files.
- Improves system performance – Deleting temporary files and data reduces clutter and allows Windows to run faster.
- Enhances security – Temporary internet files may contain sensitive information like passwords or browsing history. Disk cleanup wipes them securely.
- Fixes issues – Built up files can sometimes cause errors or glitches. Disk cleanup gives your PC a fresh start.
- Prepares for upgrades – Freeing up disk space prepares your system for major Windows upgrades which require additional storage.
Disk cleanup is recommended at least monthly, if not more often, to keep your computer optimized.
How to Access Disk Cleanup
Accessing the disk cleanup utility is easy. Here are the steps:
- Open the Start menu and search for “Disk Cleanup”. Select the Disk Cleanup desktop app.
- A disk space analysis window will open and scan your system. This may take several minutes.
- Once complete, the window will show how much space can be recovered from different areas.
- Check the boxes next to the file types you want to delete. Make sure “Temporary internet files” is selected.
- Click “OK” and then “Delete Files” to remove the selected data.
- A confirmation prompt will appear. Click “Yes” to permanently delete the files.
- Once finished, you will see a report of how much space was freed up.
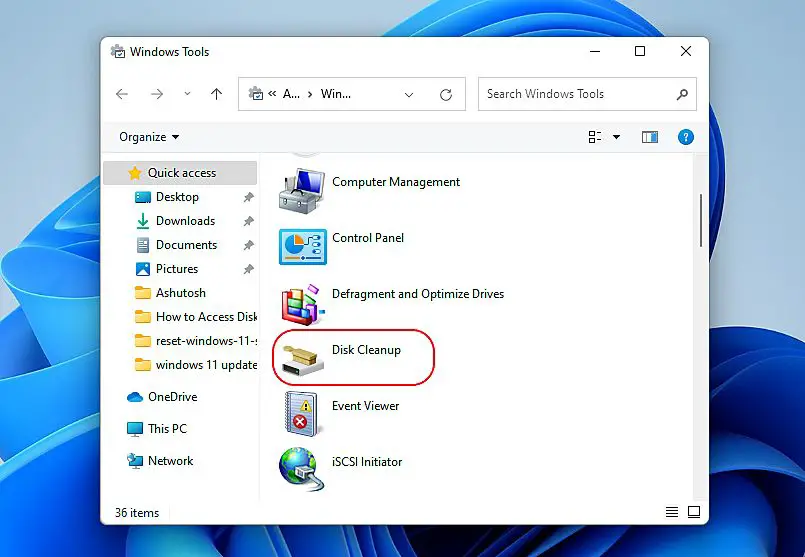
The Disk Cleanup utility is located in the System Tools folder by default in Windows 10 and 11. You can also search for it easily from the Start menu.
What Does Disk Cleanup Delete?
Disk cleanup searches your hard drive and lets you remove a variety of unnecessary files. Here are some of the main things it can delete:
- Temporary internet files – Browser cache and cookies, browsing history, web form auto-fill data.
- Temporary files – .tmp files, general program files marked as temporary.
- Recycle Bin – Permanently deletes files in your Recycle Bin.
- System error memory dump files – Debugging files created during app crashes.
- Windows Defender and update files – Old antivirus definitions and Windows Update installers.
- Windows log files – Event logs, network status logs, and more.
- Previous Windows installation files – Leftover data from past Windows upgrades.
The disk cleanup scan will show how much space can be recovered from each file type. You can choose what you want to delete before running the cleanup.
Should I Clean the Registry?
Disk Cleanup offers an option to clean up your Windows registry, but this is not recommended for regular cleanups. The registry contains important system settings that should not be changed if you don’t know what you’re doing.
Cleaning the registry has almost no impact on system performance for regular users. It risks breaking your operating system if done improperly. Leave the registry cleanup option unchecked unless directed to enable it by a trusted technical expert.
Tips for an Effective Disk Cleanup
Follow these tips to make sure your disk cleanups are as effective as possible:
- Close all open programs – This allows all temporary files to be deleted.
- Run disk cleanup as administrator – This gives it full access to delete protected files.
- Select all file types to delete – The more you delete, the more space you’ll recover.
- Preview the cleanup first – Use the preview option to see exactly what will be deleted.
- Clean up often – Set a monthly or weekly calendar reminder to do cleanups.
Other Disk Maintenance Tools
In addition to disk cleanup, there are other maintenance tools that are useful for keeping your system optimized. Here are a few to consider:
Disk Defragmenter
Defrag consolidates fragmented files on your hard drive so they take up less space. This improves speed and performance.
Check Disk
Scans drive errors and attempts to repair disk damage or bad sectors. Helpful for troubleshooting hardware problems.
Storage Sense
Built into Windows 10 and 11, this tool manages storage by deleting unnecessary files and emptying the recycle bin automatically.
CCleaner
A free third-party utility for cleaning temporary files, browser data, registry issues, and invalid shortcuts.
When Should I Do Disk Cleanup?
Aim to do a full disk cleanup at least once a month. It’s also a good idea any time you notice your PC running slower than usual. Other common times to consider a cleanup include:
- Before a major Windows update or upgrade – Frees up needed space.
- After browsing online extensively – Clears temporary internet files.
- When switching Windows user accounts – Clears temporary files.
- After removing programs – Deletes related leftovers.
- When troubleshooting PC problems – Can help identify performance issues.
Set a reminder to do cleanups regularly before small issues turn into bigger headaches down the road.
How to Automate Disk Cleanup
Doing manual cleanups takes time. Luckily, there are ways to automate the process in Windows.
Using Storage Sense
Windows 10 and 11 have a built-in tool called Storage Sense that can schedule cleanups automatically. Here’s how to enable it:
- Go to Settings > System > Storage.
- Under “Storage Sense,” turn on “Run Storage Sense automatically.”
- Choose how often you want cleanups to run.
- Enable “Delete temporary files that apps aren’t using” for maximum cleanup.
Storage Sense will now clean your system on the chosen schedule without any effort on your part.
Using Task Scheduler
You can also automate Disk Cleanup using Windows Task Scheduler as follows:
- Open Task Scheduler.
- Click “Create Task” in the right pane.
- Name it “Disk Cleanup” and select “Run with highest privileges.”
- On the Triggers tab, set the schedule. For example, monthly.
- On the Actions tab, select “Start a program” and choose Disk Cleanup.
- Click OK to save the task.
This will create an automated task that launches Disk Cleanup on your set schedule.
How to Do Disk Cleanup from Command Prompt
Disk cleanup can also be performed from the Windows Command Prompt for advanced users. Here are the steps:
- Open an elevated Command Prompt window.
- Type the command: cleanmgr
- This will launch the disk space analysis window.
- Select the desired files to delete and click OK.
- The cleanup will run from the command line.
- Use the /s switch after cleanmgr for an automatic cleanup without prompts.
Some useful Command Prompt cleanup commands include:
| Command | Action |
|---|---|
| cleanmgr /sagerun:1 | Aggressive disk cleanup |
| cleanmgr /sageset:1 | Delete previous Windows installation files |
| cleanmgr /sagerun:2 | Clean temporary files |
| cleanmgr /sagerun:3 | Empty recycle bin |
The /sagerun switch lets you specify file types, while /sageset changes configuration settings.
disk cleanup problems and solutions
Disk Cleanup is generally quite safe to use, but occasionally issues can arise. Here are some potential problems and how to fix them:
Problem: Disk Cleanup Won’t Open
If Disk Cleanup won’t launch or open, try these troubleshooting steps:
- Restart your computer – This resets processes that may be interfering.
- Run anti-malware scan – An infection could be blocking Disk Cleanup.
- Open it as admin – Right-click and select “Run as administrator”
- Re-register .dll files – Open an elevated Command Prompt and run “sfc /scannow”.
Problem: Disk Cleanup Is Very Slow
A sluggish Disk Cleanup process usually indicates a fragmented hard drive. Try defragmenting your drive first before running cleanup again.
Problem: Low Disk Space After Cleanup
If a disk cleanup isn’t freeing up much space, your storage may be taken up by large files not targeted by the cleanup. Try deleting or moving large files, videos, photos or games you no longer need.
Problem: Cleanup Delete Important Files
Always preview what Disk Cleanup plans to delete first. If it wrongly targets important files, uncheck those file types in the selection window before proceeding.
Conclusion
Doing regular disk cleanups is one of the best ways to keep a Windows PC running smoothly and maintain available storage space. The built-in Disk Cleanup utility provides an easy automated way to target and delete temporary files, internet cache, system logs and other unnecessary data.
Remember to use Disk Cleanup at least monthly, and whenever your computer starts feeling sluggish. Combined with other maintenance tools like defragging, it will help ensure peak Windows performance.
