Using a solid state drive (SSD) as your computer’s boot drive can greatly improve your system’s performance. An SSD has much faster read/write speeds compared to a traditional hard disk drive (HDD), which means your computer can boot up and launch applications much quicker. Enabling your SSD as the primary boot drive is usually simple process. Here is a step-by-step guide on how to make your SSD the boot drive.
Check if your computer supports SSDs
The first thing you need to do is make sure your computer is actually compatible with SSDs. Most modern desktops and laptops support SSDs out of the box, but older systems may not. Here are some things to check:
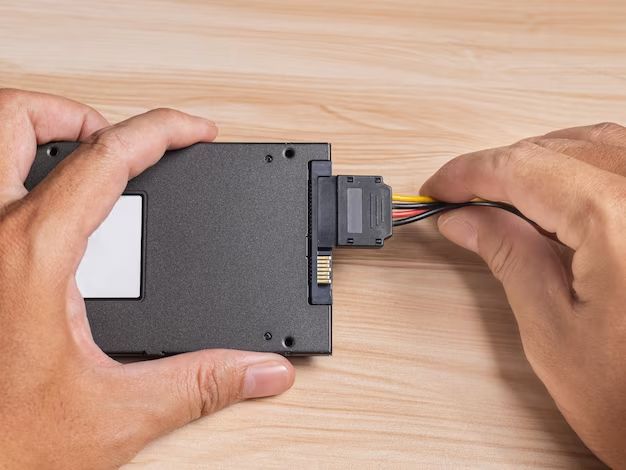
- Confirm your computer has SATA ports – Most SSDs connect via SATA, so you’ll need open SATA ports on your motherboard or an M.2 slot if using an M.2 SSD.
- Check for UEFI/EFI boot – Older BIOS systems may not work properly with SSDs. Make sure your computer has UEFI or EFI boot enabled.
- See if your OS supports SSDs – Windows 7 and newer, Mac OSX, and Linux all have native SSD support.
As long as your system meets those requirements, you should be able to install and boot from an SSD without issues. If your computer is very old, you may need to do some extra configuration or even upgrade parts to use an SSD.
Choose your SSD
Once you’ve confirmed compatibility, next you’ll need to pick out an SSD to use as your boot drive. Here are some tips:
- Get a 2.5″ SATA SSD – The most common and affordable option compatible with most desktops and laptops. Look for a capacity between 240GB to 1TB.
- Consider an M.2 NVMe SSD – For newer systems, an M.2 SSD offers incredible speeds, though costs more. Make sure your motherboard has an M.2 slot.
- Get a drive at least 2x your used space – Don’t get an SSD equal to your currently used space. Leave room for the OS and future growth.
- Stick with major brands – Samsung, Crucial, Western Digital, and Kingston make excellent SSDs.
For a boot drive, a SATA SSD around 500GB from a known brand provides the best value and performance for most users.
Back up your data
Before doing any drive changes, it’s critical to back up your data. Cloning your existing drive to the SSD can sometimes fail, so you don’t want to lose any important files or documents in the process.
Here are some backup options to consider before swapping drives:
- Clone to an external drive – Use cloning software to make a full copy of your current drive.
- Back up critical files – Manually copy important docs, photos, etc. to an external disk or cloud storage.
- Perform a system image – Create a system image backup you can restore later if needed.
Taking those preventative measures ensures you have restore points in case anything goes wrong down the road. Now you’re ready to move on to the actual SSD installation.
Physically install the SSD
To enable your new SSD as the boot drive, you’ll first need to physically install it in your desktop or laptop. This involves:
- Desktops – Mounting the 2.5″ SSD in an open 3.5″ drive bay using screws or a mounting bracket. M.2 drives insert directly into an M.2 slot on the motherboard.
- Laptops – Replacing the existing hard drive with the new SSD by removing the bottom cover and swapping out the drives.
Refer to your computer or motherboard manual for exact instructions on accessing the drive bays and removing/inserting drives. The process takes about 5-10 minutes once you have the computer open.
Install a fresh OS (recommended)
For best performance, it’s ideal to do a fresh OS installation on your new SSD. This avoids transferring any clutter or optimization issues from the old HDD. Here’s how to install a fresh copy of your operating system:
- Boot from the OS installation media – A bootable USB or DVD.
- Delete all existing partitions on the SSD. You want the drive blank.
- Go through the OS installer and select the SSD as the installation target.
- Install the OS, drivers, applications, and restore your data/files.
You’ll want to reinstall any applications and programs you need, but your files can simply be copied back over from backups.
Clean installing Windows 10
For a clean install of Windows 10 from scratch, follow these specific steps:
- Create bootable Windows 10 installation media on a USB drive.
- Boot from the media, then delete all partitions on the SSD, leaving it unallocated.
- Hit Next, then select the SSD and click New to create a fresh partition.
- Format the partition and start the clean Windows 10 installation.
- Install drivers, apps, and restore personal files when complete.
Clean installing Mac OSX
Here is how to cleanly install the latest MacOS version on an SSD:
- Create a bootable macOS installer drive on a USB stick.
- Boot from the USB, open Disk Utility, and format the SSD as GUID Partition Map.
- Quit Disk Utility, then install macOS cleanly onto the empty SSD.
- Once finished, reboot and hold Option to select the SSD as the startup disk.
- Restore apps and personal data from your backups.
Clone your existing OS drive
If you don’t want to do a fresh OS installation, cloning your existing drive over to the new SSD is an easier process. This duplicates your current OS installation bit-for-bit. Here’s how to clone your drive:
- Install the SSD in your computer if you haven’t already.
- Boot into the OS on your current hard drive.
- Download cloning software like Macrium Reflect or Acronis.
- Run the cloning software and select the source and destination drives.
- Wait for the cloning process to fully complete.
Cloning takes a bit longer but saves you having to reinstall everything from scratch. Just make sure your used space isn’t greater than the SSD’s capacity.
Cloning tips
Follow these tips for smooth sailing when cloning your drive:
- Delete any unnecessary files and apps to free up space beforehand.
- Defragment your HDD first for quicker copying.
- Use a SATA to USB adapter if needed to access both drives.
- Disconnect any other drives before cloning to avoid errors.
Re-activate your license
After installing your OS on the new SSD via either a clean install or cloning, you may need to reactivate your license:
- Windows – You can often just skip entering a license key during install, and Windows will automatically activate online after detecting the hardware change.
- Mac OSX – MacOS should automatically activate online without needing to re-enter your Apple ID.
- Linux – No activation needed. Set up Linux as normal once installed on the new SSD.
As long as you are using the same computer, the OS should activate without issue on the new drive hardware.
Configure your BIOS
Next, you need to configure your BIOS/UEFI to boot from the SSD rather than your old hard drive. Here is how:
- Reboot your computer and enter BIOS setup, usually by pressing F2, F10, or Delete.
- Navigate to the Boot or Boot Priority section.
- Change the first boot device to your newly installed SSD.
- Save changes and exit BIOS to complete the process.
On the next reboot, your system should automatically boot from the SSD. If not, you may need to press a key at startup to bring up the boot menu and manually select the SSD.
Configuring boot order
When setting the boot order in your BIOS:
- Move the SSD to the top of the boot order list.
- Make sure CSM/legacy boot is disabled if using UEFI.
- Disable unused boot options like network PXE boot.
Correctly ordering boot devices prevents issues where the wrong drive gets booted from.
Migrate your data and programs
At this point your OS should be up and running on the new SSD. Now you just need to migrate your data, files, and apps over from your old hard drive. Options for doing this include:
- Copy and paste files and folders directly over to the SSD.
- Use file backup software to restore data archives to the new drive.
- Reinstall applications fresh on the SSD.
- Copy entire program folders from Program Files to migrate apps.
Take this opportunity to clean out old data you no longer need. Be selective in what you migrate over. Once finished, double check that all your critical files, documents, and programs are present on the SSD.
Optimize your SSD
To get optimal boot time and performance from your new SSD, it helps to customize some OS optimizations specific to solid state drives. Here are some tweaks to make:
- Enable TRIM in Windows/Mac/Linux to maintain SSD performance.
- Disable Superfetch and Prefetch in Windows to avoid unnecessary writes.
- Set your virtual memory/swap file toystem managed size.
- Disable hibernation to prevent huge swap files on the SSD.
You can also use third-party SSD optimization tools for advanced tweaks. But the steps above provide the core tuning needed on most systems.
Securely erase old drive
Once your SSD is all set up and running as the new boot drive, lastly you’ll want to consider erasing your old HDD securely if it contained any sensitive information. Options include:
- Quick format – A fast full format erases all data simply.
- Secure erase – Use disk utility tools to overwrite all sectors.
- Destroy physically – If highly confidential data was stored, destroy the platter.
Quick formatting is fine for wiping most old drives being reused or recycled. But use more secure methods if totally eliminating your data footprint is important.
Conclusion
Switching your computer’s boot drive from a hard disk to a speedy SSD is one of the best upgrades you can make. By following the steps in this guide, you’ll be able to smoothly transition your OS, apps, and data over to the new SSD while keeping downtime to a minimum.
The huge gains in boot up times and overall system responsiveness make it a worthwhile upgrade. Just be sure to back up important data in advance and set up the SSD as outlined above. Once configured properly, you’ll be able to enjoy your computer like it’s brand new again!
