Introduce Error 2100
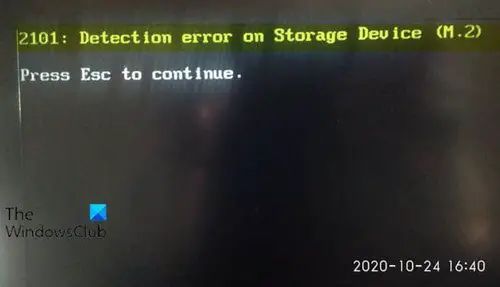
Error 2100 indicates that the M.2 storage device is not being properly detected by the system BIOS or operating system. This error typically appears during boot up or when trying to access the M.2 drive.
The main causes for Error 2100 are either hardware or software related. On the hardware side, the M.2 slot, drive itself, or connecting cables could have an issue. Software wise, outdated drivers, firmware or BIOS settings could be preventing detection.
Fixing Error 2100 will likely involve steps like updating drivers, changing BIOS settings related to M.2 detection, reseating or replacing the physical M.2 drive, trying different cables or slots, or resetting the CMOS. The goal is to determine if it is a physical hardware failure or if the drive is simply not being detected properly in software.1
Update Storage Drivers
One potential cause of error 2100 is outdated storage drivers. Storage drivers control how your PC communicates with storage devices like hard drives and SSDs. Over time, storage drivers can become outdated as new firmware revisions are released for your specific storage device or motherboard chipset.
To update your storage drivers:
- Go to the website for the manufacturer of your storage device or motherboard chipset.
- Navigate to the support or downloads section and look for the latest SATA, NVMe, or RAID drivers available for your model.
- Download and install the updated storage drivers.
- Reboot your PC to allow the new drivers to load.
With the latest storage drivers installed, error 2100 may be resolved if the old drivers were causing a compatibility issue. Be sure to get the drivers directly from the manufacturer to ensure you’re installing the correct optimized drivers for your hardware.
Check BIOS Settings
The first thing to check is your motherboard’s BIOS or UEFI settings to make sure the M.2 slot is properly enabled and configured. According to sources, you’ll want to enter the BIOS setup screen on startup and locate the storage or SATA settings. There should be a setting to enable the M.2 slot, as well as options to set the mode to AHCI, NVMe, or other relevant protocols for your M.2 drive. Make sure the appropriate mode is selected based on your drive type.
For example, on ASUS motherboards, you can press F2 or Delete during boot to access the BIOS, then go to “Advanced” settings and find the storage configurations. Enable M.2 and adjust the transfer mode if needed. Other manufacturers like MSI may have similar steps to verify M.2 is active.
After double checking the BIOS settings are correct, save changes and exit. This should allow the motherboard and OS to detect the M.2 device properly and potentially resolve error 2100 if it was a configuration issue.
Reseat M.2 Device
One potential fix is to reseat the M.2 device in its slot on the motherboard. This involves the following steps:
- Power down the computer fully and open up the case to access the motherboard.
- Locate the M.2 slot where the M.2 SSD is installed. It will likely have a small screw holding the drive in place.
- Gently remove the M.2 SSD from the slot by pulling it straight out. Be careful not to bend the drive.
- Inspect the M.2 slot for any obstructions or damage. Use compressed air to blow out any dust.
- Reinsert the M.2 SSD back into the slot and gently press down until it clicks into place.
- Replace the small screw to secure the drive in the slot.
- Close up the PC case and reassemble components.
- Power the PC back on. The act of reseating can help make a better connection and resolve detection issues.
After booting back up, try accessing the M.2 drive again. If the 2100 error persists, additional troubleshooting may be needed. But reseating the drive is an easy first step that has resolved this problem for many users (source).
Update BIOS
Identifying your motherboard’s current BIOS version is an important first step when troubleshooting error 2100. You can find the BIOS version through your system settings. Check with your motherboard manufacturer’s website to see if any BIOS updates are available that address detection issues with M.2 drives.
If an updated BIOS version is available, download it from the manufacturer’s website. Make sure to follow all instructions carefully when flashing the BIOS, as any mistakes during this process can render the motherboard unusable. Flashing the latest BIOS version may resolve error 2100 if it contains fixes related to M.2 device detection.
Try Different Slot
If your motherboard has multiple M.2 slots available, try inserting the M.2 drive into a different slot and boot your PC to see if the error persists (Electronicshub). Many modern motherboards have more than one M.2 slot, with the slots connected to different lanes and controllers (LinusTechTips). Moving the M.2 drive to a different slot can help isolate if the issue is related to that specific M.2 slot connector or controller.
For example, some motherboards have one slot connected directly to the CPU, while another M.2 slot connects through the chipset. Swapping to the other available slot may allow your M.2 drive to be detected properly if there is an issue with the original slot.
After moving the M.2 drive and booting up, check if the 2100 detection error persists. If the drive is detected normally in the new slot, then the original M.2 slot may be damaged or have a loose connection. If the error continues even after changing M.2 slots, then the issue is likely not related to the physical slot.
Reset CMOS
Resetting the CMOS can help resolve detection issues with M.2 drives. This clears any corrupted BIOS settings that may be preventing the M.2 drive from being detected properly.
To reset the CMOS:
- Locate the CMOS reset jumper on your motherboard. This is usually near the CMOS battery.
- Power down your computer and unplug the power cable.
- Use a jumper cap or metal object to short the CMOS pins for about 10 seconds.
- Remove the jumper cap and plug the power cable back in.
Resetting the CMOS will reset your BIOS settings to default, so you’ll need to go back in and reconfigure any custom settings. But this should allow your motherboard to redetect the M.2 drive properly. See this video for a visual guide on resetting CMOS.
Test M.2 in Another PC
One way to troubleshoot the 2100 detection error is to try installing the M.2 drive in another computer’s M.2 slot. This can help determine if the issue is with the drive itself or something on your original PC.
To test the M.2 drive in another PC:
- Power off both computers and unplug them.
- Remove the M.2 drive from your original PC. Refer to your computer manual for instructions on accessing the M.2 slot.
- Insert the M.2 drive into the M.2 slot on the second PC. Make sure it is fully seated.
- Boot up the second PC and enter the BIOS menu. Verify that the BIOS detects the M.2 drive.
- If the second PC’s BIOS detects the M.2 drive, the issue is likely with the original PC’s motherboard, BIOS settings, etc. If the second PC also cannot detect the drive, the drive itself may be faulty.
Testing the M.2 SSD in another system is an easy way to determine if the 2100 error stems from a problem with the drive or the original PC. This can help narrow down troubleshooting steps moving forward. (Source, Source)
Replace Cables
One potential cause of the 2100 detection error is faulty or damaged cabling connecting the M.2 drive. The data and power cables play a crucial role in allowing the motherboard to recognize the storage device. Trying new SATA data and power cables specifically designed for M.2 drives can help resolve the issue.
Cables can become loose over time or get crimped, which interrupts the connection. Faulty or inadequate cabling is a common reason why a disk may not be detected properly. Replacing the existing cables with brand new ones can rule out whether cabling issues are causing the 2100 error.
High quality M.2 SATA adapter cables like the Micro SATA M.2 to SATA adapter ensure a reliable physical link between the drive and the motherboard SATA ports. Swapping cables takes just a few minutes and costs little compared to replacing the entire M.2 drive itself.
Before attempting removal or installation, it’s advisable to use anti-static precautions. Make sure to disconnect power before changing any cables. If new SATA cables allow the disk to be recognized properly, it confirms the original cables were likely faulty.
Replace M.2 Drive
If the M.2 drive is still not detected after trying all the troubleshooting steps, the drive itself may be faulty or dead. In this case, the best solution is to replace the M.2 drive with a new one and reinstall the operating system.
To replace the M.2 drive:
- Shut down the computer and unplug all cables.
- Open up the computer case and locate the M.2 slot on the motherboard.
- Gently remove the old M.2 drive from the slot by pulling it out at an angle.
- Insert the new M.2 drive into the slot at a 45 degree angle, then press down and secure with the screw.
- Close up the computer case and reboot.
- Format the new M.2 drive and reinstall the operating system from scratch. Be sure to back up any important data first.
Replacing the M.2 drive and performing a clean OS install is the best way to resolve error 2100 if all else fails. This ensures you have a fresh drive without any software issues causing detection problems (Source). With a new M.2 drive, the system should be able to fully recognize and utilize it.
