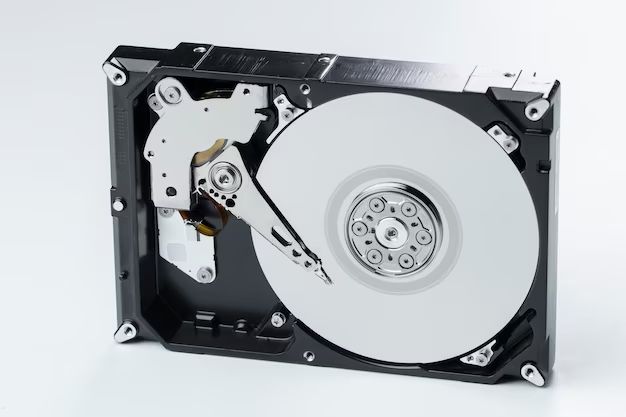
What is a Hard Drive Image?
An image of a hard drive is an exact sector-by-sector copy of the drive. Imaging a hard drive takes all the contents on the drive and creates a file with the contents formatted in such a way that the image can be restored or deployed to other drives. Imaging a hard drive allows you to back up the entire contents of a drive or clone the drive to another drive as needed.
A hard drive image is also sometimes referred to as a disk image or a ghost image. The image file contains a snapshot of everything on the hard drive including the operating system, installed software, settings, files, and folders. Imaging a hard drive captures the drive in its exact state so that you can restore that identical state to the same drive or a new drive at a later time if needed.
Why Would I Want to Image a Hard Drive?
There are several reasons you may want to create an image of your Windows hard drive:
- To back up the contents of the drive for recovery later in case of a system failure, hardware issue, or data loss. Imaging the drive provides a snapshot you can return to.
- To clone the contents to another drive when upgrading to a larger drive or replacing an old drive.
- To deploy the same image to multiple drives when configuring multiple identical systems.
- To restore your system to a known good configuration if there are problems.
- To migrate your operating system, apps, and files to new hardware.
- To extract individual files and folders from the image if needed.
Imaging is a more comprehensive backup option than simple file backups. File backups will not allow you to clone drives or restore your full system configuration. Imaging captures the entire drive for full system recovery if needed.
How Do I Image a Hard Drive in Windows?
There are a few different ways you can image a hard drive in Windows. Here are some of the recommended options:
Use Backup and Restore (Windows 7)
Windows 7 has a built-in Backup and Restore utility that can create system images. This is a good option if you want an imaging solution that comes with Windows:
- Open Backup and Restore by clicking the Start Menu and typing “backup” in the search bar.
- Click “Create a system image” on the left pane of the Backup and Restore window.
- Select the destination to save the system image file. An external hard drive or network location is recommended.
- Check the drives you want to image.
- Click “Start Backup” to begin imaging the drives.
The Windows Backup and Restore utility will create a complete system image file of your drive(s) to the destination you selected. You can return to Backup and Restore later to restore the image if needed.
Use Macrium Reflect (Free Option)
Macrium Reflect is a popular free disk imaging utility for Windows. It provides an easy wizard-based interface for creating drive images:
- Download and install Macrium Reflect.
- Launch Macrium Reflect.
- Click “Create an image of the partition(s) required to backup and restore Windows”.
- Select the drive(s) to image.
- Choose a destination to save the image file.
- Click Finish to start the imaging process.
Macrium will create a compressed image file of the selected drive(s) in the location you specify. You can then restore the image through Macrium if needed later on.
Use Disk Management
Windows Disk Management utility also provides basic imaging capabilities. This uses the native Windows image (WIM) file format instead of proprietary image formats.
- Open Disk Management (diskmgmt.msc).
- Right-click the disk you want to image and select “Capture Image”.
- Enter a name and description for the image.
- Select a destination to save the WIM image file.
- Click “Start” to start the imaging process.
This will create a WIM image file that can be restored to the same drive or deployed to other drives later on.
Use Third-Party Disk Cloning Software
There are many third-party disk cloning, backup, and imaging tools available beyond the options above, including:
- Acronis True Image
- Paragon Backup and Recovery
- AOMEI Backupper
- EaseUS Todo Backup
- Clonezilla
These tools provide additional features around scheduling, compression, encryption, incremental imaging, and more. Most offer free versions with limited functionality or paid versions with full features.
How Do I Restore a Hard Drive Image?
The process of restoring or deploying a hard drive image will vary depending on the utility used to create the image. But in general, the process looks like:
- Boot from the recovery media or utility that was used to capture the original image.
- Locate the image file and select it.
- Choose the destination drive to deploy the image to.
- Start the restoration process.
The imaging utility will then take the image file and write all the contents back to the destination drive to recreate the exact state of the drive at the time of imaging. The process may require deleting partitions or reformatting the target drive first to prepare it to accept the restored image.
When using the built-in Windows Backup and Restore utility, you can simply go back into Backup and Restore and choose to restore your system image to reboot and walk through a wizard to restore the image to the same or a new drive.
Important Considerations
Keep these important considerations in mind when imaging a hard drive in Windows:
- Destruction of existing data – Any data on the target drive will be deleted and overwritten by restoring the image.
- Disconnect other drives – Disconnect any other drives during imaging to avoid accidentally deleting or overwriting data on them.
- Imaging takes time – Imaging a drive can take hours depending on the size of the drive and speed of the system.
- Verify images – Always verify images after creation and validate that you can successfully restore them.
- Store images safely – Keep image files safe from corruption, damage or deletion.
Use Imaged Drives on Different Hardware
If the target hardware to restore an image to is different than the original hardware, there are some additional steps needed. The new hardware may have different storage controllers, a different system chipset, or other distinct components that require additional driver installation and Sysprep system preparation in order for the restored image operating system to function properly.
Some tips for deploying images to dissimilar hardware include:
- Use Sysprep to generalize the image before capturing it from the reference system.
- Install storage controller and chipset drivers for the new hardware into the image.
- Expand critical system partitions before imaging to allow room for new hardware drivers.
- Reactivate Windows after imaging to the new hardware.
With proper Sysprep and driver injection, you can adapt an image from one system to work with very different hardware. This allows broad image distribution across varied hardware configurations.
Image an External USB Drive
You can also use these imaging techniques to make an image backup of an external USB hard drive. The steps are basically the same as imaging an internal drive:
- Connect the external drive you want to image.
- Follow the same imaging procedure as outlined above.
- Select the external drive to image when prompted.
- Choose a destination to save the image file.
Imaging the external drive will capture all the data on the external drive into a single image file that can be restored later. This is useful for creating a full backup of the external drive that goes beyond just copying files.
Conclusion
Imaging a hard drive in Windows is a valuable technique for full system backup, drive cloning, and restoration purposes. Options like Windows Backup and Restore, Macrium Reflect, and third party cloning tools provide straightforward imaging capabilities accessible to most users. Just be sure to store the image file safely and validate that it can be restored properly before relying on it for disaster recovery needs.
