What is a recovery disk?
A recovery disk is a bootable disk that contains a copy of the operating system and recovery tools that can be used to restore your computer back to its original factory state. It is an essential tool to create when you first get your computer, in case you ever experience system crashes, virus infections, or other problems down the road. Having a recovery disk allows you to reformat your hard drive and reinstall the OS without needing the original OS discs.
For Asus computers, creating a recovery disk will generate a bootable USB flash drive or DVD that contains the Asus recovery partition stored on your hard drive. This partition contains the Windows operating system, Asus software, drivers, and other pre-installed applications. The recovery disk essentially creates a backup copy of this partition so you can use it to restore your Asus computer back to the state it was in when you first bought it.
Why should I make a recovery disk?
There are a few key reasons why it’s highly recommended to make a recovery disk for your Asus computer:
– Allows you to reset your PC if it becomes unstable or experiences major software issues. Restoring from the recovery disk will wipe out any software problems and return your operating system and programs back to their original state.
– Lets you reinstall the OS if you replace the hard drive or SSD. The recovery disk has your license for Windows and the Asus software, so you can reactivate them on new drive installations.
– Provides a safety net if your boot drive fails or becomes corrupted. Booting from the recovery disk will let you access recovery tools to try fixing the drive or reset everything.
– Can be used to restore your PC back to factory settings if you sell it or give it away. Wiping all personal data and resetting software ensures the next user starts fresh.
– Retains access to original Asus utilities, drivers, and pre-installed software. Recovering from the disk will reinstall all the Asus apps and optimizations that came on your PC.
Having a recovery backup on hand gives you peace of mind that you always have a way to revive your Asus system from any mishaps. It only takes a short time to make one, and it could potentially save you from headaches down the road.
What do I need to make a recovery disk?
The basic requirements for making an Asus recovery disk are:
– A Windows-based Asus computer. The recovery partition and tools only work on Asus PCs with Windows operating systems.
– Admin-level access to your Asus computer. Creating the recovery drive requires full admin permissions.
– A blank DVD or USB flash drive with at least 16GB of space. For storing the recovery data.
– Access to another working computer. You’ll need to download and transfer software to create the recovery drive.
– Asus Recovery Partition on your computer’s hard drive. This contains the Windows OS and Asus software data.
– Asus AI Recovery Burner software. This program allows you to copy the recovery partition onto a USB or DVD.
As long as your Asus computer has its original recovery partition still intact, you should have everything needed to successfully create a recovery disk. The process simply copies this data to an external source, allowing you to restore it later if needed.
How do I create a recovery disk for Asus?
Here is a step-by-step guide to making an Asus recovery disk:
1. Prep your USB or DVD
– For a DVD, insert a blank DVD-R disc into your disc burner drive.
– For a USB drive, insert a 16GB or larger flash drive into an open USB port. Be sure to backup any existing data first, as it will be erased in the next steps.
2. Download AI Recovery Burner
– From another working computer, go to the Asus support site (https://www.asus.com/support). Search for your specific Asus model and download the “AI Recovery Burner” software.
3. Install AI Recovery Burner
– Run the downloaded setup file to install AI Recovery Burner on your Asus computer. Follow the on-screen prompts.
4. Open AI Recovery Burner
– Launch the newly installed AI Recovery Burner app from your Asus computer.
5. Select source
– Choose the recovery partition on your Asus computer’s hard drive as the source to copy from.
6. Select destination
– Pick your prepared USB drive or DVD as the destination to create the recovery disk.
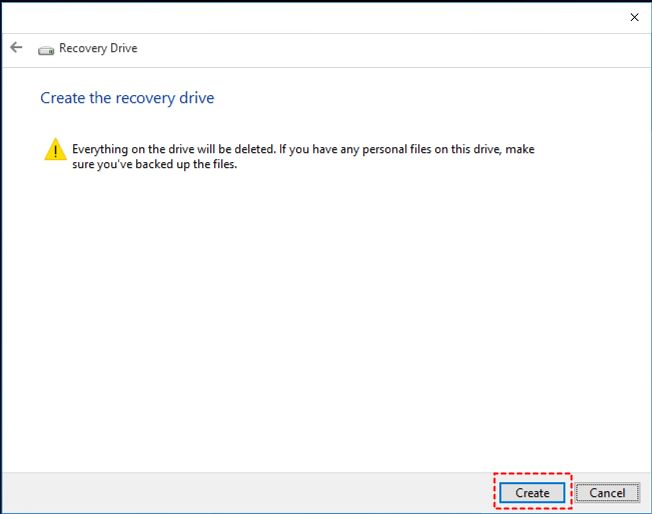
7. Burn recovery data
– The software will now copy the recovery data from the partition to the external media. This may take 20-30 minutes depending on your system.
8. Finish and label
– When complete, make sure to label your recovery disk clearly, so you know what it’s used for. Store it in a safe place you’ll remember.
You should now have a bootable Asus recovery disk on DVD or USB that can be used at any time to restore your computer back to its original state. Be sure to keep the disk in a safe, easily accessible place in case you ever need it.
How do I use the Asus recovery disk?
If your Asus computer experiences problems that require resetting everything back to factory defaults, here is how to restore it using the recovery disk:
1. Insert the Disk
– Turn off your computer and insert the prepared Asus recovery disk into the appropriate drive (USB or optical disc).
2. Access the Boot Menu
– Turn your computer back on and press F2 continuously on boot up to access the BIOS settings. Then select the option to change boot priority to your recovery disk drive.
3. Boot from the Disk
– Save changes in the BIOS and allow your computer to boot up from the recovery disk when it restarts.
4. Choose Recovery Options
– When booted into the recovery interface, choose the option to reset your PC or reinstall the operating system.
5. Follow the Prompts
– The Asus recovery software will guide you through the reset process. Follow all on-screen instructions carefully.
6. Reset the PC
– After going through the recovery steps, the operating system along with Asus software will be fully reinstalled, restoring your computer back to its out-of-the-box state.
Be sure to copy any important personal files off the computer first, as resetting will wipe the hard drive fully clean. After it’s done, you’ll have to reconfigure Windows, reinstall programs, and set the computer back up with your data and settings.
Common recovery process questions
Will I lose my data when recovering?
Yes, restoring from the Asus recovery disk will wipe your hard drive completely clean. Be sure to backup any important files and data you want to keep before starting the recovery process.
Will my Asus recovery partition be deleted?
No, using the recovery disk that you created will not remove or alter the original recovery partition stored on your hard drive. It simply copies it temporarily to restore from.
Can I restore to factory settings without the disk?
You may be able to reset your Asus PC to factory defaults from within Windows without the disk by choosing Reset This PC from Settings. However, this built-in recovery process may not reinstall all the Asus utilities and optimizations that the Asus recovery disk allows you to restore.
How long does recovery take?
The recovery and OS reinstallation process typically takes 1-2 hours to fully complete. Make sure your computer stays powered on during the entire process until it finishes.
Does my Asus data get restored too?
No, only the operating system, Asus software, and drivers will be restored from the recovery process. None of your personal data, documents, downloads, or programs will come back unless you manually choose to keep and restore them.
Tips for maintaining your Asus recovery partition
To ensure your Asus recovery partition remains intact for when you need it:
– Don’t manually delete or alter the recovery partition from Disk Management.
– Keep at least 20% of your hard drive storage free to avoid errors creating recovery media.
– Refrain from installing other operating systems which may overwrite the recovery tools.
– Make a new recovery disk if you upgrade to a replacement hard drive or SSD.
– Store recovery disks properly in a dry, cool place and avoid physical damage.
– Periodically check that your recovery partition still exists within your main hard drive partition.
Conclusion
Creating an Asus recovery disk is a simple process that could potentially save you from serious computer issues down the road. Allowing you to reset everything back to factory conditions can provide peace of mind. Just be sure to store it safely after creating it, and fully backup any important data first before performing the recovery process. With a working recovery disk, you’ll always have a way to revive your Asus system from any problems.
