What Causes a Clicking Hard Drive
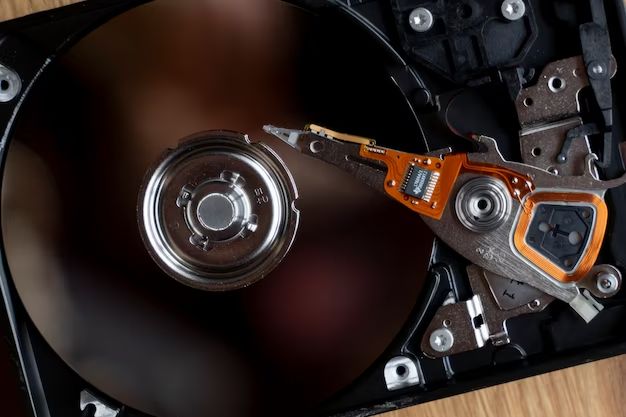
A clicking noise coming from a hard drive is a telltale sign of mechanical failure. The clicking sound is caused by the read/write heads inside the hard drive hitting or tapping the disks as they fail to properly move into position. This intermittent contact causes the distinctive and ominous clicking or tapping noise that signals imminent drive failure.
The most common causes of a clicking hard drive are:
- Worn or damaged read/write heads
- Motor spindle failure
- Misaligned or stuck actuator arm
- Degraded or failed bearings
Any of these mechanical failures result in the read/write heads no longer being able to accurately move across the drive platters to access data. The heads end up hitting or tapping the platters, producing the clicking sound.
Once a hard drive starts clicking, it means the mechanical damage has already begun. The drive will continue to degrade until it completely fails. So a clicking drive should be addressed promptly before total failure occurs.
Back Up Important Data
If your hard drive is clicking or making abnormal noises, the first step is to immediately back up your important files and data before attempting any repairs. A clicking hard drive likely has physical damage and could fail at any moment, resulting in potential permanent data loss.
To back up your data, connect the clicking hard drive to another computer as an external drive and copy your most important files to the second computer or an external hard drive. Software like Recuva can help recover data from a clicking hard drive before it fails completely. But act quickly, as the clicking likely means physical failure is imminent.
After securing your valuable data, you can then try repairing the clicking hard drive without fear of data loss. But never attempt physical repairs on the drive before recovering your files, as this often results in unrecoverable data destruction. The clicking noise itself can further damage components and make data recovery impossible if you continue using the drive.
Open the Computer Case
Before attempting any repairs on the hard drive, you’ll need to open up your computer’s case to access it. This requires care and caution to avoid damaging other components.
First, unplug all cables connected to the computer, including the power cable. Make sure your hands are clean and free of static electricity by touching a grounded metal object before handling components.
Look for screws, typically on the back of the case, that hold the side panels in place. Use a Phillips screwdriver to remove them. Slide off the side panel to expose the internal components.
Locate the hard drive, usually mounted in a drive bay or on the motherboard. Most are 3.5″ wide and 1″ tall, with SATA and power connectors on the rear. Avoid touching other components as much as possible.
If you don’t feel comfortable with this process, consider taking your computer to a repair shop instead. Improper handling of internal components can cause electrical shorts and permanent damage.
With the case open, you can now examine the hard drive and attempt repairs before replacing it if necessary.
Examine the Hard Drive
Before attempting any repairs, it’s important to examine the hard drive for any visible signs of physical damage. Open up your computer case and locate the hard drive. Look closely at the drive for any scratches, dents, cracks, or loose parts. Also inspect the connector pins to make sure none are damaged or bent. You may need a flashlight to illuminate the hard drive and get a good look at it. Turn the drive around and examine the underside and sides as well. Sometimes catastrophic failures can happen internally without any external damage, but oftentimes physical trauma to the drive case or components leads to the clicking noises and malfunction.
If there are any visible cracks, scratches, or loose parts, the drive is likely damaged beyond DIY repair. You will probably need professional data recovery services to attempt extracting the data. If the drive suffered a physical shock like being dropped, that can easily damage internal parts and make data recovery difficult or impossible. Always handle hard drives delicately and protect them from impacts.
However, if there are no noticeable signs of physical damage, the problem may be related to internal components like the read/write heads, motor, or PCB. In that case, some DIY troubleshooting and repairs may help recover data or get the drive temporarily working again. Just don’t continue using a damaged hard drive for long-term storage, as failure could be imminent.
Try a Different SATA/Power Cable
One of the easiest first troubleshooting steps is to try using a different SATA data cable and/or power cable for the hard drive. Cables can become damaged over time from repeated plugging/unplugging or bending, which can cause connectivity issues. A loose or faulty SATA or power cable could potentially cause your hard drive to click or fail to be detected properly.
First, with the computer powered off, disconnect the existing SATA and power cables from the hard drive. Then connect a known good SATA data cable and power cable that you have verified work properly with another drive. Power on the computer and see if the clicking sound persists and whether the drive appears in the BIOS/UEFI and operating system.
If the clicking stops with the new cables, then the issue was likely with the original cables. Cables are inexpensive to replace and this simple swap could potentially fix your clicking and restore full functionality. See this thread on the Tom’s Hardware forums for more details on how a faulty SATA cable can cause clicking issues: https://forums.tomshardware.com/threads/sata-cable-will-not-click-with-new-hard-drive.1797968/
Attempt Data Recovery Software
Before replacing the hard drive, try running data recovery software that is designed to read data even when there are mechanical issues with the drive. Some good options to try include:
Stellar Data Recovery – This comprehensive data recovery software works for both Windows and Mac computers. It can recover data from formatted, corrupted, or damaged hard drives. Stellar Data Recovery has different levels depending on your needs.
R-Studio – R-Studio is known for being able to recover data from mechanically damaged or clicking hard drives. It supports RAID arrays and has advanced capabilities like disk imaging and data erasure.
R-TT – Standing for “Recovery for Total Trauma”, R-TT is designed for recovering data from drives with physical damage. It can work despite issues like bad sectors, motor or r/w head failure.
Run a thorough scan with data recovery software before further disassembly or replacement of the hard drive. This gives you the best chance of recovering your data non-invasively if the issue is mechanical failure or corruption.
Use a Donor PCB
One potential fix for a clicking hard drive is to swap the printed circuit board (PCB) from a working donor drive. The PCB contains the controller electronics that allow the drive to communicate with the computer. If the PCB is damaged, it can cause the clicking noise and failure for the drive to be detected.
To swap the PCB, you will need a donor hard drive that is the exact same model as your clicking drive. Open up both hard drive cases and locate the PCB on each drive. Carefully detach the PCB from both drives by removing any screws and gently unplugging the connections. Then, swap the PCBs between the drives, plugging the donor’s PCB into your clicking drive. Screw the PCBs into place and reassemble the drives.
After the PCB swap, connect the clicking drive with the donor PCB to your computer. If the drive spins up and is detected, the PCB swap was successful. You can now attempt to access the drive to recover data before any further issues occur. However, the PCB swap is not a permanent fix, as it does not address the root cause of the clicking noise and imminent drive failure.
Replace the Read/Write Heads
If the clicking sound is due to a failed read/write head, replacing the head stack assembly may fix the issue. The read/write heads are the small components that read and write data on the platters inside the hard drive.
Replacing read/write heads is an advanced procedure that requires very specialized tools and a clean room environment. It should only be attempted by experienced technicians. The process involves:
- Opening the hard drive in a certified clean room to prevent dust contamination.
- Removing the stuck headstack assembly using a special tool.
- Installing the new headstack and precisely aligning it over the platters.
- Reassembling the drive and testing that the new heads can read/write data.
Head replacement tools such as the HDD Head Combo Tool are needed to safely remove and replace the old heads without scratching the platters. It’s important to purchase a compatible donor headstack assembly as heads are precisely tuned for each drive model.
While possible for experienced technicians, head replacement is a delicate and difficult process with no guarantee of success. For many users, it may be more practical to send the drive to a professional data recovery service with a clean room rather than attempting head replacement themselves.
Send to a Data Recovery Service
If all troubleshooting options have been exhausted and your clicking hard drive still cannot be accessed, utilizing a professional data recovery service may be the best option to retrieve your files. However, keep in mind that this can be a costly process.
Data recovery services use specialized equipment and techniques in a cleanroom environment to extract data from damaged drives. According to Hard Drive Recovery Group, prices can range from $99 for minor recovery to $2000 or more for complex cases. Other companies like 300 Dollar Data Recovery also list prices starting around $100 and going up based on the extent of work needed.
Before choosing a data recovery service, research their capabilities, prices, and reviews. Recovering data should be viewed as a last resort when all other options have not worked, due to the potentially high costs involved.
Replace the Hard Drive
If the hard drive is completely unrecoverable through software or hardware repairs, the only option left is to replace it with a new drive. This will require reinstalling the operating system and applications. Here are the steps for replacing a hard drive:
1. Buy a new compatible hard drive that meets or exceeds the specifications of the old one. For desktops, this is typically a 3.5″ SATA hard drive from brands like Seagate or Western Digital [1]. For laptops, you’ll need a 2.5″ SATA drive [2].
2. Open up the computer case and locate the hard drive bay. Remove any cables or screws securing the old drive in place.
3. Slide the old drive out and insert the new drive into the bay. Secure it with screws if needed.
4. Connect the SATA data cable and power cable to the new drive.
5. If you have a desktop, install the new drive into an external enclosure to access it from another computer. If you have a laptop, use a SATA-to-USB adapter cable [3].
6. Boot from the operating system install media and follow the on-screen prompts to install the OS on the new drive.
7. Once complete, shut down and reconnect the new drive to the desktop/laptop internal connections.
8. Boot up the computer from the new drive and reinstall applications and restore data from backups.
