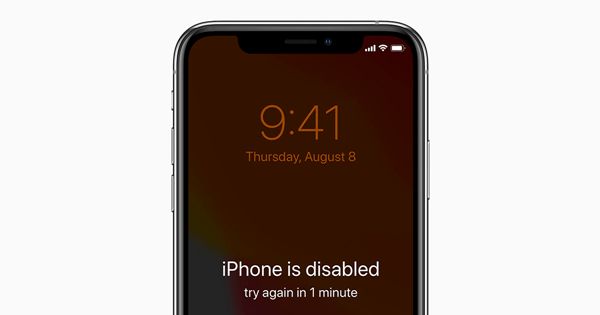
Having a disabled passcode on your iPhone can be incredibly frustrating. Without being able to enter your passcode, you can’t access any of the features or apps on your device. Thankfully, there are a few different methods you can use to regain access to your iPhone even with the passcode disabled.
What Causes the iPhone Passcode to Become Disabled?
There are a couple main reasons why you may find yourself locked out of your iPhone due to a disabled passcode:
- Entering the wrong passcode too many times – After 6 failed passcode attempts, your iPhone will disable the passcode for increasing amounts of time before it requires you to connect to iTunes to restore.
- Forgetting the passcode – If you can’t remember your passcode, repeated guessing will lead to the passcode being disabled
- Software bugs – Very rarely, a software glitch can cause the passcode to unexpectedly become disabled.
Regardless of what led to the disabled passcode, the end result is being locked out of your iPhone with no easy way to enter the correct passcode. Thankfully, the techniques below will help you get back into your iPhone so you can use it once again.
Method 1: Force Restart Your iPhone
The first method to try when your iPhone passcode is disabled is to force restart the device. Force restarting will cause the iPhone to reboot, which can reset many software issues that may be preventing the passcode from working properly.
To force restart an iPhone 8 or earlier, press and hold the Sleep/Wake button and Home button together until the Apple logo appears on the screen. For iPhone X and later, press and hold the Side button and either Volume button until the Apple logo is shown.
After force restarting, try entering your passcode again. There is a chance this may have resolved the issue and re-enabled the passcode input screen.
Method 2: Connect iPhone to iTunes and Restore
If force restarting your iPhone didn’t work, the next step is to connect it directly to a computer running iTunes and perform a restore. This will wipe the iPhone and reinstall the operating system, which should reset any software issues causing the passcode to be disabled.
To restore your iPhone using iTunes:
- Install the latest version of iTunes on your Mac or Windows PC.
- Connect your iPhone to your computer using the included USB cable.
- Open iTunes on the computer. If a message pops up asking for your iPhone passcode or to Trust This Computer, click Cancel.
- In iTunes, click on the iPhone icon when it appears in the upper-left corner.
- On the Summary screen for your iPhone, click Restore iPhone.
- iTunes will download the latest iOS software and perform a complete restore on your iPhone. This process can take up to an hour.
- Once done, iTunes will prompt you to set up and activate your iPhone. Follow the on-screen steps to set up the device as new.
After restoring, your iPhone passcode should be reset, allowing you to set a new one. Be sure to enable Find My iPhone and iCloud backups as soon as possible so you can restore from a backup rather than setting up your iPhone as new.
Method 3: Erase iPhone Using Find My iPhone
If you have Find My iPhone enabled with iCloud on your disabled iPhone, you can use the Find My app on another iOS device or iCloud.com to remotely wipe your iPhone. This will erase all content and settings and allow you to enter a new passcode when you set it up again.
To erase your iPhone from Find My iPhone:
- On another iPhone, iPad, or iPod Touch, open the Find My iPhone app. Or go to iCloud.com/find on a computer.
- Enter your Apple ID and password to log in if prompted.
- Select your disabled iPhone from the list of devices.
- Tap Erase iPhone at the bottom of the screen.
- Tap again to confirm erasing. It may take some time to complete.
- Once finished, your iPhone will reboot and you’ll be able to set up the device like new and enter a new passcode.
Method 4: Put iPhone into Recovery Mode
As a last resort, you can force your iPhone into Recovery Mode and connect to iTunes to restore. Recovery Mode is a built-in failsafe in iOS that will allow a restore even when the passcode is disabled.
To put your iPhone into Recovery Mode:
- Connect your iPhone to your computer using the USB cable.
- For iPhone 8 or earlier: Press and hold the Sleep/Wake and Home buttons together until you see the Recovery Mode screen.
- For iPhone X and later: Press and quickly release the Volume Up button. Press and quickly release the Volume Down button. Then press and hold the Side button until you see the Recovery Mode screen.
- You’ll see a Connect to iTunes screen. Launch iTunes on your computer.
- In iTunes, you’ll be prompted to Restore or Update your iPhone. Click Restore to wipe and restore your device.
Recovery Mode will force your iPhone into a state where it can be restored even with a disabled passcode. After the iTunes restore process completes, you’ll be able to set a new passcode on your iPhone.
Enable Lost Mode as Soon as Possible
Once you regain access to your iPhone, it’s critical to immediately turn on Lost Mode using Find My iPhone. This will lock the device with your Apple ID so no one else can use or erase it if it’s misplaced.
To enable Lost Mode:
- Open Find My iPhone app or go to iCloud.com/find on a computer.
- Select your iPhone.
- Tap Activate.
- Enter a phone number and message to display on the lost iPhone’s screen.
- Tap Next, then tap Activate Lost Mode.
Your iPhone will now show the message and require your Apple ID password before anyone can use it. This prevents it from being accessed if lost or stolen after being unlocked.
Prevent Needing to Unlock a Disabled iPhone
While the methods above allow you to regain access to your iPhone if the passcode gets disabled, it’s best to avoid getting locked out in the first place. Follow these tips to prevent your iPhone’s passcode from becoming disabled:
- Use a complex passcode – Passcodes with only numbers are easier to guess and brute force. Combine numbers, letters, and symbols for better security.
- Don’t disable auto lock – Requiring a passcode when your iPhone locks prevents unauthorized access if it’s lost or stolen.
- Write down your passcode – Keep your passcode written down in a safe place in case you forget it.
- Create an Apple ID – Having an Apple ID linked to your device allows you to use Find My iPhone to remotely erase it if needed.
- Enable Touch ID/Face ID – Using biometric authentication prevents you from having to enter your passcode as frequently.
- Don’t jailbreak – Jailbreaking bypass iPhone security measures and increases the chances of passcode issues.
Following best practices for iPhone passcode security will help avoid you ever needing to unlock a disabled passcode. But if you do get locked out, use the methods listed above to get back into your iPhone quickly.
Conclusion
Dealing with a disabled passcode on an iPhone can be stressful and inconvenient. Thankfully, there are several effective techniques you can use to regain access even with the passcode disabled. Force restarting, connecting to iTunes, erasing with Find My iPhone, and Recovery Mode provide ways to reset your iPhone no matter the cause of the disabled passcode.
Remember to always set a strong passcode and enable Find My iPhone on your device. Avoid repeated guessing of your passcode, as this is the most common way passcodes become disabled. With a few precautionary steps, you can avoid passcode problems and quickly resolve them if they do occur using the methods outlined here.