Firmware is low-level software that controls the functionality and performance of hardware devices. SSDs like those made by Seagate rely on firmware to handle critical tasks like wear leveling, garbage collection, and more. Over time, companies release firmware updates that can improve performance, fix bugs, and add new features to SSDs.
Seagate is a major manufacturer of SSDs. Like other SSD makers, they periodically release firmware updates for their drives. Updating to the latest firmware can optimize speed, maximize lifespan, and enable new capabilities.
Updating Seagate SSD firmware involves first downloading the latest firmware file from the company’s website. You’ll then create a bootable USB drive to load the firmware update onto the SSD. After rebooting with the USB drive, you’ll initiate the firmware flash process. Once completed, you can verify successful installation and restore your data.
Overall, updating SSD firmware is an important maintenance task that helps keep a drive running at peak performance. This guide will walk through the steps for updating firmware specifically on Seagate SSD models.
Prerequisites
Before updating the firmware on your Seagate SSD, you’ll want to make sure you meet the following prerequisites:
Have the correct Seagate SSD model – Firmware updates are specific to certain models of Seagate SSDs. Make sure you have identified the correct firmware update for your specific drive. Check Seagate’s product support page for your SSD to find the available firmware versions.
Have an available PC with internet access – You’ll need a Windows PC with an internet connection to download the latest firmware from Seagate and create a bootable USB drive for the update process. The PC should have a USB port and enough storage space to hold the firmware update files.
Backup data before updating – It’s crucial to make backups of your data before attempting a firmware update. A failed firmware update can potentially brick an SSD, making data recovery extremely difficult. Back up your data to another drive or cloud storage to be safe.
For more details on prerequisites, check the Seagate knowledge base article on firmware update requirements.
Download the Firmware Update
To download the latest firmware for your Seagate SSD, you’ll need to go to Seagate’s firmware download page at https://www.seagate.com/support/downloads/. Once there, you’ll need to enter your drive’s serial number to identify the specific firmware file required for your model.
To find your SSD’s serial number, look on the back or underside of the physical drive for a sticker containing a long alphanumeric code. This is the serial number you’ll need to enter on Seagate’s page.
After entering the serial number, Seagate will display the latest firmware available for download for your specific SSD model. Be sure to download the firmware file (.exe format) to your computer.
Creating a Bootable USB Drive
Before updating the SSD firmware, you’ll need to create a bootable USB drive that contains the firmware update files. Here are the steps for making the USB drive bootable:
The USB drive must meet certain requirements to be used for the bootable firmware update:
- The USB drive should be at least 8 GB in size to accommodate the firmware update files.
- The drive must be formatted as FAT32 or NTFS file system.
- It’s recommended to use a blank USB drive to avoid any conflicts.
You’ll need to use third-party software to make the USB drive bootable. Popular options include:
- Rufus – https://rufus.ie/
- Universal USB Installer – https://www.pendrivelinux.com/universal-usb-installer-easy-as-1-2-3/
- Bootice – https://www.softpedia.com/get/System/Boot-Manager-Disk/BootIce.shtml
The software will format the drive, make it bootable, and allow you to transfer the firmware update files to the USB drive. Follow the instructions for the software you choose to complete the process.
Alternatively, you can create the bootable USB drive manually in Windows using the command prompt. But this involves multiple steps and requires some technical expertise.
Updating the Firmware
Once you have created the bootable USB drive, you are ready to update the firmware on your Seagate SSD. Follow these steps:
1. Insert the USB drive into your computer and restart it. As it boots, enter the BIOS setup menu (typically by pressing F2, Delete, or a function key during startup). Change the boot order to prioritize booting from the USB drive.
2. Save changes and exit BIOS. The computer will boot from the USB drive into the FreeDOS environment.
3. At the FreeDOS prompt, type the drive letter for your USB drive followed by a colon to access it. For example, if your USB drive is E, you would type E:
4. Type “cd firmware” to enter the firmware folder on the USB drive.
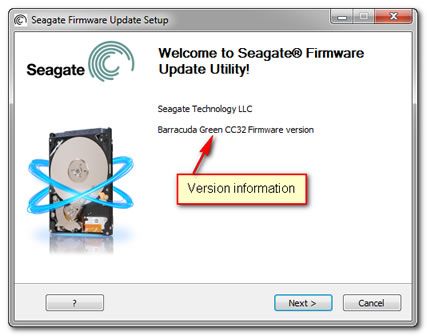
5. Type the firmware executable name and press Enter to launch the Seagate firmware update utility. For example: seagate_firmware_update.exe
6. Follow the on-screen instructions to complete the firmware update process. The utility will search for all Seagate drives connected to your system and prompt you to begin the update.
7. Do not interrupt or disconnect power during the update, which may take 5-10 minutes. Wait for confirmation that the firmware update completed successfully.
8. Once done, restart your computer and remove the USB drive during startup to boot back into Windows normally.
You can verify the new firmware version in the BIOS or using Seagate’s SeaTools utility. If the update encountered errors, you may need to restore the original firmware and troubleshoot the cause before trying again.
Verifying the Update
After updating the firmware on your Seagate SSD, it’s important to verify that the update was successful. There are a couple ways to check that the new firmware version is installed.
First, you can check the firmware version in Windows. Open the Start menu and type “Device Manager”, then press Enter. In Device Manager, expand the Disk drives section and locate your Seagate SSD. Right click on it and select Properties. In the Properties window, go to the Details tab and select Firmware version from the dropdown menu. This will display the current firmware version installed on your SSD. Compare this to the version number of the update you just performed to confirm it matches.
You can also verify the update by running diagnostics on the SSD. Seagate provides a free diagnostic tool called SeaTools that can perform checks on the drive. Download and install SeaTools from Seagate’s website. Run the basic tests on your SSD drive. If the firmware update was successful, the tests should complete with no errors reported. The SeaTools software can also be used to check the firmware version.
After confirming the new firmware version is installed and diagnostics pass, you can be assured the SSD update completed properly. Your Seagate solid state drive is now running the latest firmware.
Troubleshooting
Like any firmware update process, sometimes errors can occur when trying to update an SSD. Here are some common errors and potential fixes when troubleshooting a failed SSD firmware update:
If the firmware update tool cannot detect the SSD, make sure the drive is properly connected and powered on. Trying a different SATA cable, port, or USB connection may help the drive be recognized.
An “update failed” error usually means the firmware file was corrupted during download or the update process was interrupted. Redownloading a fresh firmware file and running the update again often resolves this.
If the SSD disappears from the system after a failed update, powering down and restarting the computer will often restore functionality. The drive may need to be reformatted if data corruption occurred.
Insufficient system resources like RAM or storage space can sometimes cause update failures. Closing other programs and ensuring sufficient disk space is available may allow the update to complete.
For advanced troubleshooting tips from Seagate, see their knowledgebase article on troubleshooting firmware update failures.
If an SSD firmware update fails and renders the drive unusable, data recovery is still often possible. Seagate provides detailed instructions for recovering data from a failed SSD firmware update using their SeaTools utility.
Restoring Data
After updating the firmware on your SSD, you may need to restore data from a backup. Here are some tips for safely reconnecting your SSD and restoring data:
First, reboot your computer and enter the BIOS. Make sure the BIOS recognizes the SSD before proceeding. Then, power down the computer again and reconnect the SSD data cable and power cable if you had disconnected them earlier.
Next, boot into Windows normally. Open Windows Explorer and verify the SSD is detected. If you see the SSD drive letter, you can attempt restoring data.
To restore data, connect the backup drive or access the backup files from the cloud storage. Use the software that created the backup to restore files and folders to the SSD. For example, if you used Macrium Reflect to make system image backups, use its restore feature to extract the backup image.1
Alternatively, you can use backup software like Veeam or Acronis True Image to restore file backups to your SSD. Take care not to overwrite existing files on the SSD when restoring from backup.
With backups restored, your SSD will have your original files and data again after the firmware update. Double check everything is restored correctly before using the SSD as your main drive.
Maintaining Performance
SSDs can experience performance degradation over time without proper maintenance. Here are some tips to keep your SSD performing optimally:
Enable TRIM support in your operating system if available. TRIM allows the SSD to more efficiently erase deleted data blocks, improving write speeds. See https://www.slrlounge.com/tips-to-get-the-most-from-your-ssds/ for more detail on TRIM.
Periodically optimize your SSD by manually running the built-in TRIM function if your OS doesn’t support it. Tools like EaseUS Partition Master can schedule and run TRIM with minimal effort. Refer to https://www.easeus.com/partition-manager-software/ssd-maintenance.html for a step-by-step guide.
Keep at least 10-20% of your SSD storage space free. Having this buffer space allows the SSD controller to optimally distribute writes across all cells. Move infrequently accessed files to a secondary HDD if space gets low.
Update to the latest firmware for your SSD occasionally or when performance issues arise. Firmware updates often include bug fixes, compatibility improvements, and new features that enhance SSD reliability and speed.
In summary, enabling TRIM, optimizing partitions, maintaining free space, and installing firmware updates as needed will keep your SSD running fast for years to come.
Conclusion
Updating the firmware on your Seagate SSD is an important maintenance task that should not be overlooked. As we’ve seen, the process involves downloading the latest firmware, creating a bootable USB drive, booting into the firmware update tool, and selecting the firmware update file to install. While it may sound complicated, following the step-by-step instructions outlined here will make the process straightforward.
Keeping your SSD firmware up-to-date provides significant benefits. Firmware updates often improve performance, stability, compatibility, and security. They may also enable new features not available at launch. Given how frequently new SSD firmware versions are released, it’s a good idea to check for updates every 6-12 months. An up-to-date firmware maximizes the potential of your SSD.
Updating the firmware is quick and easy with the right preparation. The peace of mind and performance boost are worthwhile. So don’t delay – update your Seagate SSD firmware today!