With the growing size of apps, photos, videos, and music on our phones, many Android users find that they eventually need more storage space. Luckily, there are several ways to upgrade the storage on Android devices to gain more gigabytes for all your data and media.
What are the storage options for Android phones?
Android devices have a few different storage options:
- Internal storage – This is the built-in storage that comes with your phone. It ranges from 8GB to 512GB depending on the phone model.
- microSD card slot – Many Android phones have a slot for a removable microSD card that can add anywhere from 32GB to 2TB of extra space.
- USB OTG storage – You can use a USB On-The-Go (OTG) cable to connect an external USB flash drive or hard drive to your phone.
- Cloud storage – Services like Google Drive provide online cloud storage space you can use for backups and extra capacity.
When is it necessary to upgrade Android storage?
Here are some signs that indicate you may need more storage space on your Android phone or tablet:
- You regularly get low storage warnings
- Your phone won’t let you install new apps
- You can’t take more photos or videos
- You constantly have to delete apps, photos, or videos to free up space
- Apps crash or stutter due to lack of free space
If you run into any of these issues, it’s time to consider upgrading your Android storage.
How to Check Android Storage
Before upgrading your storage, it’s important to understand how much total space you have and how it’s being used currently. Here’s how to check your storage on Android:
- Open the Settings app.
- Scroll down and tap Storage.
- View the total internal shared storage space and how much space is free.
- Tap Internal Shared Storage for details on usage by type – Apps, Photos, Videos, Audio, etc.
- Check to see which apps, photos, or files are taking up the most space.
This will give you an idea of how much extra storage you need. Many Android devices also let you view MicroSD card usage if you have one installed.
Clear Storage Space on Android
Before upgrading, it’s a good idea to clear up as much existing storage as possible. Here are some tips:
- Uninstall unused apps – Delete apps you no longer need to free up space.
- Clear app cache and data – In Settings, tap Apps > select the app > Storage > Clear Cache and Clear Data.
- Remove photos/videos backups – Photos and videos often take up a lot of space. Remove copies stored on device.
- Store files on SD card – Move files and media to a MicroSD card if your phone has one.
- Upload files to cloud – Use cloud storage like Google Drive to store files off your device.
- Delete downloads – Remove files you’ve downloaded that you no longer need.
After clearing all unnecessary files, check your storage again. You may find you’ve opened up enough space to hold you over for awhile.
Add MicroSD Card for Extra Android Storage
One of the easiest ways to add external storage on Android is with a MicroSD card. Here’s how:
- Buy a MicroSD card – Choose 32GB, 64GB, 128GB or higher based on your needs.
- Turn off your Android phone.
- Insert the MicroSD card into the card slot on your device.
- Turn your phone back on – Your phone will automatically detect the card.
- Open Settings and tap Storage to verify the MicroSD card details.
- To set apps or files to save directly to the SD card, tap the Change button on some phones or tap each app’s individual storage settings.
Apps can now save files, photos and data right to your expandable SD card storage for extra capacity. Be sure to get a fast, high speed MicroSD card rated for HD video recording if using for media files.
Tips for Using MicroSD Storage
- Make sure you buy a reputable brand of MicroSD card for reliability.
- Regularly transfer photos/videos from the SD card to your computer or cloud storage to back them up.
- Don’t remove the MicroSD card when apps are using it or writing files to avoid corruption.
- Check that your specific Android phone model supports MicroSD cards before buying.
Set Up USB OTG Drive for Android
USB On-The-Go (OTG) is a feature on some Android devices that allows you to connect external USB storage devices like flash drives and hard drives. Here’s how to set it up:
- Buy an OTG adapter cable – This has a USB port on one end and a MicroUSB or USB-C port on the other end to fit your phone.
- Attach external USB storage device like a flash drive to the adapter cable.
- Insert the adapter into your Android device’s charging port.
- Open Settings > Storage to verify the connected device.
- Use a file manager app to access, copy and manage files on the flash drive.
- To safely remove the drive, eject it from within the file manager app first.
The advantages of USB OTG include being able to use cheap high-capacity flash drives and external hard drives. Just be sure your Android device supports OTG before buying an adapter cable.
USB OTG Tips
- Always safely eject the external drive before unplugging it to avoid corruption.
- Higher capacity hard drives may require external power to work with your phone.
- Not all apps may recognize files saved directly to external OTG drives.
- OTG support may be limited on some phones, so check before buying.
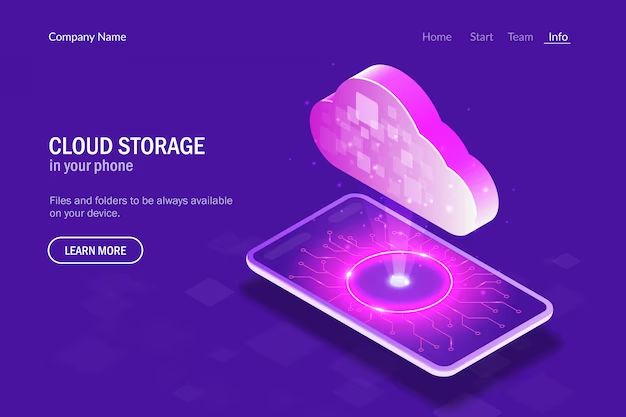
Cloud Storage Options for Android
Cloud storage services give you expandable capacity online which you access from your Android device:
| Service | Free Storage | Paid Plans |
|---|---|---|
| Google Drive | 15GB | 100GB for $1.99/month |
| Dropbox | 2GB | 2TB for $9.99/month |
| Microsoft OneDrive | 5GB | 1TB for $6.99/month |
| Amazon Photos | Unlimited for photos | 100GB for $1.99/month |
The benefits of cloud storage include:
- Access your files from anywhere with an internet connection.
- Share files and photos easily.
- Backups of your data to prevent loss.
- Sync files across all your devices automatically.
When using cloud storage, be mindful of:
- Privacy and security of your data.
- Uploading large files can use considerable bandwidth.
- You’ll need an internet connection to access your files.
Change Internal Storage on Android
Some Android manufacturers like Samsung allow you to expand your built-in internal storage with a memory card. This combines the internal storage and memory card capacity into one larger pooled storage space.
To set this up:
- Check your device supports internal memory expansion – This is often microSD cards in Samsung devices.
- Insert the compatible memory card into your phone’s tray slot.
- In Settings go to Device Storage > Advanced.
- Tap the option to combine internal and SD card storage.
- Follow the prompts to migrate your data over.
The benefit of expanded internal storage is that all apps can be installed to and use the pooled space, with no need to selectively set apps to external SD storage.
Cautions With Internal Storage Expansion
- Not all Android models support this feature.
- You may not be able to remove the SD card afterward without impacting apps storage.
- Make sure your phone can accept the specific memory card type and capacity before purchasing.
- Migrating data combines the storage spaces, so back up first.
Upgrade Built-In Storage by Changing Android Phone
Some Android phones allow you to directly upgrade the built-in storage when purchasing. For example, you may be able to choose 128GB instead of 32GB of storage for an extra cost. This is the most seamless way to get more native internal storage without using external options.
When buying an Android phone, consider:
- Storage options – Buy the highest storage capacity within your budget.
- Expandable storage – Choose a model that also supports MicroSD cards.
- Cloud storage – Get free Google Drive, Dropbox or other cloud space.
- USB OTG support – For connecting external drives as needed.
Upgrading to a completely new Android phone may be an option if you are due for an upgrade and want both more storage and improved features. Research the latest models that offer generous built-in capacity.
Tips for Buying New Android Phones
- Compare storage options and expandability across different models.
- Look at years of OS updates pledged to maximize usefulness.
- Consider buying directly from Google to get clean Android vs. OEM layers.
- Choose a phone with ample RAM (e.g. 6GB+) to aid performance.
Reset Android to Factory Settings
Performing a factory reset on your Android erases all data and resets it to default settings. This can reclaim a significant amount of storage space if you’ve accumulated a lot of apps, photos, files, and cached data. It’s like a fresh start.
Here are the steps to factory reset an Android device:
- Back up any data you want to keep first – contacts, photos, etc.
- Open Settings > System > Advanced > Reset Options.
- Tap Erase All Data (Factory Reset).
- Tap Reset Phone.
- If prompted, enter your passcode.
- Confirm that you want to erase everything – this cannot be undone!
The device will reboot into the initial setup process. While it wipes your data, a factory reset may buy you some time until you’re able to upgrade storage or clear more space.
Risks of Factory Resetting Android
- Will permanently erase all your data and settings.
- Requires reinstalling apps and setting up the device again.
- May not clear enough space if the core apps/OS are taking up most storage.
Conclusion
Running out of storage space on your Android can be frustrating. Luckily there are a variety of options to upgrade and expand the available storage. The best solution for you will depend on your specific needs and phone model.
Adding removable MicroSD card storage or using a USB OTG flash drive can instantly give you more external capacity. Cloud storage gives you expansive space to work with by storing files online. Or you may choose to upgrade to a newer Android phone with greater built-in storage and expandability.
After choosing one of these excellent storage upgrade options, you’ll be able to keep all the apps, photos, videos, music and data you need without worrying about running out of room again!