Using a USB drive as an external disk drive is a very common way to store and transfer files between computers. USB drives, also known as flash drives or thumb drives, offer a convenient and portable solution for extra storage and file transfers.
What is a USB drive?
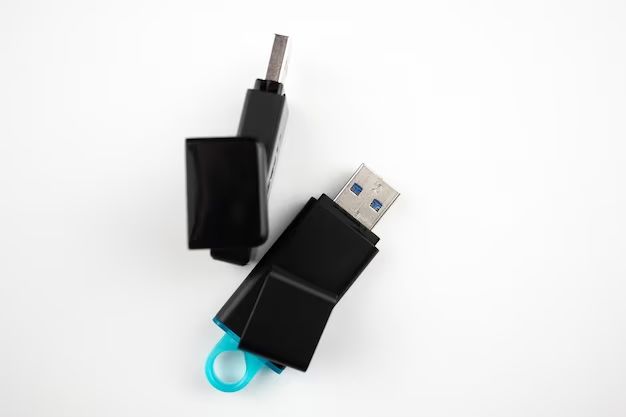
A USB drive is a small, lightweight flash memory data storage device that connects to a computer’s USB port. USB drives come in a variety of storage capacities, from just a few gigabytes to terabytes of storage space. The flash memory inside the drive allows you to quickly write and rewrite data files without the moving parts found in traditional mechanical hard drives.
USB drives get their name from the USB (Universal Serial Bus) interface they use to connect to computers and other devices. The USB plug on the drive fits into any available USB port on a computer or device that supports USB connections.
Benefits of using a USB drive as a disk drive
Here are some of the benefits of using a USB flash drive as an external disk drive:
- Portability – USB drives are small, lightweight and easy to carry around. You can easily transport files between different computers.
- Re-writable storage – Files can be added, removed and edited directly on the USB drive.
- Plug-and-play functionality – No drivers or installation required, just plug the USB drive into a USB port and it is ready to use.
- Fast transfer speeds – USB 3.0 drives provide very fast data transfer speeds to quickly copy files on and off the drive.
- Durable – USB drives have no moving parts and are able to withstand shocks and drops.
- Wide compatibility – USB drives can be used with Windows PCs, Macs, Linux computers and other devices with USB ports.
- Cheap storage – The cost per gigabyte of a USB drive is very affordable compared to external hard drives.
- Easy file sharing – Files can quickly be copied to a USB drive and shared with others.
Using a USB drive on Windows
Using a USB drive is very simple on a Windows PC. Follow these steps:
- Insert the USB drive into an available USB port on your computer.
- After a few seconds, Windows will recognize the drive and install any necessary drivers.
- The USB drive will appear as a new removable storage drive, typically labeled as the drive letter E:, F:, or G:
- You can access the USB drive in File Explorer just like any other disk drive connected to your system.
- To copy files to the USB drive, simply drag and drop files and folders onto the USB drive letter in File Explorer.
- To safely remove the USB drive, click the Safely Remove Hardware icon in the system tray and select Eject for your USB drive.
- Once the “Safe To Remove Hardware” message appears, you can unplug the USB drive from the computer.
Changing the default drive letter
If you want to change the default drive letter Windows assigns to your USB drive, you can use Disk Management to change it:
- Open the Disk Management utility. You can access it by right-clicking the Start menu and selecting Disk Management.
- Locate your USB drive in the list of disks at the bottom.
- Right-click on the rectangular bar representing the USB drive and choose Change Drive Letter and Paths.
- Click Change and choose the new drive letter you want to assign.
- Click OK to save the drive letter change.
Creating a shortcut to the USB drive
For quick access to your USB drive in File Explorer, you can create a desktop shortcut:
- Open File Explorer and navigate to the USB drive.
- Right-click on the USB drive and choose Send To > Desktop (create shortcut).
- A shortcut will be created on your desktop labeled with the USB drive name.
- You can double-click this shortcut anytime to open the USB drive.
Using a USB drive on Mac
On a Mac, using a USB drive is very similar:
- Plug the USB drive into an open USB port on your Mac.
- The drive will mount on the desktop with its name shown.
- Click on the drive icon to view its contents in the Finder window.
- To copy files to the drive, just drag files/folders onto the USB drive icon.
- To eject the drive, right-click on the drive icon on the desktop and select Eject.
- Once the eject icon disappears, you can unplug the USB drive.
Creating an alias
To create quick access to the USB drive from the desktop:
- Open the USB drive window in Finder.
- Right-click on the white space in the window (not on a file).
- Choose Make Alias from the menu.
- An alias file will be created on the desktop with the USB drive name.
- Double-click this alias anytime to access the files on the USB drive.
Using a USB drive on Linux
On Linux systems, accessing a USB drive is straightforward:
- Insert the USB drive into an open USB port.
- After a few seconds, the drive will auto-mount and an icon will appear on the desktop.
- Click the drive icon to open it and view files.
- To copy files, just drag-and-drop files onto the USB drive icon.
- Before unplugging the drive, right-click the USB icon and choose Safely Remove.
- When prompted it is safe, unplug the USB drive from the computer.
Mounting the drive from the terminal
You can also mount and unmount USB drives from the Linux terminal:
- Insert the USB drive and open a terminal window.
- Enter
lsblkto list all drives and identify the USB drive device name (e.g. /dev/sdb1). - To mount the drive, enter
mount /dev/sdb1 /mnt(using your drive device name). - To unmount, enter
umount /dev/sdb1. - The USB can then be safely removed after unmounting.
Formatting a USB drive
USB flash drives generally come pre-formatted with the FAT32 file system, which allows them to work on Windows, Mac, Linux and other operating systems. But you may want to reformat the drive to change the file system for better performance or stability.
Here’s how to reformat a USB drive on each operating system:
On Windows
- Plug the USB drive into your computer.
- Open File Explorer, right-click on the USB drive, and select Format.
- In the Format window, under File System, select a file system like NTFS, FAT32, or exFAT.
- Check the Quick Format box.
- Click Start to begin formatting the USB drive.
On Mac
- Insert the USB drive and open Disk Utility.
- Select the USB drive in the sidebar.
- Click Erase near the top.
- Enter a name for the drive and select a format like APFS, exFAT, FAT32.
- Click Erase to reformat the USB drive.
On Linux
At the terminal, use the mkfs command to format the USB drive device name (e.g. /dev/sdb1) to the desired Linux file system format:
mkfs.ext4 /dev/sdb1– Ext4 file systemmkfs.ntfs /dev/sdb1– NTFS file systemmkfs.fat -F 32 /dev/sdb1– FAT32 file system
Booting from a USB drive
Many computers allow you to boot from a USB drive, allowing you to run operating system installation files or diagnostic tools from the USB flash drive.
Enable USB boot in BIOS
To boot from a flash drive, you must first enable USB boot in your computer’s BIOS or UEFI settings:
- Restart your computer and press the key to enter BIOS, usually F2, F10 or Del.
- Look for a Boot, Boot Order or Boot Priority setting.
- Make sure USB boot is enabled and move it to the top of the boot order.
- Save changes and exit BIOS to reboot.
Create a bootable USB drive
Next, you need to create a bootable USB drive with an OS installer or bootable diagnostic tool:
- On Windows, use the Media Creation Tool to create a bootable Windows install drive.
- On Mac, enable bootability when creating a bootable macOS installer drive.
- On Linux, use utilities like dd, UNetbootin or Rufus to create a live USB.
- For hardware diagnostics, download an ISO file for the bootable tool you want to run.
With USB boot enabled and a bootable USB drive, insert the USB and restart your computer. It should boot from the flash drive allowing you to install, diagnose or repair your system.
Using USB with VMs
You can also use a physical USB drive with virtual machines for expanded storage and file transfers:
VMware Workstation Pro
- Plug your USB drive into the host computer.
- Open VMware and edit your virtual machine settings.
- Expand the USB controller and check “Connect at power on” for your USB device.
- Start the VM, and your USB will appear as a drive letter in the VM.
Oracle VirtualBox
- On Windows/Linux hosts, plug in your USB drive.
- Start VirtualBox and select your VM.
- Click Settings > USB, then enable the USB controller.
- Check the box for your USB drive then click OK.
- Start the VM, the USB will mount when powered on.
Hyper-V
- Open Hyper-V Manager and select your VM.
- Under Settings, expand USB Configuration.
- Check “Enable USB Controller” and select your USB device.
- Start the VM and the USB drive will mount automatically.
This allows your VM to access the full storage capacity and files on your physical USB drive for easy transfers between host and guest OS.
Security tips for USB drives
While USB drives are very handy, it’s important to use them securely. Here are some USB security tips:
- Set a strong password – For drives with encryption, use a long password/passphrase.
- Eject safely – Always eject/safely remove USB drives before unplugging them.
- Avoid public computers – Don’t use your USB drive on public or untrusted computers.
- Scan for malware – Occasionally scan your drive for viruses and malware.
- Backup data – Copy important files from your USB drive to cloud storage or external drives.
- Avoid sensitive data – Don’t store extremely sensitive personal/work files on a USB drive.
- Encrypt files – Use VeraCrypt, 7-Zip or other tools to encrypt files on your drive.
- Physically secure – Keep the USB drive in a secure place when not in use.
Following these tips will help keep your data more secure when using a USB drive.
Troubleshooting USB drive issues
Here are some common issues and fixes when using USB drives:
Drive not recognized
- Try plugging into a different USB port on your computer.
- Check for dirt/debris in the USB port and use compressed air to clean it out.
- Try the USB drive on a different computer to isolate the issue.
- If still not recognized, the USB drive itself may be damaged.
Cannot access files
- Files may be corrupted – try scanning for errors using chkdsk (Windows) or fsck (Linux).
- If drive shows no files/appears empty, try using recovery software to restore lost data.
- The file system may be damaged – you may need to reformat the drive.
Slow transfer speeds
- Try different USB ports, some may provide slower performance.
- USB 2.0 drives provide slower speeds than USB 3.0.
- The USB drive controller/memory may be wearing out.
- Try reformatting the USB drive to improve performance.
Cannot boot from USB
- Ensure USB booting is enabled in BIOS settings.
- Try recreating the bootable USB drive using a different tool.
- The drive may not be bootable based on BIOS/hardware compatibility.
- For older systems, trying updating BIOS to latest version.
If issues persist, the USB flash drive itself may need to be replaced if damaged or worn out.
Conclusion
USB flash drives provide a versatile way to add portable storage and transfer files between computers. On Windows, Mac, Linux and other modern machines with USB ports, using an external USB drive is quick and easy to expand your storage capacity. With ample space, fast transfer speeds, and wide compatibility with nearly any computer, USB drives are one of the simplest ways to extend your data storage and transfer options.
