What is an external hard drive?
An external hard drive is a portable storage device that can be attached to a computer via a USB connection or other interface to store and access data (1). Unlike the primary internal hard drive that’s inside your computer and saves files directly to the computer, an external hard drive is completely separate and located outside of your computer.
Some key benefits of using an external hard drive include:
- Portability – External hard drives are small and lightweight, making them easy to transport and move between computers.
- Extra storage space – External hard drives provide expanded storage capacity for large files like photos, videos, and other media files.
- Data backup – External hard drives serve as a great backup location to protect important data from system failures.
- Accessibility – External hard drives allow you to easily share, access and transfer files between devices.
External hard drives connect to computers through various types of interface cables such as USB, FireWire, Thunderbolt, or WiFi (1). USB is the most common interface used by external hard drives today. USB connections allow easy plug-and-play use on most computers.
Overall, an external hard drive is a plug-and-play storage device that provides flexible extra storage space and data portability between different computers and devices.
(1) https://www.hp.com/us-en/shop/tech-takes/top-5-uses-for-external-hard-drives
Unboxing and inspecting your Seagate external hard drive
When you first receive your Seagate external hard drive, you’ll want to open the box and make sure everything is included. A Seagate portable external hard drive will typically come with the hard drive itself, a USB cable, and a quick start guide.
Carefully remove the hard drive and USB cable from the box and packaging. Inspect the connections on the hard drive, including the USB port and any additional ports if applicable, such as Thunderbolt or FireWire ports on premium models. Make sure there is no damage to the ports or any other part of the external drive.
You should have received a USB 3.0 cable with your Seagate external drive. This will allow you to connect the drive and transfer data at fast USB 3.0 speeds. Some lower-end Seagate drives may come with a USB 2.0 cable instead, which will limit transfer speeds. Refer to the included documentation to confirm the specifications of your drive and cables.
Higher capacity and premium Seagate drives may also include a power adapter and cable for providing dedicated power to the drive. If your drive includes these, inspect them as well to make sure you have all the necessary pieces.
If anything seems to be missing or damaged in the box, contact Seagate customer support using the included warranty information. Keep all packaging materials in case you need to return the product.
(Source: https://www.seagate.com/products/external-hard-drives/backup-plus/)
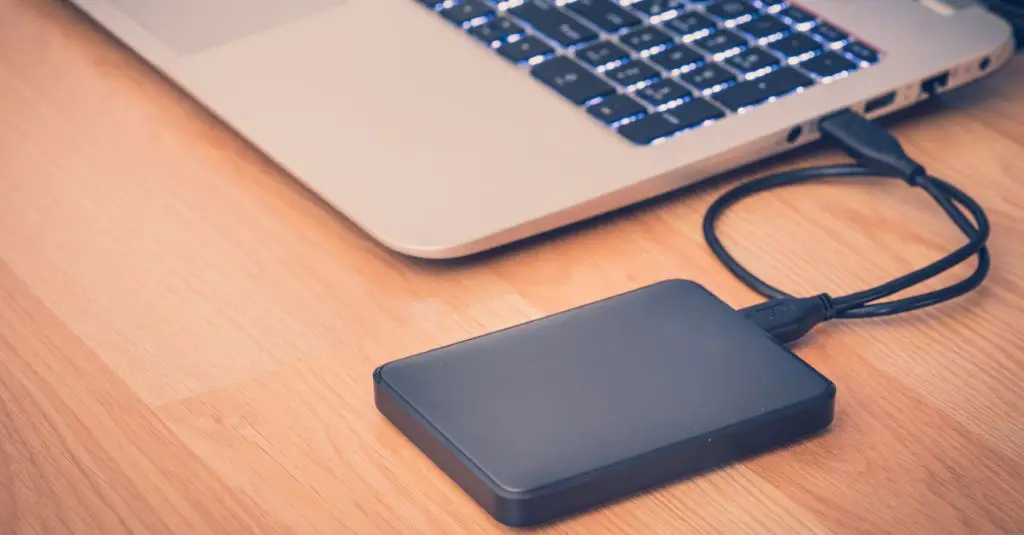
Connecting your Seagate external hard drive
Connecting your Seagate external hard drive is simple and straightforward. Most Seagate external drives connect via USB or Thunderbolt cable. Here are the steps to connect your Seagate external hard drive:
Locate the USB or Thunderbolt port on your computer. USB ports are typically located on the back or sides of a desktop computer. Laptops generally have USB ports along the edges.
Identify the USB or Thunderbolt cable that came with your Seagate drive. One end will have a flat rectangular connector that plugs into the drive, while the other end is a standard USB or Thunderbolt connector.
Plug the rectangular USB/Thunderbolt connector from the cable into the port on the back of the Seagate drive.1
Plug the other end of the cable into an available USB or Thunderbolt port on your computer.
For Thunderbolt connections, make sure both ends of the cable are securely inserted. You may need to tighten the connectors until they click into place.
Once fully connected, your Seagate external hard drive should appear as a drive letter in Windows File Explorer or as a disk icon on the Mac desktop.
Turning on your Seagate external hard drive
Most Seagate external hard drives have a power button located on the back or side of the drive. The power button is usually labeled and easy to identify. Press the power button to turn on your Seagate external drive. The drive should light up and you may hear the disk spinning inside.
Seagate external drives also feature LED lights that indicate power status and activity. An illuminated LED light typically means the drive is powered on. A flashing LED light means data is being read from or written to the disk. Refer to your device manual for specific light behaviors.
Some higher capacity Seagate drives may require an external power source and include an AC power adapter you must connect. Plug the adapter into a wall outlet, then connect it to your Seagate drive before powering on (source: https://www.bestbuy.com/site/shop/external-hard-drives-with-power-supply). Without adequate power, the Seagate external drive will not turn on.
Installing software and drivers
Before using your new Seagate external hard drive, you may need to install software and drivers. Seagate provides various utilities and software for their drives that add functionality or improve performance.
On Seagate’s software downloads page (https://www.seagate.com/support/downloads/), you can find software specific to your drive model, like backup utilities, encryption software, and diagnostic tools. Make sure to select the correct drive family (for example, External or NAS) and capacity to see the available downloads.
Some of the key Seagate software includes:
- Dashboard – Manage backups and access drive diagnostics
- Toolkit – Customize drive settings, run diagnostics, and backup files
- Secure – Encrypt your drive for added security
For many external drives like the Seagate Expansion (https://www.seagate.com/support/external-hard-drives/desktop-hard-drives/expansion-desktop-software/), the Software & Apps tab has a direct download link for the specific utilities. Be sure to also check for any available firmware updates.
Installing the software is usually straightforward. Simply download the apps, open the installers, and follow the on-screen prompts. Refer to Seagate’s Toolkit support page (https://www.seagate.com/support/software/toolkit/) for detailed installation instructions.
Once installed, the software provides added features and management for your Seagate drive.
Formatting your Seagate external hard drive
Before you can start storing files on your new Seagate external hard drive, you will need to format it. Formatting prepares the hard drive to store files by creating a file system on the drive.
Seagate external drives are designed to work for both Windows and Mac computers out of the box. However, if you want to use your drive between Windows and Mac computers, you will need to format your drive to the exFAT or FAT32 file system.
Here are the steps to format your Seagate drive for use with Mac and Windows:
- Connect the Seagate drive to your computer using the included USB cable.
- Open Disk Utility on your Mac. You can find it by searching “Disk Utility” in Spotlight or navigating to Applications > Utilities > Disk Utility.
- In Disk Utility, select your Seagate external drive from the sidebar.
- Click the “Erase” button.
- Choose “exFAT” or “MS-DOS (FAT)” as the format.
- Give your drive a name.
- Click “Erase” to confirm and format the drive.
Formatting with exFAT or FAT32 will allow your Seagate drive to be compatible with both Mac and Windows machines. Just keep in mind FAT32 has a 4GB size limit for individual files [1]. Now your drive is ready to store and transfer files between Mac and Windows computers!
Transferring files to your Seagate external hard drive
Once your Seagate external hard drive is connected and formatted, you are ready to start transferring files. The easiest way to transfer files is using drag and drop.
To drag and drop files, open up File Explorer on your computer. Find the files or folders you want to transfer on your computer and click and drag them over to your Seagate external hard drive. Let go of the mouse button and the files will copy over.
You can also set your Seagate external hard drive as a backup drive using the built-in Windows Backup tool. This will automatically copy important files like documents, photos, and media files to your external drive.
To set up backup, go to Settings > Update & Security > Backup. Under ‘Backup using File History’, select your Seagate drive. Windows will now automatically backup your files.
Setting your Seagate as a backup drive ensures your important files are protected in case something happens to your computer’s main hard drive. Just remember to safely eject the drive afterwards.
Safely ejecting your Seagate external hard drive
It is important to always safely eject your Seagate external hard drive before unplugging it from your computer. Simply unplugging the drive while it is powered on and connected can lead to file corruption or data loss.
On Windows, you can eject the drive by clicking on the “Safely Remove Hardware” icon in the system tray, selecting your drive, and clicking “Eject”. You can also right-click on the external drive icon and select “Eject”. See this Microsoft support article for more details.
On Mac, you can eject the drive by right-clicking on the external drive icon on your desktop and selecting “Eject”. You can also drag the icon to the Trash/Eject icon in your Dock. See this Sweetwater article for more Mac ejection tips.
Ejecting flushes any cached writes and allows the OS to unmount the drive cleanly. Simply unplugging does not do this, and risks data loss or corruption. Always eject first!
Tips for using your Seagate external hard drive
Here are some best practices for optimizing the performance of your Seagate external hard drive:
Keep the drive clean. Dust buildup can block ventilation and lead to overheating. Gently wipe down the exterior with a dry cloth periodically.
Avoid exposing the drive to extreme temperatures or direct sunlight for extended periods of time. Heat can damage components over time.
Do not place heavy objects on top of the drive or drop it, as this can damage internal components.
Disconnect the drive safely using the “Eject” option to prevent corruption. Do not unplug it while files are still being accessed.
Maintain plenty of free space. Having less than 20% free can negatively impact performance.
Keep your operating system and backups up to date to ensure maximum compatibility and performance.
Use the included USB cable for optimal data transfer speeds. Lower quality cables can reduce performance.
Format the drive to optimize it for your operating system. For Windows, format as NTFS. For Mac, format as Mac OS Extended.
Avoid overfilling the drive. The more full it gets, the slower the performance. Try to keep it under 75% capacity.
Run error checking tools regularly to fix any developing issues before they become severe.
Consider enabling disk write caching to boost write speeds, if your OS supports it.
Keep backup copies of your most important files on a separate drive as well in case of failure.
Position the drive somewhere stable and well-ventilated for ideal operating conditions.
Troubleshooting Tips
Here are some common issues and solutions for troubleshooting your Seagate external hard drive:
Drive Not Detected
If your Seagate external drive is not being detected by your computer, try the following:
- Try connecting the drive to a different USB port on your computer. USB ports on the front of your computer may not receive enough power.
- If possible, use a different USB cable. Some cables are charge-only and don’t transmit data.
- Try connecting the drive to a different computer. This will help determine if the issue is with the drive or your computer.
- Reboot your computer and try reconnecting the drive after rebooting.
If the drive still isn’t detected, view Seagate’s guide on USB external troubleshooting.
Drive Not Showing Correct Capacity
If your Seagate drive shows the wrong capacity, try these steps:
- Run Disk Management and see if the drive shows the full capacity there. If so, reformat the drive.
- Make sure you are using the correct file system for the drive’s capacity (such as exFAT or NTFS).
- Try connecting the drive to a different computer to check if the capacity issue persists.
If the capacity still shows incorrectly, contact Seagate Support for further troubleshooting.
Slow Transfer Speeds
If your Seagate drive transfers files slowly, try these tips:
- Connect the drive to a USB 3.0 port if possible, for faster speeds than USB 2.0.
- Use a shorter USB cable, as longer cables can cause signal issues.
- Make sure no other high-demand applications are running during transfers.
- Check if the drive needs to be formatted – right-click it in This PC and select Format.
If speeds continue to lag, contact Seagate Support to troubleshoot further or replace the drive if needed.
