There are a few reasons why you may need to disconnect a hard drive from your computer. Perhaps you need to remove it to replace it with a larger drive, move it to a new computer, or send it away for data recovery. Disconnecting a hard drive is a straightforward process, but there are some important steps you should follow to avoid damaging the drive or losing any data. In this guide, we’ll walk you through the complete process of safely disconnecting both internal and external hard drives on Windows and Mac OSX systems.
When Do You Need to Disconnect a Hard Drive?
Here are some of the most common scenarios that require disconnecting a hard drive:
- Replacing the drive with a larger/faster one
- Moving the drive to a new computer
- Sending the drive for data recovery
- Upgrading other computer components
If you need to open up your computer for repairs or upgrades, you’ll likely need to disconnect the hard drive to get access to the internal components. For external drives, you may need to disconnect it to send it offsite or move it to another system.
Safety Precautions
Before unplugging any drive from your system, it’s important to follow these safety guidelines:
- Back up any important data on the drive you’ll be disconnecting.
- Close all open files/programs accessed from that drive before disconnecting it.
- If possible, unmount or eject the drive first using your operating system’s file manager.
- Handle hard drives carefully avoiding any shocks or damage.
Backing up your data is crucial in case anything happens to the drive during disconnection. Closing open files avoids potential corruption. Unmounting or ejecting the drive properly ensures pending write tasks finish first. And avoiding physical damage maintains the integrity of the drive.
What You’ll Need
Gather the following before getting started:
- Phillips-head screwdriver (for internal drives)
- External hard drive enclosure (for internal drives you’re removing)
- Replacement drive (if applicable)
For safe handling, you may want an anti-static wrist strap as well. Have your operating system installation media handy too in case you need to reinstall or troubleshoot anything after.
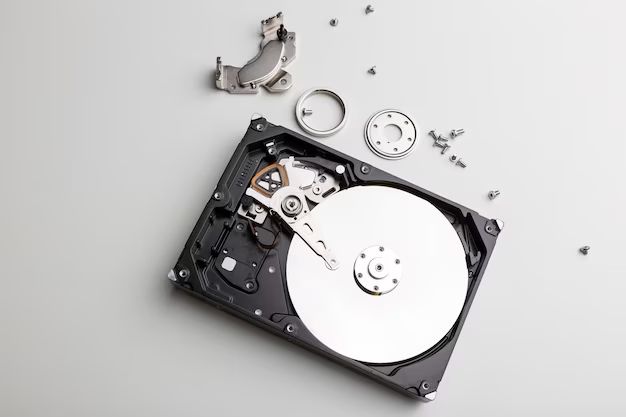
Disconnecting an Internal Hard Drive
When removing an internal hard drive from a desktop computer, follow these steps:
- Back up any data and close open files on the internal drive.
- Power down the computer and unplug all cables.
- Open the case side panel to access the drive bays.
- Identify the cables for the hard drive you want to remove.
- Disconnect the SATA data and power cables from the back of the drive.
- Unscrew the drive from the drive bay using a Phillips-head screwdriver.
- Carefully slide the drive out from the bay.
- Place the old drive into an external enclosure if you intend to access data.
- Slide a new drive into the drive bay if replacing and secure with screws.
- Reconnect the SATA data and power cables to the back of the new drive.
- Close the case side panel and reconnect all external cables.
- Power up the system and access the drive as normal.
When handling drives directly, always hold by the edges avoiding touching components on the circuit board. An external drive enclosure will allow you to connect the old drive via USB to access the data.
For laptops, the process is similar but will involve entirely removing the bottom cover rather than just a side panel. Refer to the service manual for your specific laptop model for detailed disassembly instructions.
Disconnecting an External Hard Drive
For external hard drives connected via USB, Thunderbolt, FireWire, or eSATA, follow these steps:
- Back up data and close open files on the external drive.
- Eject the drive by clicking the Safely Remove Hardware icon in the system tray (Windows) or dragging it from the desktop to the Trash (Mac OSX).
- Wait for notification that it’s safe to remove the drive.
- Disconnect the drive’s USB or other interface cable from the computer.
- Unplug the external power adapter from the wall (if applicable).
- Detach any other cables between the computer and drive enclosure.
The drive should now be fully disconnected from the system. Avoid unplugging the interface cable without ejecting first, as this risks data corruption.
Troubleshooting Hard Drive Issues
If you encounter any issues after disconnecting a hard drive, try the following troubleshooting tips:
- If not detected, make sure all cables are properly connected.
- Try a different SATA port and cable if it’s a new internal drive.
- Reseat the drive in the enclosure/bay if connections are fine.
- Check for damage to interface connectors or drive components.
- Try the drive in another computer or with a drive dock.
- Look for flashing activity light indicating electrical fault.
- Rule out other components using process of elimination.
For external drives not being detected, also try different USB ports in case one is malfunctioning. If problems persist, the drive itself may be defective requiring professional data recovery assistance.
FAQs about Disconnecting Hard Drives
Here are answers to some frequently asked questions about removing hard drives:
Why won’t my computer detect the new hard drive?
If a new internal drive isn’t being detected, make sure it’s connected to the SATA port properly and has the power cable attached. Try a different SATA cable and port if needed. Also check that it’s formatted correctly for your operating system.
How can I tell if a hard drive is damaged?
Signs of a damaged hard drive include unusual noises like grinding or clicking, flashing activity lights, detection issues, and corrupted data. If concerned, have an expert inspect the drive using diagnostic tools.
Can I reuse an old hard drive in a new computer?
Yes, you can install an old drive into a new system. It will be detected as a secondary drive and you can access existing data. Just make sure to check for compatibility if switching desktop and laptop drives.
Is it safe to move a computer with the hard drive still inside?
It’s generally best to remove internal drives before moving a desktop system any significant distance. Sudden impacts can damage drives even if the computer appears stable. For laptops, the drive is more protected.
How do I wipe a hard drive before disposal?
To wipe sensitive data before disposing of an old drive, use a secure erase tool or destroy it physically. Simply deleting files or reformatting won’t fully erase the contents.
Conclusion
Disconnecting both internal and external hard drives is a straightforward process when done carefully. The key things to remember are to backup your data, close open files, eject the drive properly, and avoid physical damage. Following the step-by-step instructions outlined will help ensure no issues accessing your data on the removed drive. Just be cautious when handling drives directly and utilize troubleshooting tips if the drive isn’t detected afterward.
