What is a USB pen?
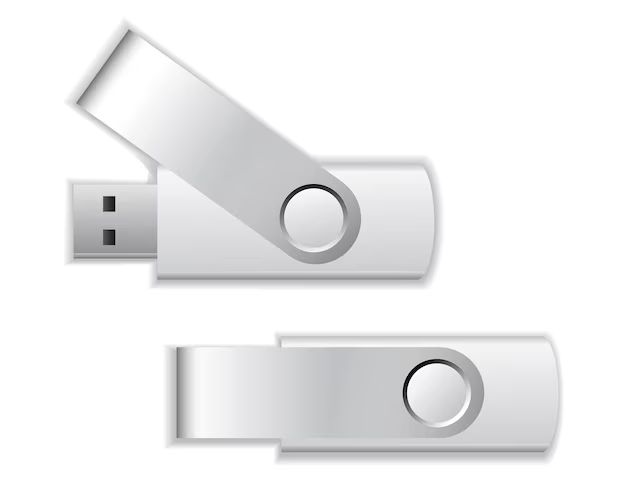
A USB pen, also known as a USB flash drive, USB stick, USB thumb drive, or pen drive, is a data storage device that includes flash memory and has an integrated USB interface (Wikipedia, 2022). USB pens first emerged in the early 2000s and revolutionized portable data storage by allowing users to easily transfer files between computers without relying on floppy disks or CD-ROMs.
USB pens are a plug-and-play storage device that do not require any additional hardware or software installation. The flash memory gives them the ability to retain data when powered off (TechTarget, 2022). Their compact size and affordability has made USB pens a popular way to store and transport documents, photos, videos, music, and other digital files.
There are many different types of USB pens available today, offering varied storage capacities to meet different needs. Lower capacity drives of 2GB-16GB are common for basic file transfers and backups. Higher capacity USB pens of 64GB-256GB enable users to store large media files and disk images. The speed and performance of USB drives can vary as well.
Inserting a USB Pen
To use a USB pen, you first need to properly insert it into a USB port on your computer. Here are some tips for correctly inserting a USB pen:
Locate an available USB port on your computer. USB ports are typically found on the front, back, or sides of a desktop computer tower. On a laptop, the USB ports are usually located on the left or right edges. Refer to your computer’s manual if you have trouble finding the USB ports (Source 1).
Orient the USB pen so the metal connector is facing down and aligned with the USB port. The connector should have the USB symbol on it to indicate which way it goes into the port. Make sure not to force the pen into the port upside down or backwards.
Gently insert the USB pen into the USB port. Push the pen straight into the port without excessive force until it clicks into place. The pen should fit snugly in the port when fully inserted. Avoid bending or twisting the pen while inserting it.
If your computer prompts you, you may need to acknowledge the USB pen by clicking on a notification or allowing access. Once properly inserted, your computer will recognize the USB pen and you can begin using it.
Safely Removing a USB Pen
Before unplugging your USB pen from your computer, it’s important to safely remove it to avoid potential corruption or loss of data. Here are the steps for safely removing a USB pen on Windows:
Locate the “Safely Remove Hardware and Eject Media” icon in the notification area on the lower right of your screen. This icon looks like a green arrow pointing up from a hardware device. If you don’t see the icon, select the upward pointing arrow to show any hidden icons. [1]
Click on the “Safely Remove Hardware and Eject Media” icon. A list of removable devices will appear.
Select your USB pen from the list. Wait for a confirmation message indicating it is safe to remove the USB pen.
You can now safely unplug the USB pen from your computer without risk of data loss or corruption.
Storing files on a USB pen
To store files on a USB pen drive, first insert the USB drive into an available USB port on your computer. Once inserted, the USB drive will appear as a new drive letter, such as E: or F:, in Windows File Explorer.
To copy files to the USB drive, open File Explorer and navigate to the USB drive letter. Double click to open the drive. Now open a second File Explorer window and navigate to the location on your computer that contains the files you want to transfer. Select the files and folders you want to copy by clicking on them. Then drag the selected files and drop them into the window showing the contents of the USB drive.
Alternatively, you can use the copy and paste method. Select the files you want to transfer in one File Explorer window. Right click and select Copy. Then open the USB drive in File Explorer, right click in an empty space within the window, and select Paste. The files will now copy over to the USB drive.
To safely remove the USB drive after transferring files, click the Safely Remove Hardware icon in the Windows taskbar and select Eject for the USB drive letter. Then physically remove the USB pen from the computer.
Accessing files on a USB pen
Once you have inserted your USB pen into your computer, you will need to access the contents in order to open, view, or transfer files. Here are the main steps for accessing files on a USB pen:
On Windows, a dialog box may appear prompting you to open the folder view of the USB pen. If it does not appear automatically, open File Explorer and locate the flash drive on the left side [1]. You can click on the drive icon or letter assigned to open it.
On Mac, a USB drive icon will usually appear on the desktop. Simply double click on the icon to open a Finder window showing the contents of the drive [2]. You can also find the drive by opening Finder and selecting it in the left sidebar.
Once you have the window open showing files and folders on your USB pen, you can view, open, copy, move or delete files as needed. Navigate through folders on the drive just as you would with folders on your hard drive.
Eject or safely remove the USB pen before physically removing it from your computer to avoid potential issues.
[1] https://edu.gcfglobal.org/en/windowsbasics/working-with-flash-drives/1/
[2] https://edu.gcfglobal.org/en/computerbasics/bringing-your-files-with-you/1/
Transferring files between computers
One of the most common uses for a USB pen is to transfer files between computers. This provides a quick and easy way to move files from one computer to another without having to use the internet or set up a home network.
To transfer files between computers using a USB pen:
- Insert the USB pen into the USB port of the first computer. Open the USB drive once it appears.
- Locate the files you want to transfer and copy them to the USB drive. This can be done by right-clicking on each file and selecting “Copy” or by using Ctrl+C on your keyboard.
- Once the files have copied over, safely eject the USB pen from the first computer.
- Plug the USB pen into an open USB port on the second computer. The drive should appear with the files ready for transfer.
- Open the USB drive on the second computer and paste the files into the desired folder on that computer. You can paste using right-click “Paste” or Ctrl+V.
- Safely eject the USB pen from the second computer once the file transfer is complete.
The USB pen allows for effortless transfer of files and folders between computers. This provides a simple alternative to emailing files or using cloud storage. It is compatible with any computers with USB ports and does not require an internet connection. With large file sizes, USB transfers are often much faster than internet transfers.
When using a USB pen to move files between computers, it’s important to safely eject the drive each time to avoid data corruption. USB pens also have size limitations, so verify the pen has enough storage space before transferring large files or folders. With some file management and planning, a USB pen can make transferring any files between computers quick and easy.
Backing up files on a USB pen
Backing up important files on a USB pen is a crucial way to protect your data against loss or corruption. Having a backup on an external device like a USB pen ensures you have an accessible copy of your files should anything happen to your computer.
Here are some key steps for backing up files to a USB pen:
1. Insert your USB pen into an open USB port on your computer. Open the file explorer window.
2. Locate the files or folders you want to backup. You can select multiple files/folders by holding down ctrl on your keyboard as you click on each item.
3. Right click on the selected files/folders and choose “Copy” from the menu.
4. In the file explorer, navigate to your inserted USB pen drive. Right click on an empty space in the window and choose “Paste” to copy the files or folders.
5. Safely eject the USB pen by clicking the “Safely Remove Hardware” icon in the system tray and selecting your USB pen drive.
The steps may vary slightly between operating systems, but the general process is the same. Be sure to backup important files regularly in case you need to access them after a system crash or hard drive failure. Keeping an up-to-date backup on a USB pen provides invaluable peace of mind.
Security considerations
When using a USB pen, it’s important to keep security in mind. One of the best ways to secure a USB pen is to encrypt it. Encrypting the USB pen will scramble the data so that if the pen is lost or stolen, the data will be unreadable without the proper encryption key. Some popular encrypted USB pens include the Kingston DataTraveler and IronKey drives (https://www.kingston.com/en/usb-flash-drives/encrypted). Encryption software like USB Disk Security can also be used to encrypt traditional USB pens (https://www.kakasoft.com/usb-security/).
It’s also important to be cautious about malware risks when using a USB pen. Malware or viruses could potentially spread from an infected computer to the USB pen and vice versa. It’s best to use antivirus software to scan both the USB pen and computers it’s used with regularly. Avoid plugging the USB pen into public computers and be wary of autorun features that could spread malware automatically. Keeping the USB pen software and firmware up to date can also help reduce potential security flaws.
Other general USB pen security tips include setting a password to access the contents of the drive, maintaining backups of important data, and properly ejecting the USB pen before removal to avoid corruption. Following good security practices helps ensure your data remains protected when using a USB pen.
Troubleshooting USB pen issues
USB pens sometimes develop issues that prevent them from working properly. Here are some tips for troubleshooting common problems:
If your USB pen is not being recognized by your computer, first try plugging it into a different USB port. You can also go to Device Manager, find the USB drive, right click on it and select Update Driver Software to update the drivers (1). If these basic steps do not work, you may need to use a USB repair tool to fix any corruption on the drive itself (2).
Another common problem is getting a read-only message when trying to add or delete files on a USB pen. This is often due to the drive being formatted as read-only. You can fix this by using Disk Management to reformat the drive to a normal read/write format like FAT32 or exFAT (1). Just be aware this will erase all existing data on the drive.
If your USB pen has any physical damage like bent connectors, you may be able to carefully bend them back in place using small pliers. But be very gentle to avoid further damage. Severely damaged pens may need professional data recovery services to attempt extracting the data, then you’ll want to properly dispose of the pen.
As a last resort if no other DIY fixes work, USB flash drive repair services exist that can attempt to repair corrupted drives. However these services can be expensive and do not guarantee results (2). Your best bet is trying all other troubleshooting steps before seeking professional recovery.
Summary
Using a USB pen allows you to easily store, transfer, and back up your files. We covered the key steps of inserting a USB pen, safely removing it, storing and accessing files, transferring files between computers, backing up important data, and security best practices.
To recap, be sure to use the “Safely Remove Hardware” option before unplugging your USB pen to avoid data corruption. Organize your files in folders so they are easy to find later. Keep a backup of critical files as USB pens can be damaged or lost. Enable encryption or password protection if storing sensitive information. Finally, scan your USB pen occasionally with antivirus software to check for malware.
Following these tips will help you get the most out of your USB pen. The portability and ease of use make them a convenient way to take your files anywhere. With proper care and handling, a USB pen can serve you well for transferring and backing up data.
