Erasing and reinstalling macOS refers to wiping the hard drive or solid state drive on a Mac and performing a fresh installation of the macOS operating system. There are two main steps involved in the process: erasing/wiping the drive and then reinstalling macOS.
Erasing the drive removes all data, apps, and settings and returns the drive to a blank state. Reinstalling macOS then puts a fresh, clean install of the operating system onto the wiped drive. Reinstalling macOS allows you to start fresh with a brand new OS installation and can be useful for troubleshooting performance issues or preparing to sell a Mac.
Back Up Your Data
Before erasing and reinstalling macOS, it is absolutely critical that you back up your data first. A clean install will completely wipe your Mac’s drive, deleting all files, applications, settings, and user data. So you’ll want to ensure your important documents, photos, music, and other personal files are safely backed up.
The best way to back up a Mac is using Time Machine. Time Machine automatically performs incremental backups to an external hard drive or network location. It’s easy to set up, allowing you to restore your entire system or specific files whenever needed. Simply open System Preferences > Time Machine and select your backup drive. Time Machine will regularly back up your data in the background.
You can also manually backup your files by dragging them to an external hard drive, or sync them to iCloud for safe online storage. iCloud stores your desktop and documents folders, along with photos, emails, contacts, calendar events, and more. Enable iCloud Drive on your Mac and ensure important data is uploaded.
No matter which backup method you choose, be absolutely certain your data is fully backed up before proceeding with an OS reinstall. Losing personal files and information due to inadequate backups can be devastating.
Erase the Drive
To erase and reformat the internal drive on your Mac, you will use the Disk Utility app that comes pre-installed on all Macs. Disk Utility allows you to completely erase and reformat the drive, removing all existing data and preparing it for a fresh install of macOS.
To erase the drive, first launch Disk Utility, which can be found in the Utilities folder within the Applications folder. Once launched, select the drive named “Macintosh HD” in the left sidebar. This is typically the internal drive on your Mac. Click the “Erase” button at the top of the Disk Utility window.
You’ll be presented with options for erasing the drive. Choose “APFS” as the format, “GUID Partition Map” as the scheme, and you can name the drive anything you like (such as “Macintosh HD” again). It’s recommended to choose the most secure option for erasing, which is “Most secure 3-pass erase” according to Apple’s support documentation. This fully erases all existing data by overwriting the drive three times, preventing any chance of recovery.
Click “Erase” and Disk Utility will fully erase and reformat the internal drive, preparing it with a blank, clean slate for the macOS reinstallation. This typically takes 10-20 minutes depending on the size and speed of your drive.
Download macOS
To download the macOS installer, you will need to use the App Store on a Mac that is compatible with the version of macOS you want to install. Here are the steps:
- Open the App Store app on your compatible Mac.
- In the App Store search bar, type “macOS” and press enter.
- The latest macOS installer will appear. Click “Get” to begin the download.
- The download time will vary based on your internet connection speed. The macOS installer is over 6 GB in size.
- Once the download is complete, the macOS installer will be located in your Applications folder.
The macOS installer must be downloaded from a Mac that can run that version of macOS or newer. For example, to download macOS Ventura, you need a Mac capable of running macOS Ventura or newer. Refer to Apple’s system requirements to determine Mac compatibility.
Create a Bootable Installer
To install macOS fresh, you will need to create a bootable USB installer drive. This drive will allow you to boot your Mac and start the installation process.
To create the bootable installer:
- Format the USB drive using Disk Utility. Select the drive in the left sidebar and click “Erase” at the top. Choose “Mac OS Extended (Journaled)” as the format and “GUID Partition Map” as the scheme. Give the drive a name like “macOS Installer.” Click Erase to format the drive. [1]
- Download the macOS installer application from the App Store. This will be labeled as something like “macOS Ventura” or “macOS Big Sur.” Run the installer to download the full OS installer file.
- Open Terminal and enter the following command, replacing “MyVolumeName” with the name of your USB drive:
sudo /Applications/Install\ macOS\ Ventura.app/Contents/Resources/createinstallmedia --volume /Volumes/MyVolumeName - Follow the prompts to begin making the bootable installer drive. This will take some time as it copies the installer files over.
- Once complete, you will have a bootable USB installer drive ready for installing macOS.
Be sure to back up your data before erasing your Mac and starting fresh with the new OS.
This covers the key steps for formatting the drive and using the createinstallmedia command to make a bootable installer. The source url is cited using standard HTML formatting.
Boot From the Installer
After creating the bootable USB installer drive, you will need to boot your Mac from the drive to begin the installation process. Here are the steps to boot into the USB installer:
For Macs without the T2 security chip:
- Connect the bootable USB drive to your Mac.
- Restart your Mac and immediately press and hold the Option key after you hear the startup sound.
- After a few moments, you should see the boot manager screen appear. Select the USB installer drive icon labeled “Install macOS” and press Enter.
For Macs with the T2 security chip:
- Connect the bootable USB drive to your Mac.
- Restart your Mac into macOS Recovery mode by holding Command-R as it restarts.
- From the macOS Utilities window, select “Startup Security Utility” and authenticate.
- Select “Allow booting from external media” and restart the Mac.
- Immediately press and hold the Option key after the startup sound. Select the USB installer drive.
Once selected, the Mac will boot from the USB installer drive so you can begin the macOS installation process. The USB installer contains a recovery image allowing you to erase your existing drive and install a fresh copy of macOS (source).
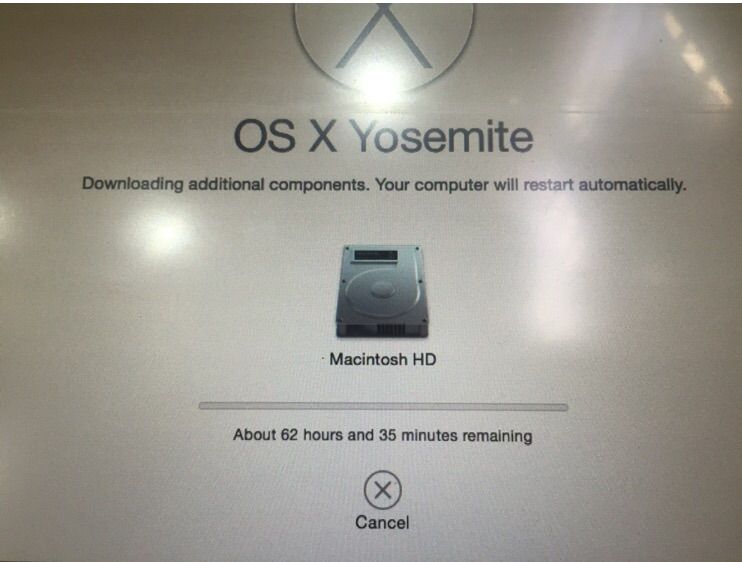
Install macOS
Once you’ve booted from the USB installer, you will be greeted with the macOS Utilities window. Here are the steps to install macOS:
- Select “Install macOS” and click Continue.
- Agree to the software license agreement.
- Choose the disk where you want to install macOS. Typically this will be your internal drive. Make sure you select the correct one!
- When prompted, enter your Apple ID and password to download necessary components.
- The installer will ask you to confirm starting the installation – click Install.
- You’ll now have the option to transfer information from another Mac, migrate data from Time Machine, or start fresh without transferring anything. Select the option that best fits your needs.
- Continue following the onscreen prompts to complete the installation process. This can take anywhere from 30 minutes to over an hour depending on your Mac.
Here are some tips for choosing install options:
- If you have a Time Machine backup available, you can migrate your data and settings easily.
- Starting fresh is great if you want to clear out old unused files and have a clean system.
- Only transfer certain apps and data if you don’t want everything copied over.
Once the progress bar reaches the end, your Mac will reboot itself a couple times and finish the installation. You’ll then be greeted with setup options for your new version of macOS.
Restore Your Data
After reinstalling macOS, you’ll want to migrate your files, settings, and data back to your Mac. The easiest way to do this is from a Time Machine backup. Time Machine automatically backs up your Mac’s data to an external drive. To restore from a Time Machine backup:
1. Reconnect the external Time Machine backup drive to your Mac.
2. Open the Time Machine app on your Mac. It will detect the backup and give you options to selectively restore files, folders, or entire drives.
3. Navigate through the Time Machine interface to find the files and data you want to restore. Select them and click Restore to copy them back to your Mac.
If you don’t have a Time Machine backup, you may be able to restore files from cloud storage like iCloud or Dropbox. Sign in to these services on your newly installed Mac and sync the files back down. Keep in mind this will only work for files you previously backed up to the cloud services.
Reinstall Apps
After reinstalling macOS, you will need to redownload and reinstall the apps that were previously on your Mac. For apps downloaded from the Mac App Store, you can open the App Store app and go to the Purchases section to redownload apps you previously purchased for free.[1]
For apps downloaded from developer websites or other sources, you will need to go back to those sites and redownload the app installation files. You may need to re-enter your license key or login credentials. Keep in mind that some apps may no longer be available for recent versions of macOS.
Here are some tips for reinstalling apps after reinstalling macOS:
- Make a list of all the apps you need to reinstall before erasing your drive.
- Know where each app was originally downloaded from – App Store, developer website, etc.
- Back up your app licenses and registration codes.
- Be prepared to re-enter login details for apps that require accounts.
- Check app developer sites for compatibility with latest macOS version.
Taking the time to organize app reinstallation now can save frustration later. With preparation, you can have your favorite apps up and running again quickly after reinstalling macOS.
[1] https://support.apple.com/guide/app-store/install-and-reinstall-purchased-apps-fir0fb69db23/mac
Estimated Time Required
The total time required to fully erase and reinstall macOS can vary, but most users report the process takes between 1-2 hours total. Here is a breakdown of estimated time for the key steps:
Erase the drive: Around 1 minute or less to fully erase the drive (Source 1).
Download macOS: The download time depends on internet speed, but many report it taking up to 1 hour (Source 2).
Install macOS: Most users report the installation taking 20-45 minutes (Source 3).
Overall, with additional time for preparatory steps like backing up data, creating a bootable installer drive, and restoring data afterwards, users can expect the full erase and reinstall process to take 1-2 hours.
