When setting up a new solid state drive (SSD), one of the first decisions you need to make is how to partition the drive. Partitioning divides the drive into separate logical sections that function as independent drives. With the right partition scheme, you can optimize your SSD’s performance, extend its lifespan, and make your system easier to manage. This guide will walk through the key considerations for SSD partitioning and provide specific recommendations for different use cases.
Why Partition an SSD?
There are several benefits to partitioning your SSD:
Optimize performance
By putting frequently accessed files like your operating system and applications on a separate partition, you localize the read/write activities to that partition. This avoids interference with less active partitions and maintains optimal speeds.
Protect data
Partitioning provides logical separation between types of data. If one partition becomes corrupted, the other partitions are still accessible and protected. This data isolation is useful for critical system files or sensitive user data.
Facilitate backups and cloning
It’s easier to image or back up partitions individually than the entire drive. Separate partitions allow you to clone your OS or system settings without overwriting personal files and data.
Multi-boot setups
Multiple operating systems can co-exist on one drive by assigning each OS its own partition. This lets you dual boot Windows and Linux, for example.
Control available space
Partitions prevent any single OS, application or data type from taking over the entire SSD. You can strategically allocate capacity for different needs.
Partition Schemes
There are two common schemes used for partitioning SSDs:
Single Partition
As the name suggests, a single partition means the entire drive space is contained within one partition. The operating system and all files reside together. This offers simplicity, but lacks the advantages mentioned above.
Multiple Partitions
Configuring two or more partitions creates dedicated spaces for different data types. A frequently used scheme is:
- System partition (OS, applications, etc.)
- Data partition (user files, documents, etc.)
But you can further divide things up based on performance, security, or access patterns. Some common approaches:
- Boot partition (OS only)
- Programs partition (applications)
- Storage partition (user data)
- Swap partition (virtual memory)
The right multi-partition layout depends on your specific needs and preferences. We’ll cover optimal setups later in this guide.
Partition Alignment
One technical consideration for SSD partitioning is alignment. This refers to how partitions are geometrically arranged relative to the underlying drive sectors and memory pages. Proper alignment minimizes read/write overhead and prevents unnecessary wear.
Misaligned partitions can severely degrade SSD performance and longevity. Unfortunately, some older operating systems and tools still create misaligned partitions by default. But modern OSes like Windows 10 and Linux align partitions correctly when you accept the default settings.
You mainly need to be concerned with alignment on older systems or if manually configuring custom partition boundaries. Consult your SSD documentation to determine optimal alignment settings.
File System Selection
In addition to partitioning, you need to select a file system for each partition. The file system manages how data is logically stored, named, accessed, and organized within a partition.
Common file system options include:
NTFS
NTFS (New Technology File System) is the default for modern Windows OSes. It is highly efficient for SSDs and supports key features like permissions, compression, encryption, and large partition sizes.
exFAT
exFAT was designed by Microsoft to bridge the gap between NTFS and FAT32. It works on both Windows and macOS. exFAT doesn’t have as many features as NTFS, but supports very large partition sizes.
FAT32
FAT32 is an older file system supported across all operating systems. But it lacks most advanced features and is ill-suited for modern SSDs.
ext4
ext4 is the default file system for Linux distributions. It handles SSD optimization well and has robust journaling capabilities.
Other options
Additional file systems like HFS+ (macOS), ReFS (Windows server), XFS, Btrfs, and more are available. But they are generally not necessary for typical SSD partitioning.
My recommendation is to stick with NTFS for Windows and ext4 for Linux in most cases. But you may need exFAT if creating a shared partition between Windows and macOS.
Single Partition Configuration
If you choose to use a single partition for your SSD, the process is very straightforward:
- When installing your operating system, delete any existing partitions so the entire drive space is unallocated.
- Create a new primary partition using all available capacity.
- Select NTFS or ext4 as the file system (unless you specifically need exFAT).
- Proceed with OS installation within this partition.
The result will be the OS, applications, and all data residing together on a single partition spanning the full SSD.
Benefits
- Simple to configure
- No wasted space
Drawbacks
- Lacks partition advantages described earlier
- Harder to control available space for OS vs user data
- No isolation between OS and user files
Therefore, a single partition works well enough for basic use cases. But multiple partitions are preferred for performance, organization, and data protection.
OS/Data Partition Configuration
A very common configuration for SSD partitioning is having two partitions:
- OS partition – Stores the operating system and applications
- Data partition – Stores personal user files and documents
This strikes a balance between simplicity and still realizing many of the advantages of partitioning.
Follow these steps to setup an OS/Data two-partition layout:
- Delete existing partitions at OS install time to wipe the SSD.
- Create a primary partition sized appropriately for your OS and apps. A good starting point is to allocate 25-50% of the total space for this partition.
- Select NTFS or ext4 file system for the OS partition.
- Install OS to the OS partition.
- Create a 2nd primary partition using remaining free space on the SSD.
- Select NTFS or ext4 file system for the Data partition.
- Upon first boot, redirect your user folders (Documents, Downloads, etc.) to the Data partition.
Now you have your system files separated from your user data.
Benefits
- Optimized OS performance
- User data is isolated
- Allows cleaner OS re-installation or cloning
- Easier to manage free space
This 2-partition layout works very well for most home and office uses. The only downside is you don’t get quite as much separation between OS files, programs, and user data. For that, an extended partition scheme is preferred.
Multi-Partition Configuration
To maximize the benefits of partitioning, you can create more than two partitions on your SSD. This allows you to tailor partitions precisely for different file types and usage patterns.
Here is an example of a robust multi-partition setup:
- Boot partition (128-256 GB) – OS system files only
- Programs partition (128-512 GB) – Applications and software
- Documents partition (128GB+) – User documents
- Downloads partition (256+ GB) – User downloads, temporary files
- Data partition (Remaining space) – Media, backups, other user data
As you can see, critical system files are completely isolated on their own dedicated SSD partition. Applications are separated from OS system files. And different user data types are divided into several partitions.
Follow these steps to create a multi-partition layout:
- Delete all partitions upon OS installation.
- Create a primary partition for your OS boot files. Allocate 25-50% of total space.
- Create a 2nd primary partition for programs. Allocate 10-25% of space.
- Create a 3rd primary partition for your Users folder. Allocate 10-25% of space.
- Create 1 or 2 more primary partitions for other data types per your preference.
- Install OS to the boot partition.
- Install apps to the programs partition.
- Redirect user folders to the documents/downloads/data partitions.
With this setup in place, you have much finer control over your SSD storage. OS files, programs, and different data types no longer interfere with each other. You also isolate and protect critical system files.
Benefits
- Maximum OS performance
- apps don’t interfere with OS or user files
- Easier space management
- Better protection and isolation for critical system files
- More flexibility to control locations of user data
- Easier cloning and reinstallation
The tradeoff is added complexity. But for power users and workstations, a multi-partition SSD layout can optimize performance, stability, and data protection.
Partition Alignment and Size
When creating multiple partitions, there are some guidelines to follow:
Use default alignment
As mentioned earlier, misaligned partitions can seriously degrade SSD performance and lifespan. Be sure to use your OS or SSD’s built-in alignment options when creating partitions. Avoid manual custom alignments unless you fully understand the optimal geometry for your specific SSD.
Equal sizes not recommended
With a two partition setup, you may be tempted to simply split the SSD into two equal-sized partitions. However, your OS and applications typically require much less space than user data. Allocating 50% of total capacity to each is often inefficient. Instead, size the partitions based on your actual usage needs.
Leave room for growth
Don’t allocate 100% of your available space right away across the partitions. Leave 10-20% free space so individual partitions can grow over time as needed.
Over-provisioning
For optimal performance, some SSD experts recommend leaving 1-5% of total drive space unallocated for over-provisioning. This provides spare capacity for background SSD optimization routines. But it’s not essential in consumer use cases.
In summary, align partitions properly, size them based on actual need rather than arbitrarily splitting space, and leave room for growth.
When to Re-partition
Once you set up your optimal partition layout, you mainly need to leave it alone for the life of the SSD. However, there are a few instances where re-partitioning makes sense:
OS reinstallation
If reinstalling your operating system, you may want to wipe existing partitions first. This provides a clean slate and removes any accumulated clutter and orphaned data over time.
Changing operating systems
If switching from Windows to Linux, or vice versa, remodeling the partitions can optimize them for the new OS.
Resizing partitions
If you run out of space on a partition, you can shrink another and expand the tight one. This is easier with partitions than trying to make space by deleting files.
Adding a new drive
When migration to a new SSD, you can re-create your optimal layout on the new larger drive.
Troubleshooting problems
In rare cases, corruption or other damage may require wiping and restarting your partition scheme.
Re-partitioning is also recommended prior to selling or disposing of an SSD, to completely wipe personal data.
Partitioning Tools
The basic partitioning tools included with Windows and Linux distributions are sufficient for most use cases. But there are also many third party options available:
Windows tools
- Diskpart (built-in command line tool)
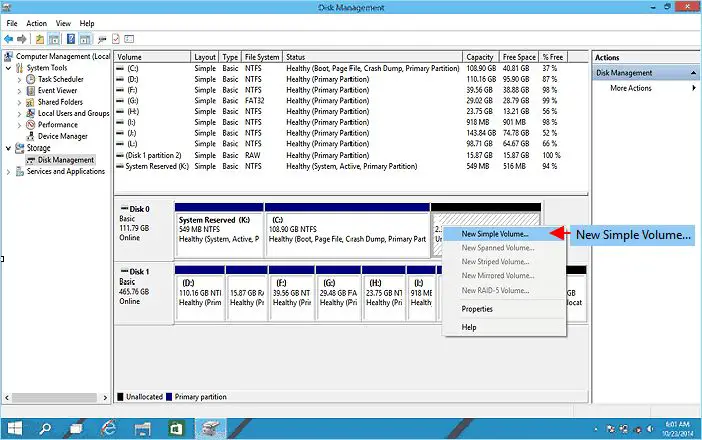
- Disk Management (included GUI tool)
- MiniTool Partition Wizard
- EaseUS Partition Manager
- AOMEI Partition Assistant
Linux tools
- fdisk (built-in command line tool)
- GParted (included GUI tool)
- KDE Partition Manager
- GNU Parted
Third party tools provide features like easy resizing, copying, backups, and bootable media. This can simplify the process compared to native OS tools.
But for basic SSD partitioning, the built-in options are quick and reliable. The process is largely the same across Windows, Linux, or Mac.
File System Conversion
If you need to change the file system on an existing partition, these utilities can convert between NTFS, FAT32, exFAT, ext4, and more:
Windows
- Convert (native command line tool)
- Paragon NTFS-FAT Converter
- EaseUS Partition Manager
- AOMEI Partition Assistant
Linux
- GParted
- KDE Partition Manager
This allows transitioning a partition from NTFS to ext4 for a Linux install, for example. Be sure to back up data first, as conversions can be risky.
Optimization Tips
Beyond the basic partitioning scheme, there are some additional optimizations possible through partition settings:
Separate boot partition
For maximum protection, you can isolate the bootable OS system files on their own small partition. Keep this read-only whenever possible.
No hibernation file
Windows system hibernation files can grow very large. Exclude them from your boot partition by disabling hibernation.
Page/swap files
Move the OS page file and Linux swap space to their own dedicated partition. This avoids interference with application performance.
Temp folders
Redirect temporary folders like C:\Temp away from your boot partition to another partition.
Partition type
For partitions containing only data, configure them as Primary partitions instead of Logical to reduce overhead.
Volume mount options
Linux partitions can be mounted with “noatime” and “nodiratime” options to reduce unneeded write overhead.
These tweaks go beyond basic partitioning but can further optimize SSD performance and lifespan if desired.
Conclusion
Partitioning your SSD is an important and strategic first step when configuring a new solid state drive. Optimal partitioning provides performance, protection, stability, and ease of management benefits. But improper partitioning can degrade the SSD experience.
For most home and office users, a straightforward two partition layout (OS vs Data) offers the right balance. But advanced users can benefit from more partitions strategically tailored for different data types and usage profiles.
Align your partitions, leave room for growth, and utilize your OS’s default schemes. Re-partition when necessary such as OS re-installation or drive replacement. Rely on the ample partitioning tools available across platforms. And consider advanced optimizations like isolated boot and page file partitions if desired.
With a properly partitioned SSD that meets your needs, you’re off to a great start with your new high speed storage. Partitioning sets the stage for optimized daily use down the road.