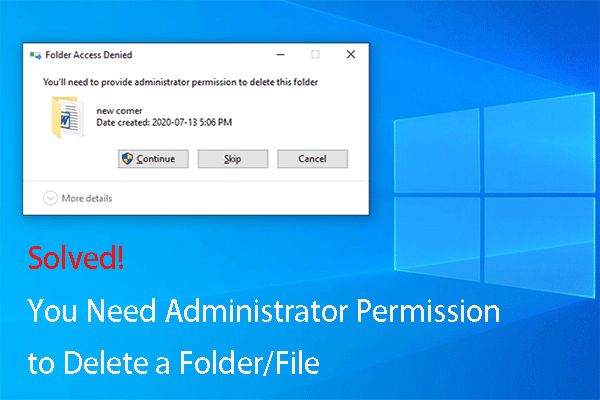
In Windows 10, you may run into a situation where you are unable to delete a file or folder even though you are logged into an Administrator account. When attempting to delete the file or folder, you may receive an error message stating “You’ll need to provide administrator permission to delete this file/folder.” This occurs because Windows sets permissions on files and folders that restrict deletion to only users with Full Control permissions.
There are a few reasons why you may encounter this issue and need admin rights to delete a file or folder in Windows 10:
- The file or folder permissions were modified to only allow Full Control access to a specific user or group, not the default Administrators group.
- You are logged into a standard user account that is not part of the Administrators group.
- User Account Control (UAC) requires elevation to admin privileges to delete system protected files.
- You do not have ownership over the file or folder.
To delete these protected files and folders, you need to either log into an Admin account, change the permissions, take ownership, or use an elevated admin prompt. This guide will go over different methods to gain admin rights to delete restricted files and folders in Windows 10.
Determine File Permissions
To delete a file in Windows 10, you first need to check the permissions on the file you want to delete. Here are the steps to view permissions on a file:
- Open File Explorer and navigate to the file.
- Right-click on the file and select Properties.
- Click on the Security tab.
- Under Group or user names, look at the permissions for your user account.
You should see permissions listed like Read, Write, Modify, etc. If you do not have Full Control or Modify permissions, you will not be able to delete the file.
Elevation Prompt
User Account Control (UAC) is a security feature in Windows that helps prevent unauthorized changes to your computer. When an app or program tries to make changes that require administrator access, UAC will prompt you to confirm the action. This is known as the elevation prompt.
By default, the elevation prompt behaves differently depending on whether the logged-in user is an administrator or standard user:
- For administrators, the elevation prompt appears on the desktop and requires entering the admin credentials to proceed. This allows admins to perform privileged operations while logged in to their admin account (see User Account Control Behavior of the elevation prompt for administrators in admin approval mode).
- For standard users, the elevation prompt appears on the secure desktop and requires logging in with an admin account to proceed. This prevents standard users from making unauthorized changes (see Behavior of the elevation prompt for standard users).
So in summary, the UAC elevation prompt ensures admins or authorized users approve changes that require admin access. Understanding this behavior is key to allowing or blocking access when trying to delete protected files in Windows.
Use Run As Administrator
Using administrator elevated permissions is the easiest method for deleting a locked file in Windows 10. To do this:
- Find the file you want to delete in File Explorer.
- Right click on the file and select Properties.
- Go to the Security tab and click Advanced.
- In the Owner field, take ownership of the file by entering your username and clicking Change. Click OK on the confirmation dialog.
This will give you full administrator access to the file. Now you can delete it:
- Open File Explorer as an administrator by right clicking on the Start menu icon and selecting “File Explorer (Admin)”.
- Navigate to the file and delete it normally.
Running File Explorer with elevated admin access allows you to bypass any permission restrictions on deleting files. Just be sure your user account has admin rights.
Edit Registry
One method to delete a protected file in Windows 10 is to edit the registry to give your user account permissions to delete the file. This involves navigating to the registry key associated with the file and modifying the permissions.
To edit registry permissions, open the Registry Editor by typing regedit in the Windows search bar and pressing Enter. Navigate to the key associated with the protected file such as HKEY_LOCAL_MACHINE\SOFTWARE\Microsoft\Windows\CurrentVersion\Policies\System.
Right click on the key and select Permissions. Click Advanced and then the Change button next to the owner name. Enter your username and click OK. Check the box for Full Control under Allow and click OK.
Now your account has full control to edit that registry key. You can delete the registry value associated with the protected file to remove the restriction. After deleting the registry value, you should be able to delete the actual file in File Explorer.
Be very careful when editing the registry as incorrect changes can cause system instability. Consider exporting a backup before making edits. Additionally, registry tweaks only impact that specific user account.
For more details, see this guide: How to Take Full Permissions Control to Edit Protected Registry Keys
Take Ownership
One way to gain permissions to delete a file is to take ownership of the file. Here are the steps to take ownership of a file in Windows 10:
1. Right click on the file and select Properties.
2. Go to the Security tab and click the Advanced button.
3. In the Advanced Security Settings window, click the Change link next to the owner name.
4. Enter your user account name and click Check Names to resolve it, then click OK.
5. Check the box for “Replace owner on subcontainers and objects” and click OK.
6. You will now be listed as the owner of the file. Close any open windows.
7. Right click on the file again, select Properties, and go to the Security tab.
8. Click Edit, then Add, enter your username, and give yourself Full Control permissions.
9. Click OK until all windows are closed. You should now have permissions to delete the file.
Taking ownership gives you full control over the file. Just be cautious when taking ownership of system files. For more details, see this reference from tech swift: Your Blog.
Reset File Permissions
You can reset the permissions on a specific file in Windows 10 to delete it. This allows you to take ownership and control of the file. Here are the steps:
- Right-click on the file and select Properties.
- Go to the Security tab and click Advanced.
- Select the Owner tab and change the owner to your account.
- Go back to the Security tab and edit the permissions, giving yourself Full Control.
- Click OK to save the changes.
- You can now delete the file.
Resetting permissions gives you full control over the file. Make sure to only give yourself access, not everyone. See this guide for more details on taking ownership of files in Windows 10.
Use Third Party Software
There are several third party software programs that can help delete protected files that cannot be removed through Windows’ built-in permissions. Some popular options include:
LockHunter is a free tool that can delete files and folders blocked by unknown applications. It works for both 32-bit and 64-bit Windows versions. LockHunter presents a list of locked files and folders and allows deleting them. It also has additional tools to fix registry errors that may prevent file deletion.
Unlocker by IObit is another free utility that can delete protected files that cannot be removed through the usual delete option. It helps unlock and delete files that are in use, locked, blocked, or protected by system files. Unlocker works by inspecting the processes locking the file and then requesting to close those processes.
Other software like Free File Unlocker, Delete Doctor, Tizer UnLocker, Wise Force Deleter, and MoveOnBoot also provide the ability to delete protected files in Windows. However, these may have limitations in compatibility or features compared to LockHunter and Unlocker.
Overall, third party unlocker utilities provide the best option for force deleting protected files, going beyond Windows’ built-in permissions. Software like Unlocker is able to inspect file locking processes to safely close and delete protected files.
Reinstall Windows
One way to reset all file and folder permissions in Windows 10 is to completely reinstall the operating system. Doing a clean install of Windows 10 will erase all user accounts, user files, applications, and system settings. This will essentially reset everything to a brand new default state, including all file and folder permissions.
According to Microsoft’s support article on resetting permissions, reinstalling Windows is a good option if you have messed up permissions and want to start fresh. The downside is you will lose all your data and customizations.
To reinstall Windows 10, you will need bootable installation media. You can create this using the Windows Media Creation Tool. Then boot from the installation media, delete all existing partitions when prompted, and do a clean install of Windows 10. This will completely reset all file and folder permissions.
Reinstalling Windows 10 is the most thorough way to reset permissions, but also the most time consuming. It should only be used as a last resort if other methods to reset permissions do not work.
Summary
There are a few different methods you can try to get administrator permissions to delete a protected file in Windows 10:
-
Use the elevation prompt to run an app as administrator and delete the file.
-
Right-click the app and select “Run as administrator” to launch the app with admin rights.
-
Edit the registry to take ownership of the file, allowing you to delete it.
-
Take ownership of the file through the Security tab of its Properties.
-
Reset the file permissions to give your account full control.
-
Use third party software designed for deleting protected files.
-
As a last resort, you can reinstall Windows to gain admin access to all files.
The easiest options are using the elevation prompt or right-clicking to run an app as administrator. Resetting permissions, editing the registry and reinstalling Windows are more complex solutions. With several methods available, you should be able to gain the admin rights needed to delete any protected file in Windows 10.
