USB devices like flash drives and external hard drives provide a convenient way to store and transfer data. However, they can become damaged due to physical trauma, file system corruption, or other issues. When your USB device stops working properly, you have a few options to try and repair it.
In this guide, we will cover some troubleshooting steps and data recovery techniques for repairing a damaged USB flash drive or external hard drive. With the right tools and techniques, you can often fix your USB device and recover lost files.
Quick Overview: How to Repair a Damaged USB Device
Here is a quick overview of the steps covered in this guide for repairing a damaged USB device:
- Try plugging the USB device into a different port or computer.
- Check for physical damage and repair it if possible.
- Run the CHKDSK utility.
- Try formatting the USB drive.
- Use data recovery software.
- Contact a USB data recovery service.
If the drive has failed completely, you may need to replace it. But in many cases, you can revive your USB drive and recover data with a few troubleshooting steps.
Signs Your USB Device May Be Damaged
There are several symptoms that indicate your USB flash drive or external hard drive may be damaged or corrupt. Here are some things to look out for:
- The drive is not detected by your computer when plugged in
- You get errors like “USB Device Not Recognized”
- The drive causes your computer to freeze or crash when accessed
- You can’t access saved files and folders on the drive
- Files appear corrupted or can’t be opened
- The drive makes unusual noises when plugged in
- Obvious external physical damage
If you are noticing any of these issues, it’s likely there is a problem with the USB device itself. The next steps will show you how to troubleshoot and repair it.
Step 1: Try a Different Port and Computer
The first step is an easy hardware troubleshooting technique – try plugging the USB device into a different port on your computer. Ports can sometimes malfunction, preventing the device from working properly. Make sure to directly connect it to a USB port on the computer itself, not a hub.
If it still doesn’t work, try plugging the USB drive into a completely different computer. Use the same cable that was originally used with the drive if possible.
This simple step will confirm whether the issue is with the USB port/cable or with the drive itself. If the drive works on another computer, the problem is likely with your workstation’s USB ports. You can then focus your troubleshooting on your computer.
However, if the USB device isn’t detected on multiple computers, the issue is with the device itself. You can then move on to the next steps for repairing the damaged drive.
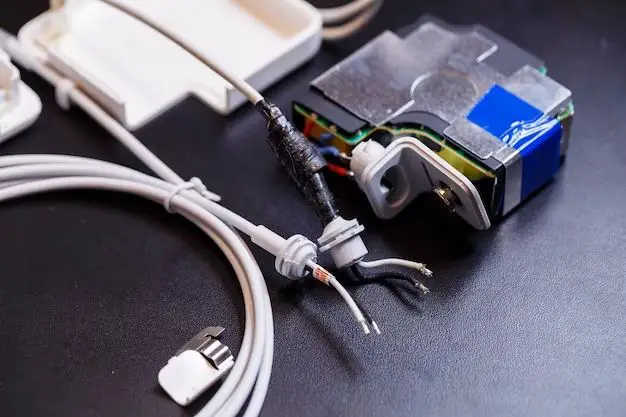
Step 2: Check for Physical Damage
Carefully inspect the outer casing of the USB drive. Look for any signs of physical damage like cracks, dents, broken parts, and leakage from the internal components.
If you find noticeable physical damage, this is likely the cause of the issues. The internal components have been disrupted and the drive will need to be repaired or replaced.
Some types of physical USB damage that may be repairable include:
- Cracked or warped enclosure – Carefully open up the drive and replace the damaged enclosure.
- Disconnected internal plugs – Open the case and reattach any loose/disconnected ribbon cables or plugs.
- Stuck moving parts – The slide-out connector may be jammed. Try gently loosening it with tweezers.
Note that even if you can repair physical damage, the drive may still have internal electronic damage. So the next steps like scanning for errors are still recommended.
If the physical damage is beyond DIY repair, you will need professional data recovery services to extract the data and likely replace the drive.
Step 3: Run CHKDSK Utility
Once you’ve ruled out physical damage, the next thing to try is scanning for file system and disk errors using CHKDSK.
CHKDSK (Check Disk) is a built-in Windows utility that verifies the integrity of your drive and can repair logical file system errors. To run it:
- Open the Command Prompt as Administrator.
- Type “chkdsk X: /f” where X is the letter of your USB drive.
- Allow the scan to run – this can take a while for a larger drive.
CHKDSK will detect and repair common errors like bad sectors. If any errors are found, it will attempt to repair them automatically. This can restore access to your drive and files.
After CHKDSK completes, try to access the USB drive normally again. Just be aware that there is still a chance for physical damage even if no errors are found.
Step 4: Try Formatting the Drive
If the CHKDSK scan doesn’t repair the corruption, the next step is to format the USB drive. This will completely erase the drive and recreated the filesystem.
Warning: Formatting will destroy any data currently on the drive. So if you need to recover the files, make a disk image first with software like ddrescue.
To format, right-click the USB drive in Windows Explorer and choose “Format”. Select FAT32 or exFAT as the new file system.
After formatting, the drive should function normally again if there is no physical damage. You can then repopulate it by copying files back onto it.
Formatting repairs the software side of issues, but cannot fix physical problems like bad sectors. Still, it is worth trying before proceeding to more advanced options.
Step 5: Use Data Recovery Software
If the basic repairs above are unsuccessful, your drive likely has physical damage or corrupted areas. Specialized data recovery software may be able to recover data from corrupted USB drives.
Data recovery software works by scanning the drive and extracting files that are still intact. Popular options include:
- Recuva – Free beginner-friendly recovery tool for Windows.
- TestDisk – More advanced open source recovery utility.
- Ontrack EasyRecovery – Proprietary paid software with advanced capabilities.
The recovery process involves:
- Install and open the data recovery software.
- Select the USB drive to scan.
- Allow a deep scan to run – this can take hours.
- Preview found files that are intact.
- Select the files to restore and recover them to another drive.
This may allow you to recover data even from a drive that appears very damaged. Just make sure to recover files to a different location, not the problem USB drive.
Advanced users may also make a disk image with ddrescue before scanning with recovery software. This image can be scanned repeatedly without stressing the damaged drive.
Step 6: Contact USB Data Recovery Services
For very severe physical damage, you may need to contact a professional data recovery company. Data recovery specialists have access to advanced tools and cleanroom facilities to repair and recover data from drives with significant physical damage.
They can perform specialized procedures like:
- Replacing damaged internal components.
- Bypassing failed circuits.
- Adjusting or replacing read/write heads.
- Microsoldering connectors.
- Data extraction in a dust-free cleanroom.
These advanced mechanical and electrical procedures can often recover data even from USB drives that appear completely dead.
Costs vary widely based on the severity of damage and desired turnaround time. Expect to pay anywhere from $100 to $3000+ for advanced professional USB data recovery.
While expensive, data recovery services are highly recommended for irreplaceable data on a severely damaged USB drive.
Replacing a Damaged USB Drive
If all repair options have been exhausted and the USB device is still non-functional, it will need to be replaced. You can purchase a brand new USB flash drive or external hard drive to use instead.
Just make sure to properly dispose of or recycle your damaged USB device – don’t just throw it in the trash. Some computer repair shops will accept old drives for recycling.
For a USB flash drive, a new one with the same or higher capacity can be purchased. Transfer any recovered data from the old drive onto the new one.
For external hard drives, you can buy a new enclosure and insert the old drive into it if only the enclosure was damaged. This essentially makes it a new external drive.
If the hard drive itself is damaged and data is recovered, you will need to buy a completely new external hard drive. Make sure it has the same or higher capacity as the damaged one.
While certainly frustrating, a damaged USB drive does provide a good reminder to regularly backup important data to avoid data loss.
Tips to Avoid Damaged USB Devices
Here are some tips to prevent damage to your USB flash drives and external hard drives:
- Don’t remove flash drives while files are still being transferred.
- Safely eject the drive before unplugging it.
- Keep drives in a protective case when not in use.
- Avoid exposing drives to excess heat, moisture, or physical shock.
- Don’t use flash drives for long-term important data storage.
- Handle drives carefully and avoid bending or jamming the connectors.
- Regularly backup your data to avoid loss from a damaged drive.
Following these guidelines will minimize the risk of physical trauma and corruption. But drives can still unexpectedly fail sometimes no matter how careful you are.
Having recent backups on separate media means you can easily restore your data if needed. Cloud backup services provide offsite protection of your files.
Conclusion
While a damaged USB drive can seem like a catastrophe, there are often ways to repair and recover your data with some persistence. Follow the step-by-step troubleshooting guide outlined in this article to get your USB device functioning again.
Try changing ports, check for physical damage, run CHKDSK, reformat, and use data recovery software to access your drive’s contents. For extreme damage, professional recovery services may be needed.
With the right tools and techniques, you can rescue your important photos, documents, and other data from a corrupted or physically damaged flash drive. Just make sure to back up regularly so a damaged USB drive doesn’t result in permanent data loss.
