A Windows 7 startup repair using your Windows 7 installation disc is often the best way to fix issues that are preventing your computer from booting properly into Windows. The startup repair tool can automatically detect and repair common issues that may be occurring during the Windows startup process. Here is a step-by-step guide on how to run startup repair on Windows 7 using your installation CD or DVD.
Preparing for Startup Repair
Before beginning the startup repair process, you’ll need to have a few things ready:
- Windows 7 installation disc – This is the disc you used to originally install Windows 7 on your computer. If you don’t have this, you can create a Windows 7 system repair disc using another working computer.
- A computer that can boot from the CD/DVD drive – Startup repair runs outside of Windows, so you’ll need to be able to boot your computer from the CD/DVD drive in the BIOS.
- Back up any important data – While startup repair should not delete any of your personal files or data, it’s always smart to do a backup before making changes to your system.
Setting Your BIOS to Boot from CD/DVD
Startup repair runs in the Windows Recovery Environment, which loads before Windows starts. To load the recovery environment, you’ll need to configure your computer’s BIOS to boot from the CD/DVD drive before the hard drive.
Here are the general steps to change your BIOS boot order:
- Restart your computer and press the key to enter the BIOS, usually F2, F10 or Delete.
- Navigate to the “Boot” section of the BIOS.
- Change the boot order to have your optical drive first.
- Save changes and exit the BIOS.
The specific steps can vary depending on your computer or motherboard manufacturer. Refer to your hardware documentation if you need assistance accessing the BIOS and changing boot order.
Starting the Windows 7 Recovery Environment
Once your BIOS is configured, follow these steps to load the Windows Recovery Environment from your installation disc:
- Insert the Windows 7 installation disc into the CD/DVD drive and restart your computer.
- As your computer boots, you should see a “Press any key to boot from CD or DVD” message. Press a key to continue.
- On the first screen, select your language preferences and click Next.
- Click “Repair your computer” in the lower left corner.
This will load the Windows Recovery Environment from your installation media. From here, you can access the various system recovery tools.
Running Startup Repair
With the Windows Recovery Environment loaded, follow these steps to initiate startup repair:
- Click on “System Recovery Options” in the lower left corner of the screen.
- Select your Windows installation drive, which is usually Drive C.
- Click “Next” to continue to the System Recovery Options menu.
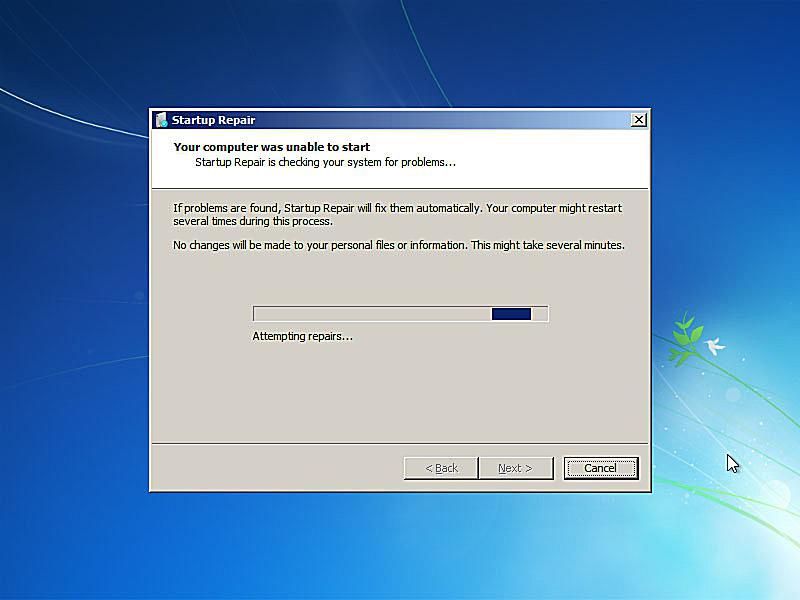
- Click on “Startup Repair” to begin the automated repair process.
Startup Repair will now run a diagnostic and make repairs to issues that may be preventing Windows from starting properly. This may take several minutes to complete.
Possible Startup Repair Outcomes
There are a few potential outcomes from running Startup Repair:
- Successful repair – Startup Repair was able to identify the issue and fix it automatically. After restarting, Windows should now start normally.
- Unsuccessful repair – If Startup Repair is unable to fix the issue, you may need to try more advanced system recovery options.
- Startup Repair cannot run – In some cases, Startup Repair may fail to start. This usually indicates a more serious system issue.
If the first attempt at running Startup Repair fails, you can try running it again in case there were multiple issues affecting your system. However, if it continues to fail, you may need to try more advanced recovery tools.
Advanced Recovery Options
If Startup Repair is unsuccessful at fixing your Windows 7 boot issues, you can try some of the other advanced recovery tools available in the Windows Recovery Environment:
- System Restore – Reverts your computer’s state back to an earlier restore point.
- Windows Complete PC Restore – Completely reinstalls Windows, reverting your PC back to factory state.
- Windows Memory Diagnostic – Tests your computer’s memory for errors.
- Command Prompt – Gives you access to the command line to run advanced diagnostics and repairs.
Using one of these additional tools may help uncover and repair the problem if Startup Repair is not enough. Just be cautious before using options like Complete PC Restore, as they can erase all of your programs and data.
Replacing Corrupt System Files
One of the most common issues that can prevent Windows 7 from starting up properly is corruption in important system files. If System File Checker finds errors, you can use it to replace the damaged files with a fresh copy from your installation disc.
To run System File Checker and replace system files:
- In the Recovery Environment, open the Command Prompt.
- Type sfc /scannow and press Enter to scan for system file errors.
- Once complete, type sfc /scannow /offbootdir=C:\ /offwindir=C:\windows to replace corrupt files.
- Restart your computer and see if Windows will start normally now.
Be sure to replace C: and C:\windows in the command with the location of your Windows installation. Running System File Checker can often fix the underlying problem when Startup Repair comes up empty.
Checking Drive Errors with CHKDSK
CHKDSK is another command you can use in the Recovery Environment to check your hard drive for errors. To run CHKDSK:
- Open the Command Prompt.
- Type chkdsk C: /r and press Enter (replace C: with your Windows drive letter).
- Allow CHKDSK to fully run; this can take a while to complete.
- Restart your PC once finished and see if Windows starts normally.
CHKDSK will scan your drive and repair any file system errors it finds. This can potentially fix start up issues caused by drive errors or file system corruption.
Troubleshooting Common Startup Problems
Here are some common startup issues and potential solutions to try from the Recovery Environment:
| Startup Issue | Potential Solutions |
|---|---|
| Missing system files | Use System File Checker to replace corrupted files |
| Drive errors | Run CHKDSK to check and repair file system errors |
| Corrupted registry | Use System Restore to revert registry changes |
| Damaged boot files | Startup Repair can automatically fix boot file issues |
| Hardware failure | Test hardware with Windows Memory Diagnostic |
Running through some of these troubleshooting steps can help uncover and repair the problem if the initial Startup Repair attempt did not work.
Resetting the BIOS to Default Settings
In some cases, your BIOS settings may have become configured incorrectly and are preventing Windows from booting properly. Resetting your computer’s BIOS back to default settings can sometimes resolve issues and allow Windows to start normally again.
Here are the general steps to reset BIOS settings to default:
- Restart your computer and enter the BIOS menu.
- Find the option to “Load Optimized Defaults” or “Restore Defaults”.
- Save changes and allow computer to restart.
- Check if Windows now starts as expected.
Resetting the BIOS clears out any settings changes that may have caused conflicts with the system boot process. Consult your motherboard or computer documentation for the exact steps to reset your particular BIOS.
Checking for Hardware Issues
While software errors are a common source of start up problems, sometimes a hardware component failure can prevent Windows from booting. The Windows Memory Diagnostic tool can help uncover any errors with your computer’s physical memory:
- In the Recovery Environment, select Windows Memory Diagnostic.
- Allow the tool to fully scan your system memory for errors.
- Review the test results – errors may indicate faulty memory.
- Consider replacing damaged memory components.
You can also listen for beep codes during startup, as particular beep sequences can indicate hardware component failures. Checking the system event logs from within Windows may reveal additional hardware error messages.
Cleaning Out Dust and Ensuring Proper Airflow
Another simple hardware check is opening up your computer case and inspecting for dust buildup and ensuring clear airflow. Excess dust and improper cooling can sometimes contribute to startup freezes, shutdowns, or other glitchy behaviors.
Follow these best practices for cleaning and airflow:
- Use compressed air to blow out dust from fans, vents, and components.
- Inspect fans and heat sinks for blockages.
- Wipe out dust with a clean microfiber cloth.
- Ensure all air vents have clearance and are unobstructed.
- Replace any failing system fans that are making noise or not spinning properly.
Keeping the inside of your computer clean and ensuring proper airflow prevents overheating issues and allows your hardware to run smoothly.
Checking External Devices for Interference
Peripheral devices and external storage connected to your computer can sometimes interfere with the Windows boot process. If you suspect an external device may be causing start up issues:
- Disconnect all peripherals like printers, scanners, cameras.
- Unplug any external hard drives, thumb drives or memory cards.
- Try booting now without anything extra connected.
If Windows is now able to start normally, plug the external devices back in one at a time to determine which one may be causing the conflict.
Conclusion
Running the Windows 7 Startup Repair tool from your installation disc is often the quickest way to automatically fix boot issues. If that fails, utilizing other recovery options like System Restore or CHKDSK can help uncover and repair the underlying problem. Resetting the BIOS to default settings, checking for hardware failure, cleaning dust buildup, and inspecting connected devices are some additional troubleshooting steps to take. With the right approach, you can resolve the problem and get your Windows 7 PC booting properly again.