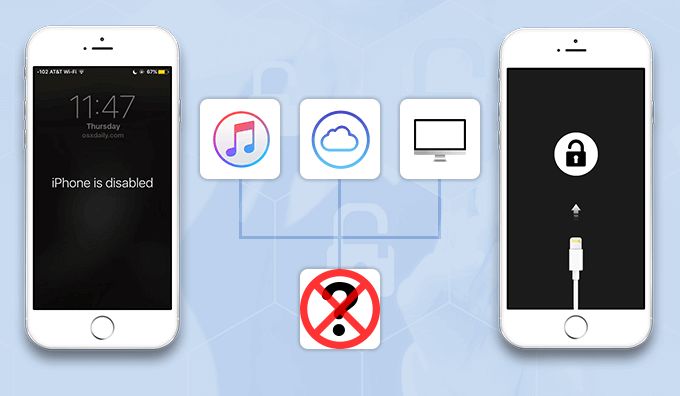
Having an iPhone SE disabled can be incredibly frustrating, especially if you don’t have access to a computer with iTunes to unlock it. There are a few main reasons why you may need to unlock a disabled iPhone SE without a computer:
- You forgot your passcode and the iPhone disabled itself after too many failed attempts
- You lost access to the computer with iTunes that you previously used to sync and manage your iPhone
- You want to sell or give away your iPhone but need to wipe it and reset it first
Thankfully, there are some methods you can use to unlock a disabled iPhone SE without a computer or iTunes. This generally involves putting the iPhone into recovery mode or diagnostic mode to reset it. We’ll provide an overview of the main steps involved:
- Back up your iPhone data if possible
- Force restart your iPhone
- Put your iPhone into recovery mode and connect it to a power source
- Use third party recovery software to reset and restore your iPhone
- If necessary, enter diagnostic mode or reset your iPhone through the settings app
While the process takes some time, you should be able to fully unlock your disabled iPhone SE without a computer by following the steps outlined in this guide.
Back Up Data
Before attempting to unlock a disabled iPhone SE, it is crucial to back up your data first. A disabled iPhone may result in data loss, so having a recent backup ensures you can restore your photos, messages, contacts and other important information if needed.
The easiest way to back up an iPhone is using iCloud backup. As long as your iPhone is connected to WiFi, it can automatically back up to iCloud each day when plugged in, charged and locked. You can also manually trigger an iCloud backup by going to Settings > Your Name > iCloud > iCloud Backup on your iPhone. Check that a recent backup from the last 24 hours is available before proceeding.
If you don’t have an iCloud backup already enabled, you may need to use recovery software like iMyFone D-Back or Dr.Fone to extract a backup from your disabled iPhone before unlocking it. However, this poses risks of further data loss if the iPhone is unresponsive.
Proceed with caution if you don’t have a current backup. Unlocking a disabled iPhone without one may result in permanent data loss.
Remove SIM Card
Before performing a reset, it’s a good idea to remove the SIM card from the iPhone SE. This will ensure none of your data or service plan information is lost during the reset process.
To remove the SIM card, first locate the SIM card slot on the iPhone SE. It is on the right side of the device, next to the power button. You’ll need a SIM eject tool (included with your iPhone) to open the tray and eject the SIM card.
Carefully insert the SIM eject tool into the small hole next to the SIM tray. Press firmly but gently until the tray pops out. Remove the SIM card from the tray, and set it aside in a safe place. You can now proceed with resetting the disabled iPhone SE without worrying about the SIM card.
Force Restart
One way to potentially bypass a disabled screen on an iPhone SE is to force restart it. A force restart, also known as a hard reset, will reboot the iPhone and restart the operating system.
To force restart an iPhone SE:
- Press and hold the Power button and the Home button at the same time.
- Keep holding both buttons until you see the Apple logo appear on the screen.
This should take around 10-15 seconds. Force restarting the iPhone will boot it back up and may allow you to bypass the disabled screen.
According to this guide, force restarting is an effective troubleshooting step if your iPhone SE is frozen, locked up, or not responding.
Put iPhone into Recovery Mode
In order to put your iPhone SE into recovery mode you will need to first connect it to a power source using a lightning cable. This ensures your device does not lose power during the recovery mode process.
Once your iPhone SE is plugged into a power source, hold down the home button and the power button at the same time. Keep holding both buttons until you see the recovery mode screen appear on your iPhone. This typically takes around 10-15 seconds.
The recovery mode screen will display an image of a USB cable pointing into an iPhone. This indicates your device is now in recovery mode and ready for you to restore or update it using recovery software.
Entering recovery mode forces your iPhone SE to connect to iTunes or Finder so you can resolve software issues. Just make sure your iPhone remains connected to a power source throughout this process. Avoid disconnecting the cable or you’ll have to repeat these steps to re-enter recovery mode.
Use Recovery Software
One option to unlock a disabled iPhone SE without iTunes or a computer is to use third-party iOS recovery software like Dr.Fone, iMyFone Fixppo, etc. These tools can remove the activation lock from your disabled iPhone.
To use the recovery software method:
- Download and install the recovery software on a computer.
- Connect your disabled iPhone SE to the computer using a USB cable.
- Open the recovery software and select the “Remove Activation Lock” option.
- The software will load the data from your iPhone and scan for the activation lock.
- Follow the on-screen instructions to enter DFU mode and remove the activation lock.
- Your iPhone should now be unlocked and ready to activate and use normally.
The recovery software provides a simple way to bypass the activation lock without needing the previous owner’s Apple ID. Just make sure to use a reputable tool to avoid software issues or data loss.
Enter Diagnostic Mode
Entering diagnostic mode on your iPhone SE allows you to access advanced troubleshooting options that can help reset and restore your device.
To enter diagnostic mode on an iPhone SE:
- Press and hold the Home button and the Power button at the same time.
- Keep holding the Home button but release the Power button after 5-10 seconds.
- Your iPhone will now be in diagnostic mode with an Apple logo on the screen.
In diagnostic mode, you’ll have access to advanced reset options that can help troubleshoot issues with your disabled iPhone SE. This mode bypasses some of the normal startup procedures and boots directly to the recovery menu.
Try using the reset and restore options in diagnostic mode to see if you can get your iPhone SE working again. If it still doesn’t work, you may need to try updating your software through iTunes.
Reset iPhone
Resetting the iPhone will wipe it completely and remove any passcode, essentially restoring it to factory settings. This will erase all data and settings on the device (source).
To reset the iPhone, you need to put it into recovery mode first. Follow these steps:
- Connect the iPhone to your computer using a USB cable.
- Launch iTunes on your computer.
- While connected, press and hold the Sleep/Wake button and Home button together for at least 10 seconds, until you see the recovery mode screen.
- In iTunes, you will get an option to Restore or Update. Choose Restore.
This will erase the iPhone and install the latest iOS software version. Once the restore is complete, you will be able to set up the iPhone from scratch without any previous passcode.
Warning: Resetting the iPhone will permanently erase all content and settings. Make sure to back up any data you want to keep before resetting the device.
Update Software
Downloading and installing the latest iOS update via recovery mode may help resolve the disabled iPhone issue after an update. According to How to Fix iPhone Locked after Update, putting the iPhone into recovery mode and updating the software can often fix glitches that caused it to become disabled.
To do this, first download the latest iOS update on a computer. Then connect the iPhone and put it into recovery mode by pressing and holding the Home button while connecting the USB cable. Open iTunes, which will detect the iPhone in recovery mode and prompt you to update. Install the latest iOS version and hopefully this will resolve any software bugs causing the disabled state.
Updating to the newest iOS is worth trying, as it specifically targets and fixes bugs in the previous versions. By wiping and reinstalling a clean, updated software version, you may be able to regain access and use of the disabled iPhone.
Contact Apple Support
If you’ve exhausted all self-service options to unlock your disabled iPhone SE, contacting Apple Support directly can help. However, there may be a cost associated with having Apple unlock the device remotely or at a retail store, especially if the iPhone is no longer under warranty. According to Apple’s website, out-of-warranty iPhone unlocking fees start at $299 for newer models like the iPhone SE. You’ll also need to schedule an appointment and bring valid proof of purchase and government-issued photo ID to verify device ownership.
Before paying Apple’s unlocking fee, make sure you’ve backed up your data, updated to the latest iOS software, and tried all the free troubleshooting steps. Also check if you have AppleCare+ coverage that includes accidental damage protection. Contacting Apple should be the last resort for unlocking a disabled iPhone SE, but their technicians can directly access the device to reset forgotten passcodes and return full functionality in many cases.