What is the ASRock Boot Key?
The ASRock boot key is a special key or key combination that allows users to access the boot menu and change boot options on ASRock motherboards (Source). The boot key allows you to select which drive or device to boot from, access the BIOS/UEFI settings, boot into safe mode, and more.
On most ASRock motherboards, the boot key is F2. Pressing F2 during the boot process will interrupt normal boot and bring up the boot menu. However, some models may use a different key like F6, F11, or Del. It’s important to check your specific motherboard manual to confirm the proper boot key.
The main purpose of the boot key is to provide a simple way to change boot order, boot device priority, or access low-level firmware settings. This gives users more control over the boot process for troubleshooting or configuration purposes.
Accessing the Boot Menu
To access the boot menu on an ASRock motherboard, you need to press the boot key during the startup process. The default boot key on most ASRock motherboards is the F11 key. [1]
Here are the steps to access the ASRock boot menu:
- Turn on or restart your computer.
- As soon as the computer starts booting, press the F11 key repeatedly until you see the boot menu.
- You may need to press F11 before the ASRock logo appears on screen.
- If F11 does not work, try other common boot keys like F12, F8, or F10 as the boot key may vary on some ASRock boards.
- Once the boot menu loads, you will see a list of bootable devices connected to your system.
Using this method, you can bring up the ASRock boot menu on startup to select a temporary boot device or access the BIOS/UEFI settings.
[1] https://www.asrock.com/support/faq.asp?id=181
Setting the Boot Key
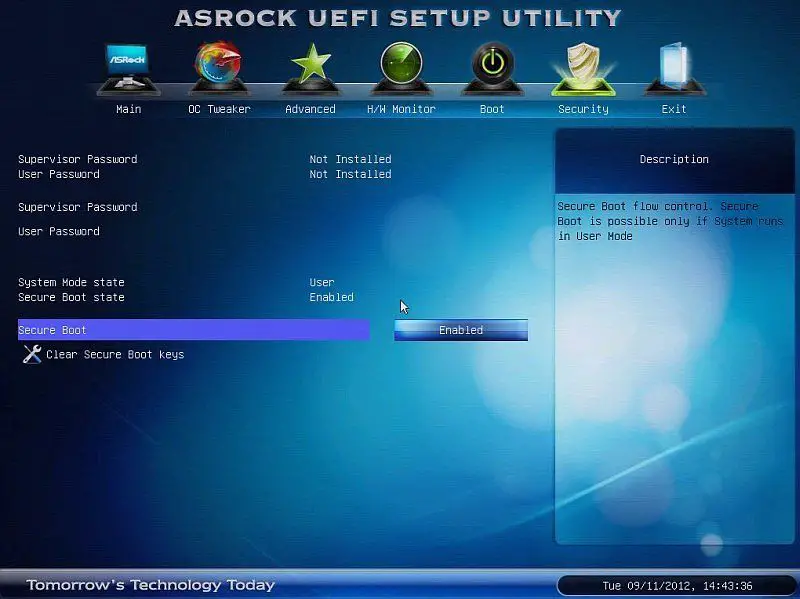
To set the boot key on an ASRock motherboard, you need to access the BIOS setup menu. When your computer first starts, you’ll see the ASRock logo splash screen. During this time, you can press F2 repeatedly to enter the BIOS setup menu (ASRock).
Once you’ve entered the BIOS, go to the “Boot” tab. Look for the setting called “Boot From Onboard LAN” and set this to “Enabled.” Now your boot key will be F12 (Reddit).
After saving your changes and exiting the BIOS, you can now press F12 during startup to access the boot menu. This allows you to select a boot device or access advanced startup options like Safe Mode.
Using the Boot Key
The boot key allows you to access the boot menu on ASRock motherboards. From the boot menu, you have several options:
- Change the default boot device – You can select which storage device to boot from, like your hard drive, SSD, or a USB drive.
- Boot to a different drive – If you have multiple drives installed, you can choose which one to boot from without changing the default boot order.
- Boot to Safe Mode – Safe Mode loads Windows with only essential drivers and services, which is useful for troubleshooting problems.
- Boot to UEFI/BIOS – This will load the UEFI or legacy BIOS settings.
The key benefit of the boot menu is that it allows you to temporarily change the boot order or boot device without having to change permanent UEFI/BIOS settings. For example, you can boot from a USB drive without having to change the default first boot device.
Boot Menu Options
The ASRock boot menu allows you to choose different boot devices and options for starting up your system. Some of the common boot options available in the ASRock boot menu include:
- Boot from hard drive – This will boot your system from the primary hard drive.
- Boot from USB – Allows you to select a USB device like a flash drive or external hard drive to boot from.
- Boot from CD/DVD drive – Boots from a CD, DVD or optical disc drive.
- Enter setup – Enters the BIOS/UEFI setup screen.
- Boot to Safe Mode – Boots into Windows Safe Mode for troubleshooting.
- Boot to Firmware Interface – Boots into the UEFI interface.
The boot menu provides an easy way to select different boot devices or change the boot order without having to enter the BIOS. It’s useful for situations like booting from a USB drive to access recovery tools or installing an operating system. The options available may vary slightly depending on the specific ASRock motherboard model.
For more details, refer to ASRock’s boot menu guide: https://www.asrock.com/support/faq.asp?k=boot+menu
Changing the Default Boot Device
To change the default boot device on an ASRock motherboard, you’ll need to access the BIOS/UEFI setup utility.
First, restart your computer and press the boot menu key, which is typically F11 or F2 on ASRock boards, during the initial boot process to enter the BIOS. You may need to press this key repeatedly.
Once in the BIOS, use the arrow keys to navigate to the “Boot” tab. Here you will see a boot priority order list of all detected boot devices, such as hard drives, SSDs, optical drives, USB drives, and network devices.
To change the default boot device, highlight the device you want to be first in the boot order using the arrow keys. Press the + key to move it to the top of the list. This will set it as the default boot device.
Then press F10 to save changes and exit the BIOS. On the next restart, your computer will boot from the new default boot device.
If you have multiple drives or operating systems installed, changing the boot order like this allows you to select which drive boots by default when powering on the computer.(1)
Booting to a Different Drive
One of the most common uses of the ASRock boot key is to select a different boot drive than the default one set in the BIOS. This allows you to choose which operating system or drive to boot from on startup.
To boot from a different drive:
- Restart your computer and press the boot key (F11 for most ASRock boards) during startup to access the boot menu.
- The boot menu will display all available boot options and drives connected to your system.
- Use the arrow keys to select the drive you want to boot from. For example, if you have Windows installed on your SSD but want to boot into Linux on your HDD, choose the HDD option.
- Press Enter to boot from the selected drive.
This will bypass the default boot order and allow you to boot from any drive of your choice. It provides an easy way to select different operating systems or bootable disks without having to change the boot order in BIOS.
According to the ASRock forums, sometimes newly connected drives won’t show up in the boot priority menu in BIOS. Using the boot key is the best way to ensure you can select and boot from these drives.
Booting to Safe Mode
Safe Mode starts Windows with a limited set of files and drivers to help troubleshoot problems. To boot into Safe Mode on an ASRock system using the boot key:
- Restart your computer.
- As soon as you see the manufacturer logo, press F8 repeatedly until you see the Advanced Boot Options menu.
- Select “Safe Mode” using the arrow keys and press Enter.
This will load Windows in Safe Mode. From here, you can diagnose problems, uninstall problematic drivers or software, run system diagnostics, and more. Safe Mode loads only the minimum required drivers and services, so it’s useful for troubleshooting issues that may be caused by third party software.1
If F8 does not bring up the boot menu, you may need to access the Boot Menu through the BIOS. Consult your motherboard manual for the proper key combination.
Booting to UEFI/BIOS
The ASRock boot key allows you to directly enter the UEFI/BIOS settings from Windows or during system startup. This enables you to access advanced configuration options and troubleshoot boot issues.
To use the boot key to enter the UEFI/BIOS:
- Restart your ASRock system.
- As soon as the system begins booting up, press the boot key continuously. The boot key will vary depending on your specific ASRock motherboard model, but common keys are F2, F11, or Del.
- After a few seconds, the UEFI/BIOS menu will appear.
Once in the UEFI/BIOS, you can navigate the various menus using your keyboard. This allows you to change settings related to overclocking, onboard devices, boot order, and more. Any changes you make will be saved when you select the “Exit and Save Changes” option.
If you are experiencing boot issues, entering the UEFI/BIOS via the boot key can be helpful for troubleshooting. For example, you can adjust boot settings or device priority to resolve problems loading your operating system or other drives.
Overall, the ASRock boot key provides a convenient method to directly access the UEFI/BIOS and configure your system’s low-level settings. Knowing how to enter the BIOS via the boot key is useful for power users and when troubleshooting boot problems.
Troubleshooting Boot Issues
If you are having issues booting your ASRock motherboard, there are some steps you can take to troubleshoot and fix the problems.
First, check the ASRock debug LEDs on the motherboard. These lights can indicate if there is an issue with the CPU, RAM, VGA card, or boot device. Refer to the motherboard manual for more details on deciphering the debug LED codes.
If the debug LEDs point to a boot device issue, make sure your hard drive and SSDs are properly connected and powered. Re-seat the SATA/power cables or try a different SATA port on the motherboard. The ASRock UEFI boot menu may also appear if the boot order was accidentally changed or a new drive was added.
For boot issues related to the operating system, you can try booting into Safe Mode or using System Restore to roll back to a previous working configuration. The ASRock boot key (usually F11) can be pressed during startup to access these recovery options.
As a last resort, clearing the CMOS by removing the onboard battery for a few minutes can reset the BIOS settings to default. This may resolve firmware-related boot problems after a BIOS update or overclocking.
With proper troubleshooting, most ASRock boot issues can be identified and resolved. Refer to ASRock’s technical documents or contact customer support if the problem persists.