Dropping your laptop can be a scary experience, especially when it results in your laptop not powering on afterward. When this happens, don’t panic! There are several troubleshooting steps you can try to get your laptop working again. With some basic do-it-yourself troubleshooting and repairs, you may be able to get your laptop up and running again without a costly trip to the repair shop.
First Steps
When you first drop your laptop and find that it won’t turn on, the most important thing is to stay calm and avoid doing anything rash. Do not try to force it to turn on by pressing the power button repeatedly. This will not help the situation and may even cause further damage.
The first thing to check is that the battery did not simply become loose or disconnected internally from the impact. Remove the battery entirely and then try connecting the laptop directly to the wall outlet using the AC adapter. If the laptop powers on when plugged in directly this way, it indicates an issue with the battery’s connection rather than something more serious.
Carefully re-seat the battery by removing and reinserting it to ensure it is making full contact again. With the battery replaced, try turning the laptop on again as normal by pressing the power button. Sometimes this simple step is all that is needed to restore power after a drop or impact.
Check for Physical Damage
If the laptop still refuses to turn on, the next step is to check for any obvious signs of physical damage. Visually inspect the laptop and look for things like cracks in the case, broken ports, loose components, or dents and impacts on the bottom cover.
Pay close attention to the screen hinges, power port, and areas around ventilation grills where crucial internal components can often be damaged in a drop. Watch for any rattling noises from loose internal parts shaking inside the case.
If the damage is relatively minor, with just external case cracks or dents, there is a good chance the internal components remain intact. More serious damage like a cracked screen, broken power port, or heavy blows near sensitive components will make powering on less likely.
Dents and Cracks
For dents and cracks limited to the external case, the laptop still has a decent chance of powering on. Cracked plastic may just be cosmetic rather than damaging anything critical. Try removing any loose case fragments and reassembling intact areas.
If the cracks and dents are near sensitive areas like vents or ports, use extra care when reassembling these spots to avoid causing any new internal damage.
Broken Hinges
With laptop hinges, the concern is that they commonly attach directly to the motherboard inside. If hinges come loose or break off from the base, this can damage the connections for power buttons, keyboards, and more.
Before attempting to turn the laptop on, check that hinges are still securely anchored to the base. If not, their attachments will need repair to restore power.
Damaged Ports
A damaged power or charging port is one of the most likely causes of a dropped laptop not turning back on. The solder points connecting these ports to the motherboard are subjected to a lot of strain in a drop.
Check closely for any looseness, cracked plastic, or bent pins around the power and charging ports. If damage is minor, carefully straightening bent pins with tweezers may help. More serious damage requires soldering work to replace the port.
Remove Battery and Power Supply
Once you’ve done an initial inspection for physical damage, the next step is to start removing components to check the internal condition. Start by disconnecting the battery and AC adapter.
On the bottom of the laptop, look for a panel held in place by screws. This provides access to the internal components. Removing screws and panels carefully can allow you to inspect the inside without causing further damage.
With bottom panels removed, unplug the battery connector from the motherboard if it didn’t come loose already on impact. Also unplug the power supply cable that runs from the AC port into the laptop body.
With these power sources disconnected, it’s safer to power the laptop on just running off battery. This helps avoid short circuits from damaged cables or ports trying to draw full power.
Inspect Inside Components
Once the external case is open, visually inspect the inside for any signs of damage. Look for things like:
- Loose or disconnected cables
- Detached wire connectors
- Burnt or damaged spots on the motherboard
- Cracked chips or components
- Hard drive damage
- Damaged cooling fan
- Broken hinge anchors
- Bent metal framework
Pay special attention to the areas around screw holes that would have borne the brunt of impact forces. Use a flashlight to illuminate dark corners and double check that no cables came unplugged.
Common Damage Points
Some key components and areas to check closely include:
- Motherboard – This is the computer’s main circuit board and where physical impacts often cause damage.
- CPU and GPU – These fragile processors are vulnerable to damage from drops, especially if their cooling heatsinks came loose.
- HDD and SSD – Drops can knock hard drive heads out of alignment or damage SSD boards.
- Cooling fan – Often cracked or bent blades from a drop.
- RAM – Memory modules can be dislodged from their slots.
- CMOS battery – Small watch-style battery that provides power to BIOS settings.
Issues with any of these components can prevent powering on. Re-seat connections and replace any clearly damaged parts if possible.
Reconnect Cables and Power
With inspection complete, the next step is methodically reconnecting cables and power supplies. Start by re-attaching any internal cables that may have come loose, like ribbon connectors between boards or display cables.
Secure the battery back in place and reconnect its cable to the motherboard. Also plug the AC power cable back into place.
Before fully reassembling the case, try turning the laptop on with just the battery connected. If it works, shut down and then repeat the test with just the AC adapter connected. This helps isolate whether there is damage to a specific power component.
Replace Damaged Parts
If testing power sources proves they are intact, you likely have damage to a specific internal component. Among the most failure-prone parts to check are:
Motherboard
If you see any burnt spots, damaged ports, or cracked chips on the motherboard it will need professional repair or replacement. Motherboard damage is often extensive from drops.
HDD/SSD
For traditional hard disk drives (HDDs), the actuator arm crashing into platters is the main risk from drops. For solid-state drives (SSDs), impacts can crack boards or detach memory chips.
For either HDDs or SSDs, install a new drive and try to access your old files externally using a USB enclosure or adapter.
CPU/GPU
Bent pins are especially common on the CPUs and GPUs after drops. Carefully straighten pins using a credit card or specialized tool. Never power on a system with bent processor pins.
If processor chips came loose or were knocked off boards entirely, they will need professional re-attachment using a hot air station.
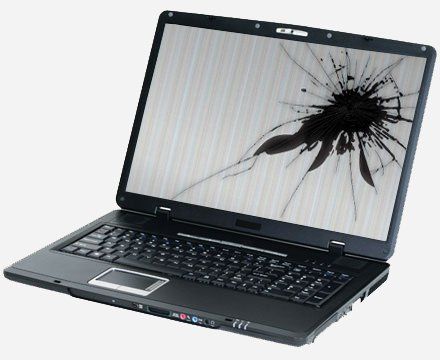
Display
Drops commonly crack display panels or cause internal connections to come loose. Replace cracked screens or try re-seating display cables where they attach to the motherboard.
Use care when working on displays to avoid contact with any broken glass or LEDs.
Attempt to Boot
Once any clearly damaged components are replaced, attempt to boot the laptop again. Reconnect the battery and AC adapter and press the power button as normal.
If the laptop starts, inspect the BIOS settings and operating system for normal functioning. Errors like invalid dates can point to CMOS battery failure.
Test wifi, USB ports, speakers, and other components one by one to isolate any issues only impacting certain functions.
Back up critical data immediately if able to boot successfully. Performing a system restore is also recommended after major drops to reset all software and drivers.
Further Troubleshooting
If the laptop still refuses to power on even after replacing obvious hardware damage, more in-depth troubleshooting is required.
Additional steps to try include:
- Testing the charger with a voltmeter
- Measuring resistors for short circuits
- Examining voltages and waveforms around processors
- Resetting CMOS by removing the onboard battery
- Testing RAM modules one at a time in different slots
This advanced logic board-level troubleshooting may require electrical engineering expertise. Forums like iFixit can help provide diagnostics tips specific to your laptop model.
When to Seek Repair Shop Help
If you have exhausted all standard troubleshooting steps and your laptop still fails to power on, it’s best to seek professional repair assistance. Repair technicians have the skills, tools, parts inventory, and diagnostics capabilities to bring even severely damaged laptops back to life.
Common options for professional laptop repair include:
- Manufacturer – Dell, HP, Lenovo, etc. often have mail-in or on-site repair options, sometimes covered under warranty.
- Local repair shops – Neighborhood IT repair technicians skilled at resolving hardware issues like no power.
- Soldering specialists – For tricky circuit board-level soldering work needed on components like USB ports.
Seeking professional assistance right away can often save money compared to damaging components further through DIY guesswork. Technicians also have access to proprietary diagnostic tools and schematics.
Data Recovery Options
If the laptop ends up requiring major component replacement or cannot be powered on at all, your top priority becomes recovering your files before any repair work.
Options like removing the hard drive to insert in an external enclosure will allow accessing your data from another system.
For more severe drive failures, professional data recovery specialists have advanced tools like clean rooms and imaging equipment to restore data from even heavily damaged drives.
Prevention Tips
While drops and accidents are often unavoidable, there are steps you can take to help minimize future laptop damage:
- Use protective sleeves, cases, and bags when traveling
- Avoid moving your laptop when powered on
- Carry it gently rather than dangling or tossing
- Don’t use it in precarious positions like stacked on books
- Keep it away from table and counter edges
- Ensure outlets have sufficient cord slack to avoid yanking
- Consider a commercial damage protection plan when purchasing
Backing up your data regularly is also critical to minimize the impact of failures and make recovery easier when troubleshooting is unsuccessful.
Conclusion
Dropping your laptop can be scary, but in many cases it is repairable. By remaining calm, following a systematic troubleshooting process, and utilizing professional help when needed, you can often get your laptop running again without critical data loss.
Careful inspection to locate physical damage points, methodical reassembly and testing, and replacing broken parts can help restore power and function. Seeking reputable repair technicians is wise once DIY efforts are exhausted.
While drops can never be fully prevented, carrying your laptop safely, using protection, and backing up data are all steps that can minimize future damage risks. With persistence and the right help, even the most severe laptop drops do not have to mean the end of your device or data loss.
