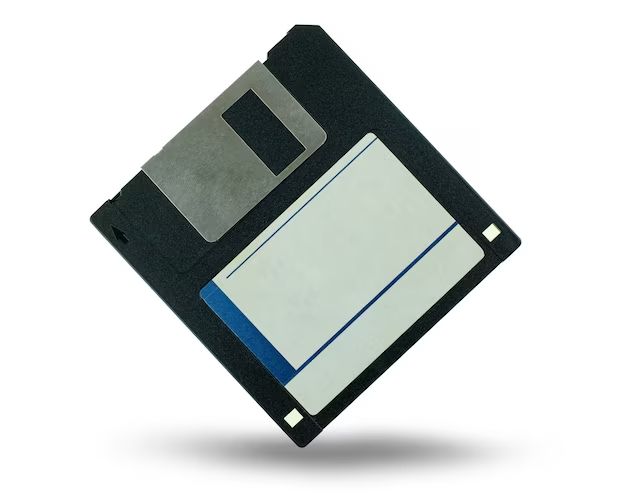
Floppy disks have a long history in personal computing, first being introduced in 1971 by IBM. They were commonly used to store and transfer files and programs from the 1970s through the 1990s and early 2000s, prior to being largely replaced by optical discs, USB drives, and cloud storage (Source). During their heyday, floppy disks were considered an innovative portable storage solution. Their most popular sizes over the years included 8-inch, 5.25-inch, and 3.5-inch.
Even though floppy disks have become obsolete for most people, some may still have important personal or business files saved on floppy disks from that era. These could include documents, photos, programs, or other data that someone wants to convert to modern formats and storage devices. Accessing those old floppy disks requires a working floppy drive, which are increasingly hard to find. So people with decades-old floppies are seeking services to transfer their contents before the disks degrade and drives disappear.
What is on Your Floppy Disks?
Floppy disks were commonly used to store and transfer files in the 1980s through early 2000s. Some common file types people may have saved on floppy disks include:
- Documents – Floppy disks were often used to save word processing files, spreadsheets, and other office documents. Programs like Microsoft Word, Excel, Corel WordPerfect, and Lotus 1-2-3 were popular for creating documents on floppy disks.
- Photos – Though low resolution by today’s standards, floppy disks provided an early way to save and transfer image files. Formats like BMP, TIFF, JPEG, GIF were used to store photos.
- Games – Floppy disks were a convenient way to distribute games. Many classic DOS and early Windows games came on floppy disks.
- Programs – Software applications were commonly distributed via floppy disks. Boot disks allowed starting up computers from floppy disks.
- Music – Early digital music formats like MIDI files allowed saving songs on floppy disks.
In addition to file contents, floppy disks may hold nostalgic value for their role in early home computing history. Many remember floppies fondly as their first external storage medium.
Challenges of Converting Floppy Disks
Converting floppy disks comes with some unique challenges, especially for older disks. Outdated hardware and software is often required. According to this Google group discussion, reading 3.5″ floppy disks on modern computers can be difficult without an older external USB floppy drive. These cheap, basic drives may not be compatible with all disks.
Another challenge is reading corrupt or damaged files from older floppies. As disks age, the magnetic properties weaken and bits can be lost. According to a Vintage Computer Federation forum thread, converting 1.44MB disks to 720KB does not always work as expected due to file corruption. Damaged disks may require multiple read attempts to extract files.
Overall, converting floppy disks requires having the right hardware, software, and technical skills to handle aged media and resulting file integrity issues. Care must be taken to maximize the data recovered from these obsolete disks.
Transferring Files from Floppy Disks
To transfer files from old floppy disks, you will first need equipment like a USB floppy drive that can read the disks. USB floppy drives are still available to purchase online or at some electronics stores. Make sure the drive you get is compatible with the size and format of your floppy disks (3.5″ disks vs 5.25″ disks).
You can try inserting your floppy disks into the USB drive and connecting it to your modern Windows or Mac computer. With the proper software installed, your computer should be able to access the contents of the disks so you can view directories and copy files off of them.
Another option is to try your floppy disks in an old computer that has the right floppy drive built in. Boot up an older Windows PC or Mac that is contemporary to the floppy disks to increase compatibility. You may be able to access and copy the files directly from an older machine.
There are also various apps and software utilities that can help read different floppy disk formats on modern computers. Do some research to find one compatible with your computer and disk format. For example, tools like DiskImage for Linux can mount floppy disk images, allowing you to view and transfer the files.
Converting Different Floppy Disk Formats
Floppy disks came in a variety of sizes and densities over the years, which means you may need to convert between formats when transferring the files. The most common sizes were 8-inch, 5.25-inch, and 3.5-inch.
8-inch floppy disks stored up to 500KB of data. 5.25-inch disks stored anywhere from 360KB to 1.2MB. The ubiquitous 3.5-inch disks could hold between 720KB to 1.44MB. Disk density refers to how much data can be stored per disk – double density could store twice as much as single density formats.
Most floppy disk formats used the FAT12 filesystem to organize data. FAT12 stands for File Allocation Table 12-bit and was commonly used on floppy disks due to its simplicity. The limit of FAT12 is that it can only support 4096 clusters per volume, restricting capacity.
When transferring files between different floppy disk sizes and densities, you’ll need a utility that can read the original format and then write it out to the destination format. Some tools like FDFORMAT allow you to reformat a disk to a different capacity.
Alternatively, you can create disk image files of the original floppies using imaging software. These images can then be mounted virtually using emulators which will make the OS treat them as real disks. This method avoids any reformatting risk to the data.
Preserving Files Long-Term
To preserve files from floppy disks long-term, it is important to transfer the files to modern storage media and file formats. This avoids issues with floppy disk deterioration and technological obsolescence of floppy drives. There are a few recommended approaches:
Convert formats to those compatible with modern computers and operating systems. For example, convert old word processing documents to .docx, spreadsheets to .xlsx, etc. Open source tools like Floppy Disk Preservation Project provide utilities to automate conversions.
Back up the files to modern storage media like external hard drives, SSDs, or cloud storage. This creates redundant copies in case of disk failure. Regularly check integrity and refresh the media to combat bit rot.
Use emulation software to mimic vintage computing environments, enabling old programs and files to be accessed. Solutions like KryoFlux work with many disk formats and provides bitstream images.
With careful file conversion, redundant backups, and emulation options, data on floppy disks can be preserved indefinitely. This retains access to vintage digital documents, programs, and memories.
Sending Out to a Conversion Service
Using a professional floppy disk conversion service is a convenient option for transferring your files to modern media. Some key pros and cons to consider:
Pros:
- Convenience – you can mail in your floppies and get back the converted files without having to buy equipment or do it yourself.
- Experience – professionals have the expertise and tools to maximize successful data recovery from floppies.
- Formats – services can convert various floppy disk formats and file systems.
Cons:
- Cost – using a service costs more than DIY options. Expect to pay $10-30 per floppy disk.
- Risk – you have to trust the service with your original disks.
- Turnaround time – services may take weeks to return converted files.
When choosing a service, look for an established company with a strong track record of recovering data from old media. Check reviews and ask about their conversion process. A trustworthy service will provide a guarantee if recovery is unsuccessful. Ask what media formats they can convert from and to. Expect a professional service to charge $15-30 per standard floppy disk for file conversion.
Well-reviewed floppy disk conversion services include:
Computer Convert,
VHS to DVD Conversion Service, and RetroFloppy.
Sending your floppies to an experienced service ensures your files get safely converted while you avoid buying equipment and learning the process yourself.
DIY Conversion Tips
For those wanting to convert floppy disks themselves without sending them out, here is a step-by-step guide to doing it with some software recommendations.
You’ll need a few pieces of hardware and software:
- Floppy disk drive – This can often be an external USB floppy disk drive that connects to your modern computer.
- Floppy disk adapter – This adapter allows you to connect the floppy drive to a USB port on your computer.
- Converting software – Software like WinImage or fc5025 can copy files from floppy disks and convert between formats.
The general steps are:
- Connect the floppy disk drive and adapter to your computer.
- Insert the floppy disk you want to convert and copy files from.
- Open your conversion software and select the floppy disk drive as the source.
- Use the software to browse and copy files from the floppy disk onto your computer.
- The software can convert between floppy disk formats if needed.
- Double check the files copied properly and were converted to the desired format.
This DIY method takes some setup but allows you to convert floppy disks on your own. Be sure to have the necessary hardware and software ready before starting.
Alternative Options
Sometimes the best option is to let go of old floppy disks rather than spend time and money converting them. Below are some alternative options to digitizing floppy disks:
Cloud Storage – Rather than convert old floppies, consider backing up your current computer files to a cloud storage service like Dropbox, Google Drive, or Microsoft OneDrive. This ensures your files are saved and accessible from any device.
External Hard Drives – For long term backup, external hard drives provide ample storage space at relatively low cost. Copy important files to one or more external drives.
Organize Non-Digital – If your floppies contain things like old family photos or documents, consider organizing the physical artifacts in albums, scrapbooks or filing cabinets rather than digitizing.
Let Go – For floppies without critical or sentimental data, it may be best to simply let them go. The time and effort to convert them may not be worth it.
Consider Priorities – Focus digitization efforts on truly meaningful data. Convert a few select floppies rather than every single one.
Conclusion
Converting your old floppy disks can be a challenging but rewarding process. With some patience and the right tools, you can recover those long-forgotten files and preserve that retro data. First, identify what types of floppy disks you have and what format they use. Then acquire a USB floppy drive to connect the disks to your modern computer. You may need to install drivers or floppy disk imaging software to interact with the contents. Carefully save copies of the files on your hard drive or in the cloud. For tricky formats, consider sending your disks to a data recovery service.
To keep your converted files accessible in the future, avoid obsolete formats like .wps and save copies in universal standards like .txt, .jpg, .mp3. Migrate the files to new storage media every few years before degradation occurs. Consider printing photos and burning CDs for physical backup too. With some time and care, you can hold onto those vintage floppy memories. Just be sure to take the steps to convert and preserve that retro data today before it’s too late!
