Partitioning a USB drive on a Mac allows you to divide the storage into multiple volumes or sections. This can be useful for organizing files, creating bootable drives for operating system installs, or using the drive across different platforms like Windows and MacOS. However, there are some compatibility issues to be aware of when partitioning USB drives on a Mac.
This article will provide an overview of USB drive partitioning on Mac, including how to use Disk Utility, common errors, and file system considerations. We’ll also look at when it may be necessary to get help with partitioning if you run into issues.
Compatibility Issues
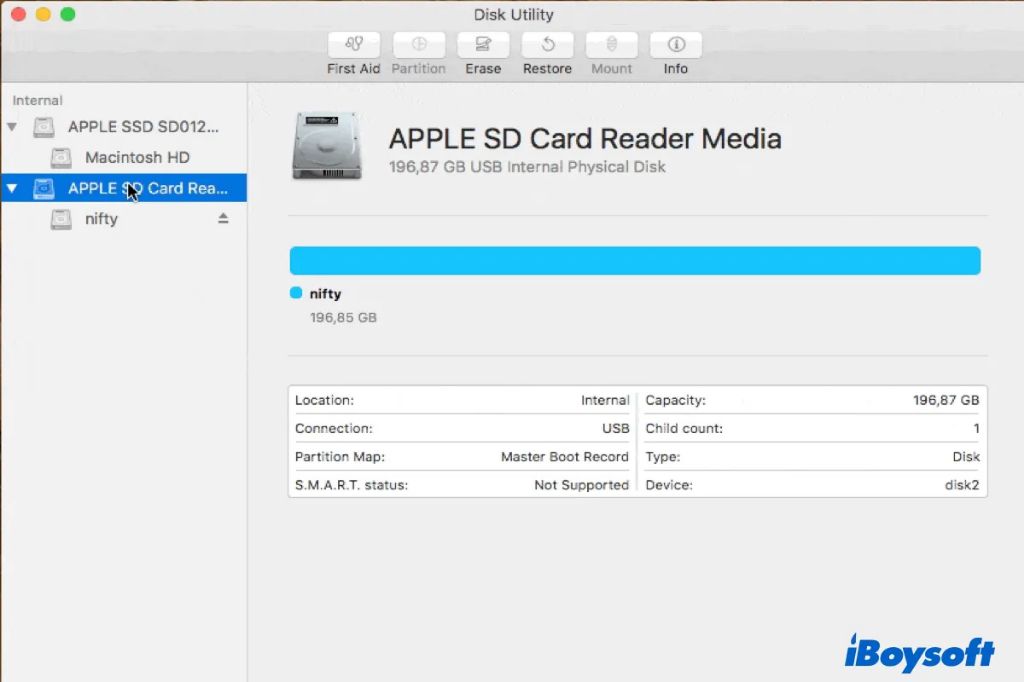
One of the main reasons you may be unable to partition a USB drive on a Mac is compatibility issues between the Mac and Windows partitioning schemes. Macs use the GUID Partition Table (GPT) scheme while Windows PCs traditionally use the Master Boot Record (MBR) scheme (source). GPT is newer and offers advantages like support for larger drives and unlimited partitions, while MBR is older but has wider compatibility with older systems.
If you want to use your USB drive between Mac and Windows, the partitioning scheme you choose matters. For full compatibility, many recommend using GPT partitioning with the ExFAT file system, as this will allow the drive to be read and written to by both Macs and Windows PCs (source). However, some very old versions of Windows may not support GPT, in which case MBR may be required.
So in summary, GPT with ExFAT is ideal for cross-platform USB drives on modern systems, while MBR may be needed for very old versions of Windows. Checking which partitioning scheme and file system your drive is using can help troubleshoot compatibility issues.
Formatting the Drive
To partition a USB drive on a Mac, the drive must first meet certain requirements. The drive must be formatted using a file system compatible with macOS such as HFS+, APFS, or exFAT. Drives formatted with NTFS or other Windows-specific file systems may not allow partitioning on a Mac (Apple Support). Additionally, the drive must have sufficient free space available to create new partitions. If the drive is already full or nearly full, partitioning may fail.
Before partitioning, it’s a good idea to backup any important data on the drive. The partitioning process will erase all existing data. Once the drive meets the requirements, the Disk Utility app included with macOS can be used to easily partition the drive (USB Memory Direct).
Using Disk Utility
Disk Utility is the native drive partitioning tool included on all Mac computers. Here are the steps to partition a USB drive using Disk Utility:
1. Connect the USB drive to your Mac.
2. Open Disk Utility (located in Applications > Utilities).
3. Select the USB drive in the left sidebar.
4. Click the Partition button in the toolbar.
5. Click the + button to add a new partition. You can customize the name, format, and size of each partition.
6. Click Apply when you are done setting up the partitions. This will reformat and partition the USB drive.
For a visual step-by-step guide, refer to Apple’s support article: Partition a physical disk in Disk Utility on Mac.
Third Party Tools
While Disk Utility is the default partitioning tool included on Macs, there are several popular third party options that provide more advanced features. Some of the top third party USB partition managers for Mac include:
GParted – An open source disk partitioning tool that supports multiple file systems. It provides options for resizing, moving, creating, deleting, and copying partitions.
Paragon Partition Manager – Allows you to easily redistribute unused space between partitions. Includes features like partition alignment, bootable media, and disk cloning.
MiniTool Partition Wizard – Allows for non-destructive partitioning operations. Can merge partitions, convert between file systems, and fix boot issues.
These third party tools provide more flexibility for power users. They allow you to perform more advanced partitioning operations compared to the basic options in Disk Utility.
Partitioning Errors
Partitioning a USB drive on a Mac can sometimes result in errors. Some common partitioning error messages include:
“Partition failed” – This usually occurs when there is not enough free space on the drive to create the partition. Try freeing up space by moving files off the drive before partitioning again (Source).
“Disk Erase failed. Couldn’t unmount disk” – The drive is currently in use and cannot be unmounted. Quit any applications using the drive and try partitioning again (Source).
“Waiting for partitions to activate” – This is usually fixed by restarting your Mac. The new partitions should activate after a reboot (Source).
If the partition errors persist, it’s recommended to run First Aid using Disk Utility to check for and repair any disk errors. Corrupted drives that cannot be fixed will need to be reformatted before partitioning again.
File System Incompatibilities
One common reason for being unable to partition a USB drive on Mac is that the drive is formatted with a file system incompatible with macOS. The main options are FAT32, exFAT, APFS, and Mac OS Extended (HFS+).
FAT32 has a maximum individual file size of 4GB and is not optimized for macOS. exFAT removes the file size limit but is still not ideal for a Mac-only drive. For full compatibility, the drive should be formatted with APFS (for newer macOS versions) or HFS+ for older OS versions.
Trying to partition a drive that uses FAT32 or exFAT can result in errors or instability. The solution is to backup data, reformat the drive to APFS or HFS+, and then repartition. Some third party tools like Paragon NTFS can add Mac support for other file systems without reformatting.
Insufficient Space
Partitioning a USB drive requires reserving space for each partition. On small capacity drives like 4GB or 8GB, there may not be enough free space to create multiple partitions [1]. For example, a bootable macOS installer partition requires at least 8-16GB depending on the version. With only 8GB total space on the drive, there wouldn’t be room for any additional partitions.
To partition a small drive, you first need to free up space by moving data off the drive. Delete unused files and applications until there is enough contiguous free space for the partitions you want to create. The minimum size for a usable partition is generally around 2GB.
For very small flash drives like 2GB or less, it’s not recommended to partition them. There likely won’t be enough free space after creating even one partition. It’s better to use the full capacity as a single volume on very small drives.
Corrupted Drives
USB drives can become corrupted for a variety of reasons – sudden removal, bad sectors, file system errors, etc. Corrupted drives may not mount properly, show up sporadically, or be unreadable by your Mac. Before partitioning a corrupted drive, you’ll want to try repairing it first.
The Disk Utility app included with macOS has a “First Aid” feature that can check for errors and attempt basic repairs. Open Disk Utility, select your USB drive, and click First Aid. If errors are found, it will try to fix them [1].
For more serious corruption, you may need dedicated repair software. Tools like Disk Drill and iBoysoft Mac Data Recovery can scan drives and rebuild directory structures. This gives you the best chance of salvaging data from a corrupted drive before reformatting or partitioning [2].
In severe cases, you may need to erase the drive completely using Disk Utility before attempting to partition again. This will wipe all data, so recover anything you need first. Go to Disk Utility, select the drive, click Erase, and choose a format like APFS or ExFAT.
If basic repairs don’t work, the drive itself may be damaged beyond software fixes. Consider replacing it if corruption persists after multiple attempts at repair.
When to Get Help
In some cases, DIY data recovery software may not be able to recover your files from a USB drive. If you’ve exhausted all options to fix your drive and recover deleted files yourself, you may need professional help.
Data recovery experts have access to specialized tools and clean room facilities to physically repair drives and recover data. However, these services can get expensive. Costs often start around $300 and can go up to $3000 or more depending on the drive size and amount of data to recover.
Before using a professional data recovery service, be sure to get a quote for the cost of recovery. Reputable companies like DriveSavers and Kroll Ontrack offer free evaluations to assess your drive and determine if they can recover your files.
Look for a company that has been around for a while and has trained technicians, certification, security protocols to protect your data, and positive customer reviews. This can give you more confidence that they can successfully recover your important files if you are unable to do it yourself.
