SSD stands for solid-state drive, it’s a type of storage device that uses integrated circuit assemblies to store data persistently. SSDs use flash memory instead of spinning platters like traditional hard disk drives (HDDs). Being able to identify and differentiate SSDs is important because they offer several advantages over HDDs including faster read/write speeds, quicker boot times, lower latency, better reliability, and lower power consumption. With the growing adoption of SSDs, it’s useful to know how to distinguish between models based on key characteristics.
Model Number
To find the model number of an SSD on Windows, you can use a few different methods:
From File Explorer, right click on This PC and select Properties. In the System window, go to Device Specifications and look for the disk drives section. This will show the model number for any SSDs installed in your system.
You can also open the Command Prompt as Administrator and use the command wmic diskdrive get model to list the model numbers of disks (see this guide).
On laptops, SSD model information may be listed in the BIOS under the storage or hardware details section.
The model number itself is typically an alphanumeric code assigned by the manufacturer to identify that specific SSD product. For example, the Samsung 970 EVO Plus SSD has a model number of MZ-V7S500. This model number can be used to look up full specs and details for that SSD.
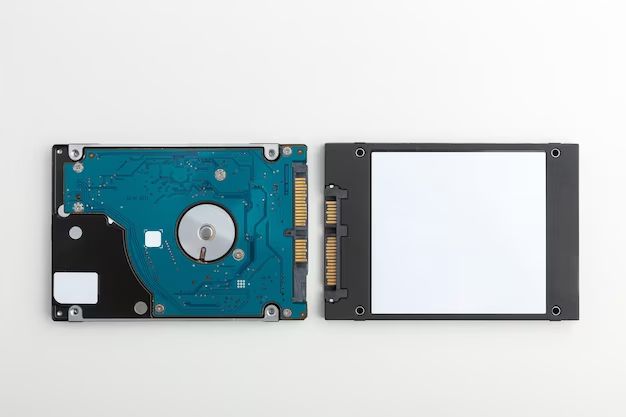
Physical Size
One way to tell SSDs apart is by their physical form factor or size. Common SSD form factors include:
- M.2 – An M.2 SSD is about the size of a stick of gum. It connects directly into a slot on the motherboard. M.2 drives come in different lengths such as 2242, 2260, 2280, or 22110 which refers to the dimensions in mm.
- 2.5-inch – This is the most common SSD size and it’s the same form factor used for laptop hard drives. 2.5-inch SSDs connect via SATA or SAS interfaces.
- Add-in card – These SSDs fit into PCIe slots and offer extremely high performance. They are larger than other form factors.
- mSATA – This form factor is about half the size of a standard 2.5-inch SSD. mSATA SSDs are mainly used in smaller devices like tablets and mini PCs.
The physical size and connector type are key identifiers for SSD form factors. M.2, 2.5-inch, and add-in card SSDs are common in desktops and laptops. Checking the dimensions and interface connections is an easy way to determine the form factor.
Interface
SSDs use different interfaces that affect performance. The main interfaces are SATA, NVMe, and PCIe. SATA SSDs connect via the SATA interface, which has been the standard for HDDs and SSDs for over 15 years. SATA is limited to a maximum sequential read speed of around 560MB/s[1]. NVMe (Non-Volatile Memory Express) SSDs communicate directly with the CPU via the PCIe bus, which was designed for add-on cards like graphics cards. NVMe removes the SATA bottleneck and can reach sequential reads over 3500MB/s. However, NVMe requires an M.2 slot or PCIe slot on the motherboard. PCIe 4.0 SSDs push speeds even faster. So NVMe SSDs will have much higher theoretical speeds than SATA, but require NVMe support from the motherboard.
[1] https://www.kingston.com/en/blog/pc-performance/nvme-vs-sata
Controller & NAND Type
The controller and NAND type are key factors that determine the performance and reliability of an SSD. Here are some ways to identify the controller and NAND specs:
Use a utility like SSD-Z to easily look up the controller model, NAND type, and other specs of your SSD based on the drive’s model number or serial number. SSD-Z maintains a large database of SSDs and their components.
Check reviews of your specific SSD model – reviewers often mention the controller and NAND configuration. For example, the Crucial MX500 uses the Silicon Motion SM2258 controller and Micron 64L TLC NAND according to this review.
Search the SSD manufacturer’s website for product specs – datasheets sometimes provide information on the controller and NAND components.
Use Linux commands like lshw or lspci to inspect hardware details including the SSD controller when connected to a Linux machine.
Once you know the controller model, search online to learn if it uses a proprietary design or a controller from a major supplier like Phison, Silicon Motion, etc. The controller architecture affects performance capabilities.
Sequential Read & Write Speeds
Sequential read and write speeds refer to how fast an SSD can read and write data in sequential order. This metric provides insight into the SSD’s maximum performance for transferring large files like videos, photos, games, etc. Faster sequential speeds allow for quicker file transfers and load times.
For most general use, an SSD with sequential read speeds of at least 500 MB/s is sufficient. For intensive tasks like 4K video editing or PC gaming, speeds of 1500 MB/s or higher are ideal for the best performance. The interface also impacts speed – SATA SSDs max out around 550 MB/s, while NVMe SSDs can reach over 7000 MB/s.
When comparing SSDs, look at reviews to see real-world test results. The manufacturer specs can be misleading. Pay attention to 4K speeds for small files, and 512K/1M speeds for large sequential transfers. For gaming and overall responsiveness, 4K speeds are often more relevant than purely sequential speeds.
Sources:
[1] What Are Read/Write Speeds, and Why Do They Matter?
[2] SSD read/write speed for gaming: Does it matter?
Warranty Period
SSDs typically come with a warranty period ranging from 1 to 10 years, with 3-5 years being the most common. The length of the warranty is one way to gauge the expected lifespan and reliability of an SSD.
Manufacturers will warranty an SSD for a certain period of time, implying that the drive should continue functioning properly beyond that time frame. For example, Samsung offers a 5-year limited warranty on many of its SSD models like the 870 EVO series, covering defects in materials and workmanship [1].
A longer warranty period indicates that the manufacturer has more confidence in the SSD’s endurance and longevity. Typically enterprise/datacenter-focused SSDs will have longer 5-10 year warranties as they are built for durability with higher write endurance. Consumer SSDs aimed at home builds tend to have 3-5 year warranties.
When comparing SSDs, opting for a model with a longer warranty can give you greater peace of mind. However, warranty length alone doesn’t tell the whole story, as other factors like controller, NAND type, and TBW endurance rating also impact reliability.
Manufacturer
When looking at SSDs, the manufacturer is an important consideration for reliability. According to reviews, the most reliable SSD brands include:
Samsung: Widely considered one of the most reliable SSD manufacturers, Samsung SSDs are known for their high performance and endurance. Popular models like the Samsung 970 EVO Plus have excellent ratings.
Western Digital: WD’s Black SN750 NVMe SSD is a top pick for gaming SSDs and scores well in reliability tests. Overall, WD is a trusted brand for SSDs.
Kingston: For great read/write speeds, Kingston’s KC2500 SSD comes recommended. The company has a reputation for making quality, reliable drives.
Crucial: Known for solid state drives that deliver good value, Crucial SSDs tend to perform well over time. The MX500 is one of their most popular and reliable models.
Overall, sticking with leading brands like Samsung, WD, Kingston, and Crucial is a good way to get a reliable, long-lasting SSD with good performance.
Price
The price of an SSD can often be a good indicator of its performance and quality. More expensive SSDs tend to use higher-quality NAND flash memory, have faster sequential read/write speeds, and last longer than budget options (Source). For example, SSDs designed for gaming and professional workloads often cost more per gigabyte because they offer exceptional speeds, while basic SATA SSDs for everyday computing are very affordable (Source).
Over the past few years, SSD prices have declined significantly, making fast solid state storage more accessible to the average consumer. In 2018, the average price per gigabyte for an SSD was $0.25, whereas in 2022 it had dropped to around $0.15 per gigabyte (Source). However, higher-end NVMe PCIe 4.0 SSDs still command a premium and may cost over $0.20 per gigabyte.
In summary, SSD pricing gives a good indication of expected real-world performance and endurance. Paying more yields faster speeds, better reliability, and advanced features. But for general everyday use, more affordable SATA SSDs offer excellent value and significant improvements over hard disk drives.
Conclusion
When choosing an SSD, the key specifications to look for are the model number, physical size, interface, controller and NAND type, sequential read/write speeds, warranty period, manufacturer, and price. The model number will identify the specific SSD model. Confirm that the physical size, interface, and sequential speeds match your computer or usage needs. Research the controller and NAND type to determine quality and reliability. A longer warranty period signifies the manufacturer’s confidence in the product. Stick with reputable brands known for quality SSDs. Finally, find the best balance between your budget and required specifications.
By identifying the above key factors, you can select the right SSD for your specific needs. Paying attention to details like interface and physical size ensures compatibility, while specs like controller, warranty, and manufacturer give insight into expected performance and longevity. Taking the time to research before purchasing will result in an SSD that delivers an optimal experience.
