Nintendo Switch uses SD cards as expanded storage for game downloads, screenshots, and other data. SD cards allow you to download more digital games and applications than what the internal storage allows.
To properly work with the Switch, SD cards must be formatted to a compatible file system. The formatting process erases all data on the card and prepares it with the correct structure for Switch usage. This involves selecting the right file system and using your computer to complete the format.
This guide will walk through the steps to safely format an SD card to use with the Nintendo Switch. We’ll cover backing up your card data, choosing the file system, formatting on a PC, transferring data back, and troubleshooting issues.
When to Format an SD Card for the Switch
There are a few common situations when you may need to format an SD card for use with the Nintendo Switch:
Using a new SD card for the first time with the Switch – When you get a brand new SD card, it will need to be properly formatted before using it with the Switch. The Switch performs a quick format on first use, but it’s recommended to do a full format on a PC for optimal performance.
Switch not recognizing current SD card – Sometimes the Switch will suddenly stop detecting your SD card. Formatting the card on your PC and then reinserting it into the Switch should resolve this issue.
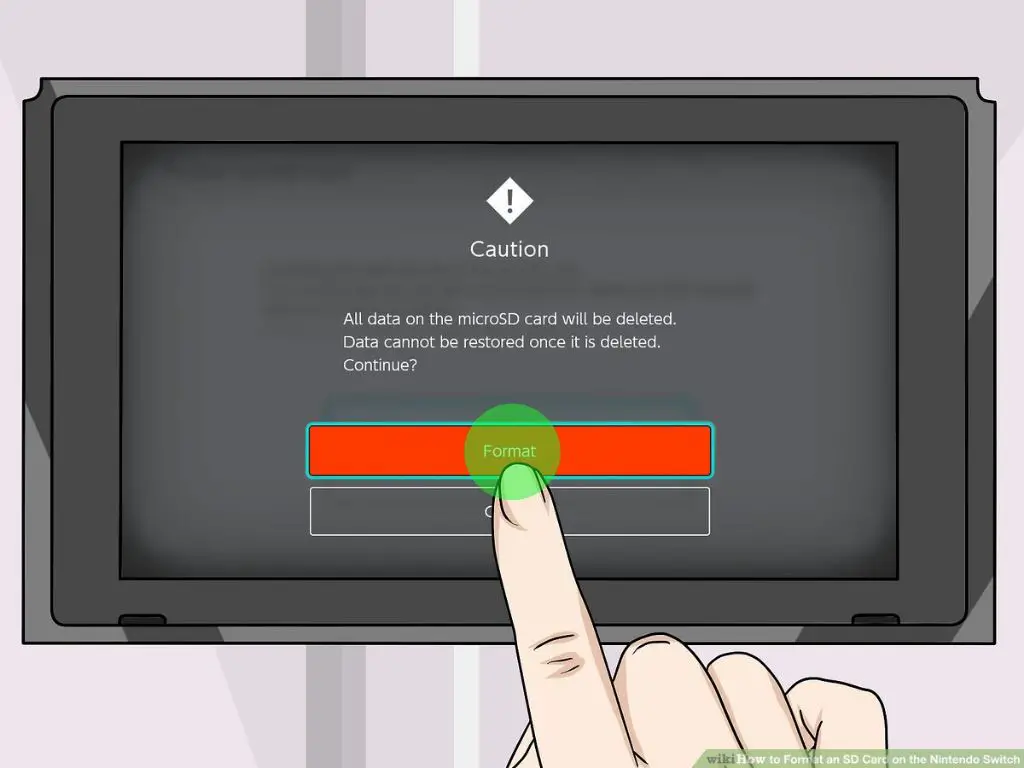
Wanting to delete all data from an old SD card – If you want to wipe an SD card clean before reusing it or giving it to someone else, formatting will completely erase all of the data.
Sources:
https://en-americas-support.nintendo.com/app/answers/detail/a_id/22398/~/how-to-format-a-microsd-card
https://www.reddit.com/r/NintendoSwitch/comments/firrzn/is_it_really_necessary_to_format_an_microsd_card/
Backing Up SD Card Data
Before formatting your SD card, it’s crucial to back up any existing data on the card that you want to keep. Formatting will completely erase everything on the SD card. To back up your data:
- Insert your SD card into your computer’s SD card reader or a USB adapter.
- Open File Explorer on Windows or Finder on Mac.
- Locate your SD card and open it.
- Select all files and folders you want to keep and copy them to a folder on your computer.
You can also use backup software to copy the entire contents of your SD card to your computer. This ensures you have a full backup of your card before formatting it. Some good free backup tools include SnapConstructor and Macrium Reflect Free.
Once your SD card data is backed up, you’re ready to format the card for use with your Nintendo Switch.
Formatting the SD Card
Formatting erases all data on the SD card and prepares it for use with the Nintendo Switch. Here are the steps to format an SD card on a Windows PC:
1. Insert the SD card into your computer’s card reader.
2. Open File Explorer and right-click on the SD card drive. Select “Format…”
3. In the Format window, choose “FAT32” as the File System. Leave Allocation unit size as “Default”.
4. Check the “Quick Format” box to format the card quickly. Click “Start” to begin formatting.
5. Wait for the formatting process to finish. The SD card will now be formatted and empty.
For more advanced formatting, you can use the free SD Formatter tool. This allows you to do a “Full (Overwrite)” format which checks for bad sectors. Most users don’t need to do this, but it can help resolve errors.
The Quick format is faster but only deletes the file table. The Full format takes longer but overwrites all data on the card. For most purposes the Quick format will be sufficient to prepare the SD card for your Switch.
Choosing the Correct File System
When formatting an SD card for the Nintendo Switch, you have three main file system options: exFAT, FAT32, and NTFS. However, only exFAT and FAT32 are compatible with the Switch.
FAT32 is an older file system that has some limitations, such as a maximum file size of 4GB and maximum partition size of 32GB (Source). This makes FAT32 a poor choice for larger SD cards. exFAT removes these limitations, supporting much larger file and partition sizes.
Therefore, exFAT is recommended for SD cards larger than 32GB as it provides greater flexibility. The Switch’s system software also includes built-in support for exFAT since version 8.0.0 (Source). No additional drivers or software are required.
In contrast, NTFS is incompatible with the Nintendo Switch and should not be used. For SD cards 32GB or less, FAT32 is a reliable option. But for anything larger, exFAT is the ideal file system for Switch SD cards.
Reinserting the SD Card
After formatting the SD card on your computer, the next step is to reinsert it into your Nintendo Switch. This is a simple process:
- Locate the SD card slot on the top of your Switch. It is under the stand on the back.
- Gently slide the SD card into the slot until it clicks into place.
When you first insert the newly formatted SD card, the Switch will need to prepare it for use. This may take a few minutes. You’ll see a message on screen saying the console is checking the SD card.
Once it finishes, the SD card will be ready to hold game data, screenshots, and any other files you want to save. The card has been wiped clean during the formatting process, so you’ll need to re-download any digital games, save data, or other content you had stored on it previously.
You can now use the SD card normally. Check that games save properly and you can take screenshots that get saved to the card. If you experience any issues, try re-inserting the SD card or follow the troubleshooting tips.
Transferring Data Back to the SD Card
After the SD card has been formatted for the Switch, you’ll need to transfer any data and games you had stored on the original SD card back onto the newly formatted card if you want to retain that information.
To transfer data from an old SD card to the newly formatted one:
- Insert the old SD card into your computer using a card reader.
- Copy all of the files and folders from the old SD card to your computer.
- Safely eject and remove the old SD card.
- Insert the newly formatted SD card into your computer using a card reader.
- Copy the files and folders you copied from the old SD card to the same locations on the new SD card.
- Safely eject the new SD card.
For any digital games you had downloaded on the Switch, you’ll need to re-download those to the new SD card once it’s inserted back into the console. You can do this by going to the Nintendo eShop, selecting your account icon in the top right, and re-downloading any previously purchased games.
By copying the data from your old SD card to the new one, you can avoid having to start your Switch data and games over from scratch after formatting the new card. Just be sure to only copy the data from the old card and not the card itself, since it was formatted for a different device.
Verifying the SD Card Works
After formatting the SD card and transferring your data back onto it, it’s important to test it to ensure everything is working properly. Here are some tips for verifying your SD card functions correctly with your Nintendo Switch:
Launch a few games from the SD card to test performance. Pay attention to things like load times, frame rates, and any graphical issues or glitches. If games run smoothly without problems, your SD card is likely formatted properly.
Check for any error messages about the SD card in the system settings. Go to System > System Settings > System and scroll down to MicroSD Card. If any errors display here about reading/writing to the SD card, there may still be an issue.
Run a benchmark test on your PC if available. There are various free SD card benchmark utilities that test read and write speeds. Compare results to your card’s expected speeds to verify proper performance.
Let your Switch run for awhile with the SD card inserted while playing games, downloading content, and putting the system in Sleep mode. Errors or issues are likely to crop up during extended gameplay sessions if the SD card has problems.
Testing your SD card thoroughly after formatting helps ensure you formatted it properly for your Switch. Catching any problems early prevents headaches down the road.
Troubleshooting Tips
If your Nintendo Switch is having issues recognizing or reading your SD card after formatting, there are a few troubleshooting steps you can try:
First, try taking out and reinserting the SD card to make sure it is seated properly in the card slot. You can also try gently cleaning the contacts on the SD card with a dry cloth.
If that doesn’t work, the SD card connector inside the Switch itself may be dirty or damaged. You can try cleaning it carefully with compressed air or a cotton swab dipped in isopropyl alcohol. Be very gentle, as the pins are delicate. If cleaning doesn’t help, the connector may need to be repaired or replaced (source).
Corrupted data can also prevent the Switch from reading the SD card. You may need to reformat the card using your computer if the Switch gives errors about corruption. Be sure to back up any important data first.
For errors about the SD card being “removed” when it’s still inserted, rebooting the Switch fully by holding down the power button may resolve the issue. If not, there may be a problem with the card reader requiring repair.
As a last resort, you can try testing the SD card in another device like a computer or phone. If it’s not recognized anywhere, the card itself could be damaged and need replacing.
Summary
Properly formatting your SD card is a crucial step to prepare it for use with the Nintendo Switch. This article covered the key steps involved:
- Backing up your SD card data before formatting to avoid losing your game data and saves
- Using your computer to access SD card formatting tools and select the exFAT file system
- Safely removing and re-inserting the now-formatted SD card into your Switch
- Transferring your Switch data and games back onto the SD card
- Verifying everything saves and loads correctly on the SD card
- Troubleshooting tips in case you run into any issues with the formatted SD card
Following these steps properly ensures your SD card is optimized and ready for use on your Nintendo Switch. With a freshly formatted SD card, you can expand your Switch’s storage capacity and enjoy downloading more games!
