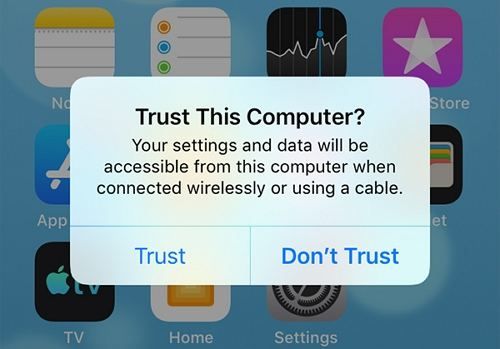
Connecting your iPhone to iTunes is necessary to sync content, back up your device, and update to the latest version of iOS. However, you may encounter an error message stating “iTunes could not connect to this iPhone” and find that iTunes does not recognize your device. There are a few steps you can take to troubleshoot this issue and grant iTunes proper permission to connect.
Quick Fixes
Here are some quick things to try first:
- Restart your iPhone by pressing and holding the side or top button until the power off slider appears. Turn your phone back on and reconnect to your computer.
- Force restart your iPhone if the standard restart does not work. Press and quickly release the Volume Up button, press and quickly release the Volume Down button, then press and hold the side button until the Apple logo appears.
- Check for and install any available updates for iTunes on your computer.
- Update your iPhone software in iTunes or via Settings > General > Software Update if an update is available.
- Quit iTunes on your computer, restart the app, and reconnect your iPhone.
- Try connecting your iPhone to a different USB port on your computer if possible.
With some luck, one of those simple steps will get iTunes to recognize your iPhone and connect properly. If you still see the error message, there are a few other things to check.
Check iPhone Lock Screen Settings
One cause of the iTunes connection issue is having settings on your iPhone lock screen enabled that block certain connectivity with computers. Here is how to check those settings:
- Go to Settings > Face ID & Passcode (or Touch ID & Passcode on older models).
- Check if you have USB Accessories disabled under the Allow Access When Locked section. Make sure this is toggled on to allow USB connections from your computer when locked.
- Also check that iTunes Wi-Fi Sync is enabled if you sync over Wi-Fi at all.
Adjust those settings as needed so iTunes can properly communicate with your iPhone when locked. Try connecting again afterwards.
Authorize Computer in iTunes
iTunes may fail to connect if your iPhone does not have your computer authorized to connect. To check this:
- Open iTunes on your computer and connect your iPhone.
- Look under iTunes in the top left and select Account > Authorizations > Authorize This Computer.
- Enter your Apple ID account info if prompted.
That will authorize the computer and add permission for iTunes to connect and sync with your iPhone. Reconnect your device and iTunes should recognize it.
Disable USB Power Management
Some connectivity issues arise from computer USB power management settings that shut off power to USB ports. Here is how to disable that in Windows:
- Open Control Panel and view Devices and Printers.
- Right click on your iPhone and select Properties.
- Go to the Hardware tab and select Properties again under USB Device Properties.
- Click the Change Settings button in the Power Management section.
- Uncheck the “Allow the computer to turn off this device to save power” box.
- Hit OK to save the changes.
With power management disabled for the USB port, your iPhone should remain powered on to maintain the iTunes connection. Try syncing again.
Update iPhone and iTunes Software
Outdated software is a common source of connection issues. Make sure you have updated software on both ends:
- iPhone Updates – Go to Settings > General > Software Update and install the latest iOS version.
- iTunes Updates – In iTunes, click Help > Check for Updates to install any available versions.
Updating to the newest software improves compatibility between your iPhone and iTunes, which could resolve any out-of-date issues blocking connectivity.
Reset iPhone Network Settings
Resetting all network settings on your iPhone may clear out any problematic configurations that interfere with iTunes connections:
- Go to Settings > General > Reset.
- Tap Reset Network Settings – this clears Wi-Fi networks, Bluetooth pairings, cellular settings, etc.
- Your iPhone will restart. Try connecting to iTunes again when it powers back on.
Resetting networks back to defaults eliminates any corrupted settings that may have been preventing iTunes from recognizing your device.
Factory Restore iPhone
If all else fails, a last resort is to wipe your iPhone back to factory default settings with a restore in iTunes:
- Connect your iPhone to iTunes on your computer.
- In iTunes, select your iPhone, then click Restore iPhone in the Summary tab.
- Click Restore again to confirm – this will erase your iPhone back to factory defaults.
- Set up your phone as new after the restore rather than using a backup.
This will rule out any problematic software issues by fully wiping your iPhone and starting fresh. As long as you have a recent backup, you can restore your data afterwards.
Get Hardware Support
In rare cases, underlying hardware problems could prevent iTunes from interfacing with an iPhone properly. If you still cannot get your computer to recognize your iPhone after trying all standard troubleshooting, it may be time to seek hardware support:
- Make a Genius Bar appointment at an Apple store for in-person hardware diagnostics.
- Contact Apple support online or by phone for remote troubleshooting.
- Take your iPhone to a reputable repair shop for assessment.
Hardware technicians can test components like the dock connector, perform diagnostics, and determine if part replacements are needed. Get professional support to identify and resolve defective hardware causing connectivity issues.
Conclusions
Troubleshooting an iPhone that will not connect to iTunes involves working through various software settings and updates on both devices, resetting network settings, and restoring your iPhone as a last resort. Hardware problems are uncommon, but can also cause connectivity issues in some cases. With systematic troubleshooting and professional support if needed, you should be able to get your iPhone syncing properly with iTunes again.

