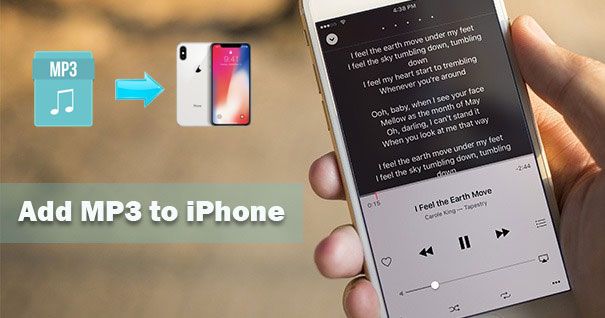
Importing mp3 files to your iPhone allows you to listen to music on the go. Whether you want to add songs you’ve purchased online or sync music from your personal collection, there are a few different ways to get mp3s onto your iPhone.
Can I Import mp3 Files into the Apple Music App?
Unfortunately, you cannot directly import mp3 files into the Apple Music app. The Apple Music app is designed to stream music from Apple’s library, play music you’ve purchased from iTunes, or play music from your iCloud Music Library.
So in order to get mp3 files onto your iPhone so you can listen to them via the Apple Music app, you will need to first import them into your iTunes library on a computer. Then you can sync them to your iPhone. See the instructions below for how to do this.
How to Import mp3 Files into iTunes
To import mp3 files into your iTunes library on your computer, follow these steps:
- Open iTunes on your computer and select Music from the top menu bar
- Go to File > Add File to Library
- Browse your computer files and select the mp3 files you want to import
- iTunes will import the mp3 files into your music library
Once the files are imported, they will appear in your iTunes library alongside any other music you’ve added. You can then follow the steps below to sync the music over to your iPhone.
Syncing mp3 Files to Your iPhone Using iTunes
To get the mp3 files onto your iPhone, you’ll need to sync your iPhone to your iTunes library on a computer. Here’s how:
- Connect your iPhone to your computer using the included USB cable
- Open iTunes on your computer
- Select your iPhone icon in the top right corner of iTunes
- Go to the Music section in the left menu
- Select which music and playlists you want to sync to your iPhone
- Check the box next to “Sync Music”
- Click Apply in the bottom right corner to start the sync
This will transfer over all the mp3 files and playlists you selected from your iTunes music library onto your iPhone. The sync may take awhile depending on how many songs you are transferring over.
Transferring mp3 Files to Your iPhone Without iTunes
If you don’t want to use iTunes, there are other ways to get mp3 files onto your iPhone:
- Via Email: Email mp3 file attachments to yourself that will show up in the iPhone Mail app. Open the attachments to save the mp3 files to your Music app.
- Using iCloud Drive: Upload mp3 files to your iCloud Drive. Then on your iPhone go to the Files app, select Browse, then iCloud Drive and you’ll see the mp3 files you can download.
- With AirDrop: Use AirDrop to wirelessly transfer mp3 files from a Mac or other iOS device directly to your iPhone.
- Via online storage: Upload mp3 files to a cloud storage service like Dropbox, Google Drive, etc. Then download them directly on your iPhone in the apps.
What Apps Can I Use to Play mp3 Files on iPhone?
Once you’ve imported mp3 files over to your iPhone, there are a few different apps you can use to play them:
- Music: The built-in Music app that comes with every iPhone can play your mp3 files. Just sync or transfer the files to your iPhone and you will find them in the Music app.
- iTunes: If you used iTunes to sync music over, you can play the mp3 files using the iTunes mobile app.
- Apple Music: You can add mp3 files to your iCloud Music Library in iTunes on your computer. This will allow you to stream them on your iPhone in the Apple Music app.
- VLC: A popular third party app for playing various audio and video files. You can transfer mp3s to VLC to play them.
- Spotify: If you have a Spotify premium account, you can add local mp3 files to Spotify playlists by syncing your music library with the Spotify desktop app.
How Can I Organize and Manage mp3 Files on my iPhone?
To keep your growing mp3 collection organized on your iPhone, there are a few handy tips:
- Use iTunes playlists to group songs together so they are organized in the Music app.
- Utilize the Media Kind filtering option in the Music app to only view your mp3 files.
- Use Siri to search for and play specific songs, artists, or playlists.
- Download a music player app that allows creating customized playlists from your mp3 files.
- Use iCloud Music Library to access your music collection seamlessly across all your devices.
- Leverage iTunes Match to store your music library in iCloud, including mp3s, for streaming anywhere.
The Music app has options to browse by Playlists, Artists, Albums, Songs, and more. Using playlists is the best way to organize your music library including imported mp3 files.
Can I Set Imported mp3 Files as Ringtones on iPhone?
Yes, you can set custom ringtones using your imported mp3 files on an iPhone. Here’s how to do it:
- Open the GarageBand app on your iPhone
- Tap on an empty project
- Tap the Audio Recorder icon and record a short clip
- Tap My Songs and select the song
- Tap the Share icon and tap Ringtone
- Select the section you want as the ringtone
- Tap Export and choose a name
- Go to Settings > Sounds & Haptics on your iPhone
- Under Ringtone, select your new custom ringtone
Now the custom ringtone made from your mp3 file will play when you get phone calls!
Can I Add mp3 Files to My iPhone from a CD?
Unfortunately there is no direct way to import mp3 files from a CD to your iPhone. However, you can follow these steps:
- Insert the music CD into your computer
- Use iTunes or Windows Media Player to rip the CD into mp3 format
- The mp3 files will be saved on your computer
- Then follow the steps above to sync the mp3 files to your iPhone using iTunes or transfer them over via email, AirDrop, etc
So while you can’t directly import songs from a CD onto your iPhone, you can use a computer to first convert the CD to mp3 format before transferring the files.
What are some tips for quickly importing my music library to iPhone?
Here are some useful tips to quickly import your full music library including mp3s to your iPhone:
- Use iTunes to sync your entire music library to iPhone
- Sign up for iTunes Match to sync your library via iCloud
- Use Apple Music to combine your library with streaming songs
- Set up Family Sharing to share music with family members
- Use AirDrop to quickly transfer large playlists
- Import iTunes playlists instead of full library
- Sync music overnight while charging your iPhone
The fastest way is using iTunes sync to transfer all music at once. But iTunes Match and Apple Music give you access to your full library from the cloud.
What formats can I import and play on iPhone?
Here are the audio formats supported by iPhone for importing music and listening to songs:
| Format | Import to Music App | Playback |
|---|---|---|
| MP3 | Yes | Yes |
| AAC | Yes | Yes |
| WAV | Yes | Yes |
| FLAC | No | Yes |
| AIFF | Yes | Yes |
| ALAC | No | Yes |
| MP3 VBR | No | Yes |
| Apple Lossless | No | Yes |
So lossless formats like FLAC and ALAC can be played on an iPhone, but you need to convert them to mp3, AAC, or another supported format before importing into the Music app.
Should I use iTunes or Music app to play imported mp3s?
Both iTunes and the Music app can play mp3 files imported to your iPhone. Some key differences:
- Music app plays only files stored locally on your iPhone.
- iTunes allows streaming music from iCloud as well.
- iTunes may take up more storage space on your iPhone.
- Music app integrates better with Siri and iOS widgets.
- iTunes has more advanced library management features.
- Music app is easier to use for basic playback.
For most users, the simpler Music app is best for playing imported mp3 files stored on your iPhone. But iTunes offers deeper library management if you need that.
Conclusion
Importing mp3 files to your iPhone is easy once you know the various syncing, transfer, and organization methods. While you can’t directly import mp3 files from a CD, you can use iTunes or Windows Media Player to rip the CD then sync the files over.
The Music app provides simple playback of your locally stored mp3 files. But you also have advanced options like iTunes, Apple Music, third-party apps, and iCloud Music Library for accessing huge libraries. With the right tools, you can import, manage, and enjoy your entire music collection on your iPhone.
Hopefully this guide covered all your questions about getting mp3 music files onto the iPhone! Let me know if you have any other specific questions.
